Design Study Manager: Manage Geometry Changes
Use this procedure to manually implement geometry changes to a small number of designs. To automate a series of changes using CAD model instances, use the Design Study Builder.
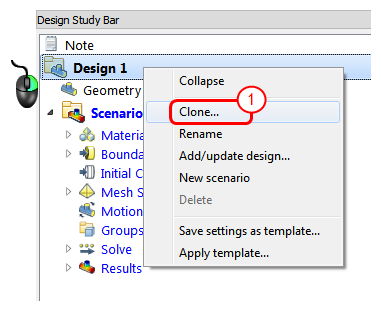
In Autodesk® CFD, on the Design Study bar, right click on a Design, and click Clone.
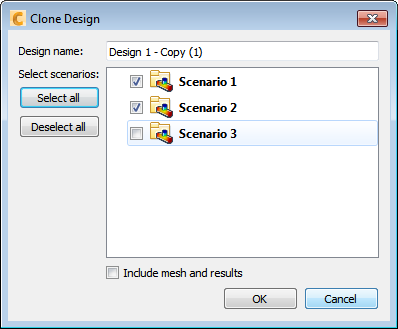
In the Clone Design dialog, assign a unique name to the new Design. Select the scenarios you wish to include in the cloned design, and indicate if you want to clone the mesh and results as well as the geometry and settings (with the Include mesh and results check box).
In the CAD tool, modify the geometry as needed, and launch into Autodesk® CFD.
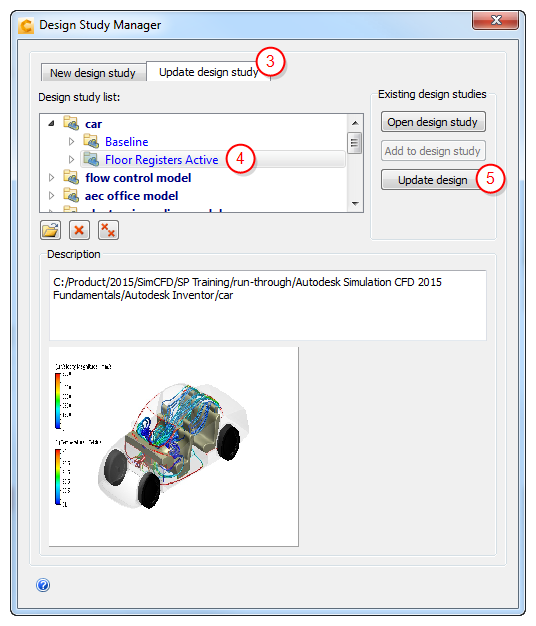
On the Design Study Manager, and click the Update design study tab.
Select the new design from the list.
Click Update design.
These are the results of this procedure:
A new Design is created containing the modified geometry
The new Design contains all of the Scenarios from the original Design
The settings in each Scenario are transferred to the new geometry
Scenarios in the new design that had been run before they were cloned are marked with the Warning icon to indicate that the results do not match the model:

To change the geometry of an existing design, follow steps 2-5.
For an example of updating a design to incorporate a design change