Wall Layers
Wall Layers adds element layers along all fluid-wall and fluid-solid interfaces. It augments the original mesh to produce a smooth distribution along all walls, which is critical for accurate flow and temperature prediction. Wall Layers ensures adequate mesh across small gaps, which can be very difficult manually.
Wall Layers creates layers before the 3D mesh is constructed. Diagnostic algorithms detect and avoid element clashes in small gaps automatically. Element layer height across each surface is uniform, and is based on the smallest length scale on a surface. A gradual transition between surfaces ensures gradual variations in element height throughout the model.
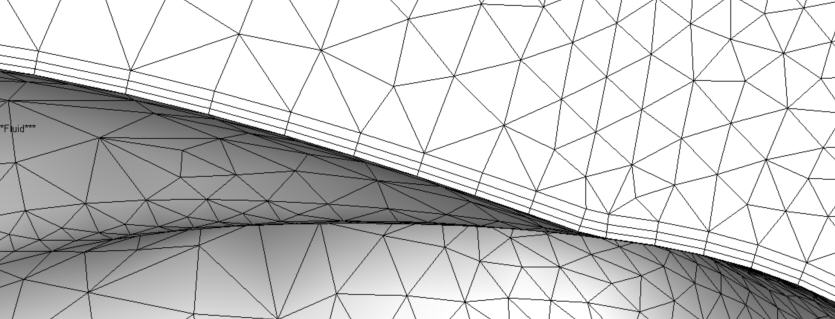
Layer uniformity is important for accuracy in certain analyses. Examples include flows in which the turbulence is very sensitive to the flow near the walls and within long, narrow channels. In the latter case, meshes that have been enhanced have been shown to be significantly less disruptive than non-enhanced meshes to the flow near the walls, resulting in improved flow uniformity throughout the channel.
Using Wall Layers
To open the Wall Layers dialog, click Wall Layers on either the Mesh Sizes quick edit dialog or in the Automatic Sizing context panel.
Enable wall layers
Toggles Wall Layers (on by default)
Enable wall layer blending
By default, the transition between the wall layers region and the adjacent mesh is instantaneous from highly anisotropic to isotropic. You can use the Enable wall layer blending option to cause a more gradual transition in this region.
This has been shown to improve solution stability and accuracy in certain simulations, especially those featuring the new turbulence models.
Number of layers
Control the number of layers of prismatic elements.
Layer factor
Controls the layer thickness. The layer height is determined by multiplying this factor by the local isotropic length scale for that surface. Reduce this factor for thinner layers and reduced total thickness.
Layer gradation
Use Layer gradation to control the rate of growth of the wall layers. As the number of wall layers increases, the layer thickness often has a tendency to become uniform. Gradation allows the layers nearest the wall to be smaller than those closest to the neighboring unstructured elements.
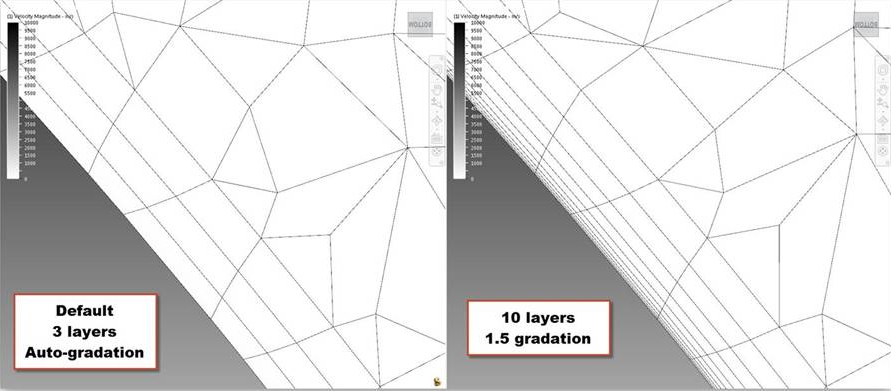
Use this setting to improve the accuracy of heat flux at the wall as well as for the SST k-omega turbulence model.
When the Number of layers is greater than 5, you should change the Layer gradation value from Auto to a value. This is an effective way to reduce the element thickness near the wall and the value of Turbulence y+. When simulating external aerodynamics with the SST k-omega turbulence model, a low value of y+ is essential for accurate flow prediction.
You can also change the value with the mesh_enhance_gradation in the Flag Manager.
Effect of Changing Settings on Restart
Because Wall Layers are constructed prior to the 3D mesh, changing certain analysis settings after the mesh has been generated will require the entire mesh to be regenerated. If the analysis is continued from a saved iteration or time-step, the results are mapped to the new mesh.
Changes to analysis settings that will cause the mesh to regenerate include:
- Changing a material type. An example is changing a solid to a fluid. Changing a material but not its type (example: air to water) will not cause the model to re-mesh
- Adding or removing a flow boundary condition (such as velocity, pressure, volume flow rate, mass flow rate, external fan, slip, unknown, periodic, and external fan). Changing the value of an applied condition will not cause a re-mesh
- Adding or removing a motion assignment
- Modifying a wall layers parameter