Sphere Environment

VRED provides two kinds of environment nodes. One gets it representation and lighting behavior from a texture file and the other one simulates the position of the sun depending on world time and location.
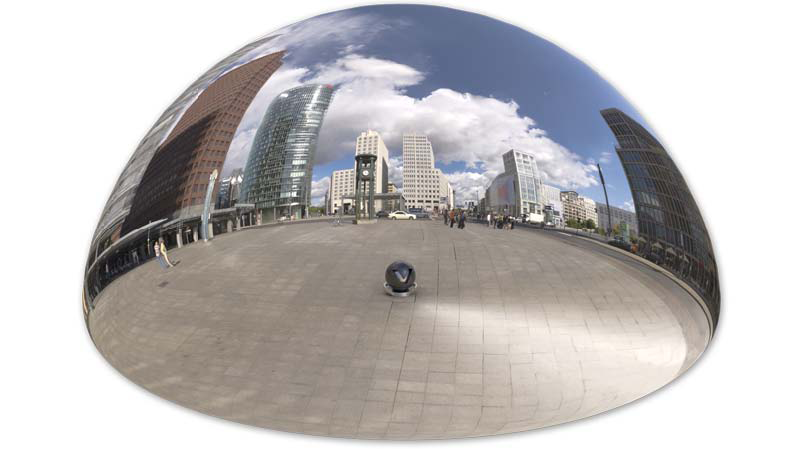
An environment node provides a textured surrounding with shadow plane on its ground. Its texture affects the representation of all scene-related materials. The creation dialog box asks for this texture. It generates the dome and shadow plane automatically.
Environments add realistic reflections and lightsources to the scene. Use Sphere Environments in Truelight Material for this. They deliver precomputed Image-Based Lighting (IBL) for their assigned Truelight Material. The lighting of a Truelight Material can be adjusted with the settings of the Sphere Environment. Each Sphere Environment can be assigned as an input node of each Truelight Material in the Material Editor (see General Truelight Material Settings > Common > Environment). The Sphere Environment is a single-sided shader in OpenGL rendering mode.r
The Sphere Environment gets its representation and lighting behavior from a texture file.

Environment Material
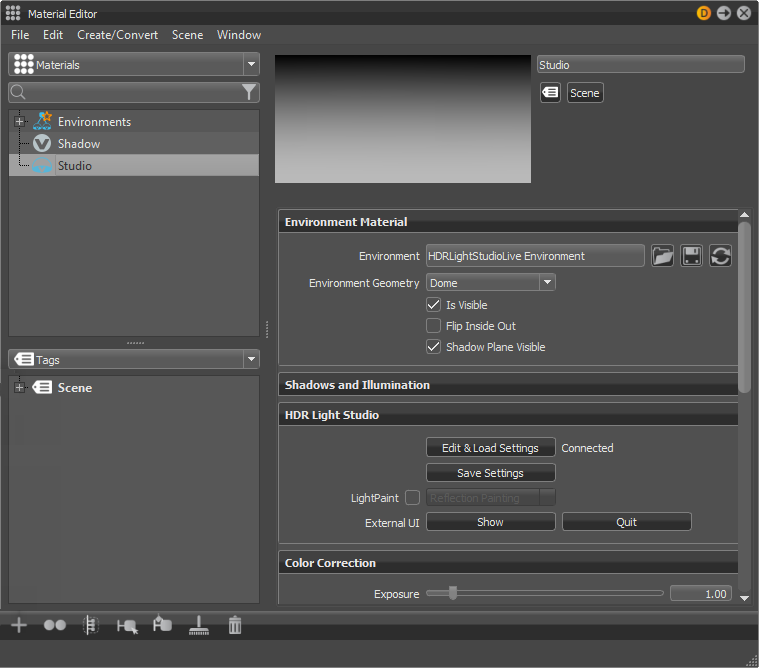
Environment - Loads the HDR image to be used as the lightsource. The HDR image is used as an environment, which is reflected on reflective surfaces in OpenGL rendering. In raytraced rendering, the 3D space is reflected in the surfaces. LDR (.png and .jpg) can also be loaded.
Click
 to locate and assign a texture. When a texture is assigned, the path and filename are displayed in the field to the left.
Use Image Sequence - Select when an image sequence is loaded in the Use Texture box. This uses an image sequence as a texture. The image name for the sequence will be generated based on the filename and the image number. Use the Curve Editor to animate the image number. Go to Animation > Timeline. Click play to view the animated image sequence on the material.
Note:For a group of images to be considered an image sequence, there must be at least two images with the same name with an increasing numeric value. The required naming format is name, number, and extension. For example, image000.png image01.png.
- Frame Offset - Sets an offset to the image number when using an image sequence. An image sequence is loaded into Use Texture and Use Image Sequence is selected.
- Inline Image Sequence - Inlines the image sequence into the .vpb file. When selected, loaded image sequences are packaged within the .vpb file. If the .vpb is moved to another computer, the image sequence does not need to be moved separately.
Glossy Quality - Defines the quality for the precomputed glossy IBL. Also, use it for the precomputed raytracing mode. This is not for Full Global Illumination. The entries are internally specifying a sample amount per pixel and correspond to the following values:
Low - 256 samples
Medium - 512 samples
High - 1024 samples
Ultra High - 2048 samples
Higher values generate better the visual quality. Lower values are computed faster.
- Environment Geometry - Selects the geometrical form for the current environment. Dome, sphere, and cube shapes are available as presets; custom enables you to load an external geometry file.
- Geometry File - Loads a custom file as the environment geometry.
- Is Visible - Toggles the primary visibility of the environment. An environment material set to not be visible can still illuminate scene objects, if it is enabled to be used as lightsource, and can still be used for specular reflections in Raytracing.
- Flip Inside Out - Flips the normals of the environment sphere. This changes whether the environment geometry can be viewed from the inside or outside.
- Shadow Plane Visible - Enables or disables the shadow plane on the ground. Enable to see the shadow.
Shadows and Illumination
- Shadow Lightsources - Sets the number of explicit lightsources. There are 256 lightsources available.
- Use Lightsources Only - When selected, only the shadow lightsources used for the environment are used for illumination. At least one lightsource must be entered in the Shadow Lightsources option for results. In the Raytracing Settings tab, set Illumination to Full Sphere to get illumination from the floor.
- Material Shadow Intensity - Sets the shadow intensity of the generated lightsources on BRDF-based materials.
- Ground Shadow Intensity - Sets the shadow intensity of the generated lightsources on the shadow material.
- Map Filter Radius - Sets the radius used for filtering the shadow map lookup in OpenGL.
- Map Resolution - Sets the quality of OpenGL shadow maps. Higher values increase the quality.
HDR Light Studio
The HDR image of a Sphere Environment can be interactively created using HDR Light Studio by Lightmap LTD. This part of the GUI is visible, if a demo or full version of HDR Light Studio detects VRED on startup.
- Edit & Load Settings - Opens HDR Light Studio and tries to load a project saved for this material. If no project has been previously saved for this material, you start with a blank canvas. The current HDR image is replaced. All changes made on the HDR Light Studio canvas are immediately applied to the HDR image of the connected VRED Sphere Environment.
- Save Settings - Internally saves the HDR Light Studio project for the Sphere Environment currently being edited.
LightPaint - This feature has been available since HDR Light Studio version 4.0. Integration of LightPaint within VRED allows you to directly click the VRED Render Window for positioning lightsources in the HDR image.
For example, the current lightsource reflects in that position. Refer to the HDR Light Studio manual for detailed information on the different painting modes. Choosing one of the three painting modes activates the Paint tool in the VRED Render Window. Hold SHIFT and click within the scene to place the selected lightsource in the HDR Light Studio canvas. Hold SHIFT and right-click within the scene to select a lightsource. The active painting mode is used to determine the light node in the HDR map.
External UI - Contains two buttons for working with area lights and HDR Light Studio.
Show - Displays the HDR Light Studio window, if previously closed.
Quit - Shuts down an HDR Light Studio background process (
HDRLightStudio.exe) and free up the license. Once all edits have been made in HDR Light Studio and the HDRI saved, click the Quit button to release the HDR Light Studio license for others to use.
Color Correction
- Map RGB(1.1.1) to - Only available when Photometric Parameters is enabled. Maps the RBG values to the option selected. Select from 1, 100, 10000 (realistic), or a custom value of cd/meters squared.
- Luminance Mapping - Only available when Photometric Parameters is enabled. Defines what an RGB white color in the image refers to. Since there is no definition of what a white color in an HDR file actually represents, this is a way to baseline different HDRs to the same level.
- Exposure - Sets the scaling factor on the HDR results. It controls the influence about lighting and reflection from the environment node to any object within the scene. A threshold from 1.0 interprets the texture exactly like it is; a value below/above darkens/lightens all objects. Set the HDR image’s exposure level. The higher the exposure level, the longer the series of shutter cycles which are used to calculate the image’s light intensity.
- White Balance - Sets the camera's white balancing color temperature. Lower values balance the camera to a lower color temperature and therefore create cooler (bluish) colors. A higher value balances the camera to a higher color temperature and produces a warmer (yellowish) color. 6500K is a sRGB standard for most monitors.
- Hue-Shift - Shifts all colors in the HDR image uniformly through the hue color range, setting the hue shift in degrees.
- Contrast - Separates the light and dark color values further from each other, setting the color contrast.
- Brightness - Sets the scaling factor that is as part of the color correction, by applying a color correction matrix, raising the color value of the whole HDR image, and setting the color brightness. It is applied to the image before the scaling by the exposure.
- Saturation - Sets the HDR image’s saturation.
- Reflected Saturation - Sets the HDR image’s saturation when the HDR image reflects in any surface.
Transformation
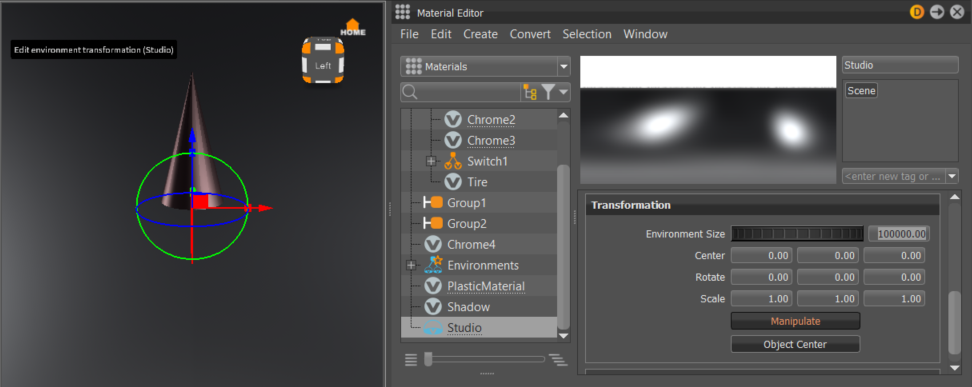
The source of spherical projection of the Sphere Environment material can be set with transformation parameters.
- Environment Size - Sets the size of the projection. Textures default to infinite projection depth and cover the entire object. You can restrict the texture to one side of the object by limiting the range of the projection. Changing the Z value of the projection size from zero (infinite) to another value achieves the restriction.
- Center X, Y, Z - Sets the x, y, and z coordinates for the center of the projection.
- Rotate X, Y, Z - Sets the x, y, and z rotation angles for the projection plane.
- Scale X, Y, Z - Sets the x, y, and z scale factor for the projection plane. With the scale value, the image projection can be stretched and squashed on any axis.
Manipulate - Activates/Deactivates the interactive environment texture manipulator in the render window. This function requires a selection in the Scenegraph and a single selection in the Material Editor. Use it to rotate, scale, and translate your environment material.

- Object Center - Sets the projection sphere’s center. To center the projection pivot automatically, select an object and press Get Center. The selected objects center is used as projection spheres pivot.
Raytracing Settings
These settings take effect in Raytracing Mode only.
- Is Visible in Reflections - Sets the visibility of the environment in reflections. For highly reflective materials in a scene, to turn off the reflection of the environment, disable Is Visible in Reflections.
- Use as Light Source - Does not calculate diffuse or glossy illumination, when disabled. Only one visible environment should be used as light source, otherwise VRED does not know which environment to use as light source.
Use Accurate Geometry - When selected, uses the real environment geometry, for more accurate diffuse and glossy illumination in Precomputed+IBL and Full Global Illumination Mode (at the cost of a 20 to 25 percent performance hit compared to the default finite sphere environment). It is disabled by default, so all diffuse and glossy reflection calculations are based on the virtual sphere of the environment.
Note:This option is only supported for diffuse and glossy environment reflections.
- Emit Caustics - Activates/deactivates Emit Caustics. Allows the HDR to emit caustics (light rays reflected or refracted by a curved surface or object or the projection of that onto another surface). Mode with caustics (Photon Tracing mode = Caustics + Indirect). Only supported in Full GI Illumination mode with caustics.
- Material ID - Sets the ID of the material for Renderpasses rendering.
Illumination - Defines the shadowing used for the environment shadows in the Illumination Mode, Precomputed+Shadows, for the shadows on the Shadow Material and for the shadow lightsources generated for the environment.
Upper Hemisphere - Generates shadows based on the upper hemisphere of the environment.
Full Sphere - Generates shadows based on the full environment sphere.
Override IBL Sampling Quality - If enabled, the setting overrides the global IBL Sampling quality for sampling the environment map.
Interactive - Sets interactive IBL sampling quality.
Still Frame - Sets still frame IBL sampling quality.