Edit the email template for change orders notifications, including the subject line and body in a central location for all users.
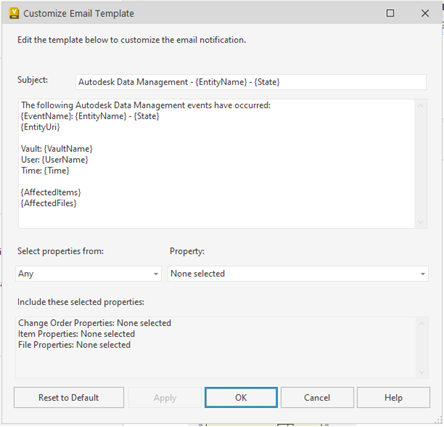
Here is the default view of the Change Order email notification template you will see under Vault Settings before selecting any properties.
Tags are placeholders in email templates that auto-populate information in the email. For instance, {EntityName}.
Below is the list of default tags:
|
Tag |
Description |
|
EntityName |
The name of the current Change Order. |
|
EntityUri |
A Uri link to access this Change Order. |
|
EventName |
Description of the current operation, e.g. Change Order Approved, Closed, or New Comment. |
|
State |
The state of the current Change Order. |
|
ShortEntityProperties |
A list of Change Order property values joined with '-'. |
|
DetailedEntityProperties |
A list of change Order property name and values displayed in multiple lines. |
|
VaultName |
Name of the current Vault. |
|
UserName |
Name of the user who started this operation. |
|
Time |
When the email is generated. |
|
AffectedItems |
A list of Items associated to current Change Order, with their names, Uris, and also properties if the customer has chosen any. |
|
AffectedFiles |
A list of Files associated to current Change Order, with their names, Uris, and also properties if the customer has chosen any. |
To edit the email notification template:
- In the Vault Client, click Tools
 Administration Vault Settings.
- In the Vault Settings dialog, select the Change Orders tab.
- Click Customize next to Customize the email notification for Change Orders.
- Edit the subject of the email as required.
- Add/edit the content in the email. You can also move the text within the email body.
- Add/edit property attributes in the email body.
To add property attributes in the email body:
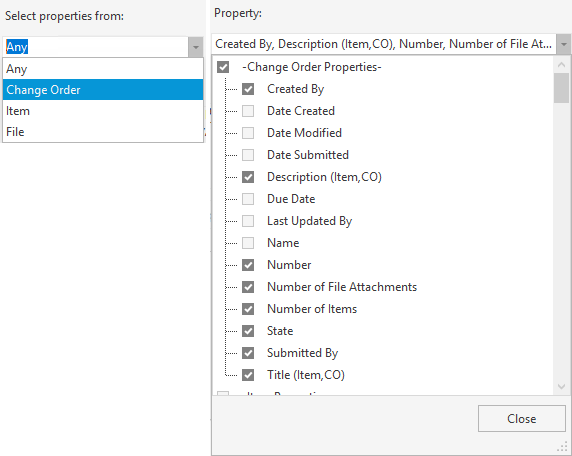
- From the Select properties from drop-down list, select the workspace from where you want to add the properties.
- From the
Property drop-down list, select the checkbox for the properties that you want to list in the email body, and then click Close. The selected properties are listed in the Include these selected properties section.
- A new property attribute {DetailedEntityProperties} is added to the email body below the {AffectedItems} and {AffectedFiles}. You can copy and paste {DetailedEntityProperties} to rearrange it to another section of the email body.
Note: Only tags part of {DetailedEntityProperties} are displayed in the email body.

- Click Apply to save the changes.
- If desired, click Reset to Default to reset the template to the default state.
- Click OK.
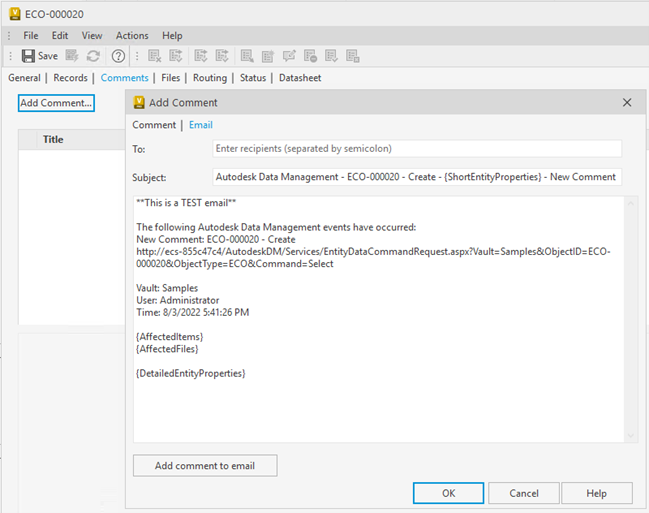
- Create a new change order to find a preview of the email notification.
- Create a new change order.
- Click Add Comments on the Comments tab.
- Click on the Email tab in the Add Comment dialog.
You can edit the email subject as well as the email body for the change order.