Use this procedure to add dimensions to specify the overall default size of the model. Dimensions are used to define the default size of a part family (or part within a part family). You can add other sizes, such as a list of values, to create individual part sizes within a part family.
Tip: You may find it easier to add model dimensions in the top view, rather than in a model view direction. To change the view, on the View menu, click 3D Views Top.
Top.
Top. - To define the overall length of the part, in the part browser, right-click Model Dimensions, and then click Add Distance. Note: For constant parameter values, you can define a constant dimension, or choose not to add a dimension and use the default value based on the actual size of the geometry. When no dimensions are added, the parameter and its value are not displayed during part size selection.
- Select the model modifier feature in the modeling area, and specify a location to place the dimension.
A length dimension (for example, LenB1 or LenB2) is placed in the model and is added to Model Parameters and Size Parameters in the part browser.
- To modify the default, or to specify a calculated value for the length of the component, in the part browser, expand Model Parameters, right-click a length dimension, and click Edit.
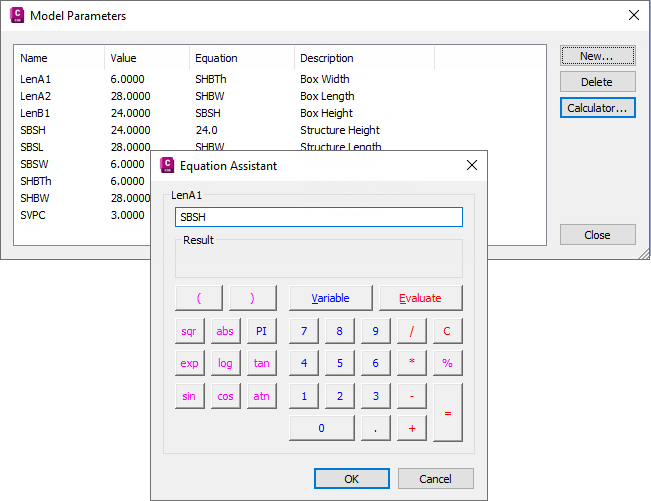
The Model Parameters dialog box is displayed.
- Double-click the Equation column value for a model parameter (such as LenB1), and you can enter a value or an equation to specify the length of the part. Tip: Click Calculator to access the Equation Assistant.
- The next step is to add individual part sizes to the model. Proceed to To Add Individual Part Sizes in Part Builder.