-
Click
 Find.
Find.
- In the Mapcheck Analysis window, click
 New Mapcheck Report.
 - Enter a name for the Mapcheck, for example PLOT 1.
- Click
 to Use Command Line Interface and follow the prompts at the command line.
 - Specify a Start Point. The interactive graphics display the SP in the drawing. Note: Colors displayed in the temporary graphics are controlled by the Mapcheck command settings.
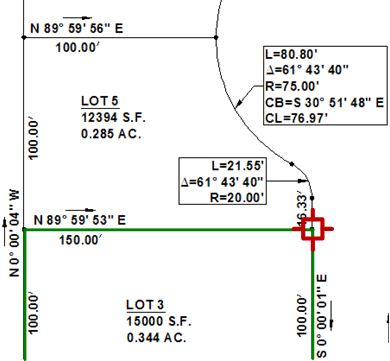
The following illustration shows the Start Point:
- At the command line you are prompted to select a label. After selecting a label, the interactive graphics display in the drawing. If you need to make a change, at the command line you have options to do the following:
- Clear: Clears the current side.
- New: Starts a new mapcheck report.
- Flip: Changes the direction of the curve to either clockwise or counter-clockwise.
- Reverse: Changes the direction of the line or curve.
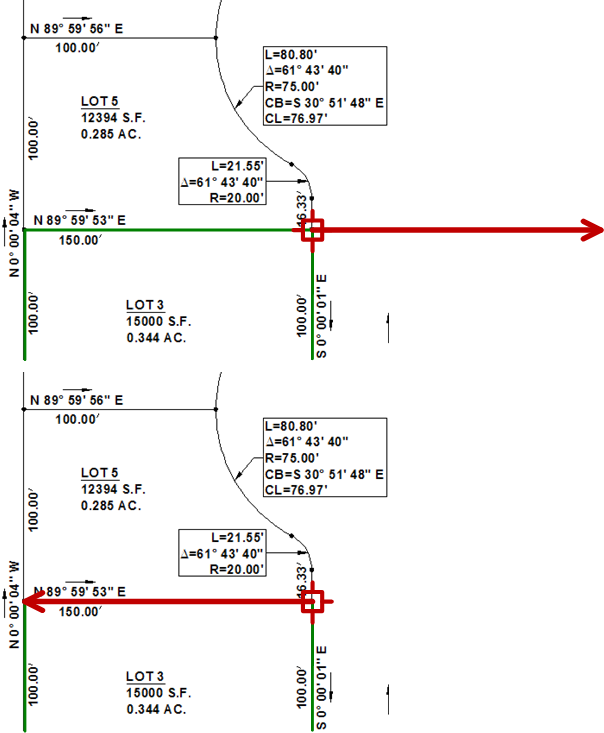
Note: If the mapcheck requires more information to make the calculation, a red circle displays in the drawing and you are prompted at the command line.The following illustration shows how the Reverse command can be used to change the direction of the mapcheck line:
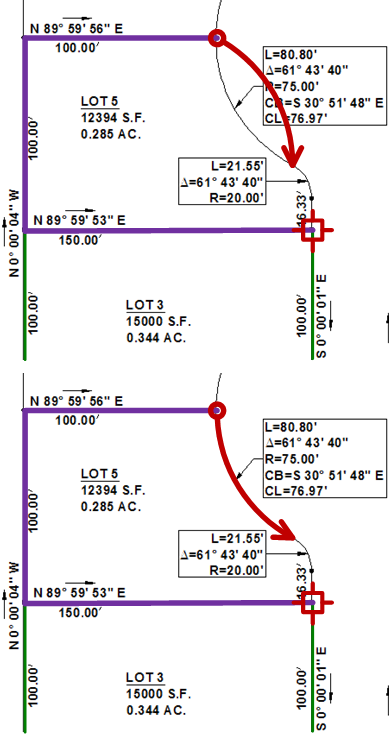
The following illustration shows an example of using the Flip command:
- Continue to follow the command line prompts by selecting labels until you return to the Start Point.
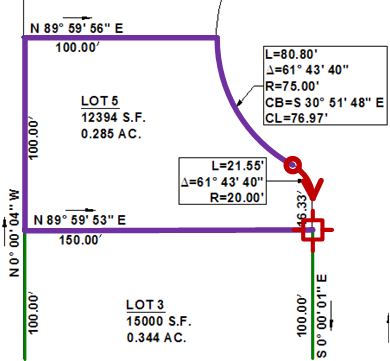
The following illustration shows the continuation of the mapcheck towards the SP:
- Click
 New Mapcheck to add a new mapcheck to the existing Mapcheck Report. Repeat steps 5 through 7.
 - Click
 Output View to review the mapcheck analysis report. Click
  to return to the input window.
 - Optionally, in either the Input View or the Output View, click
 Insert Mtext to insert either the current mapcheck or all mapchecks into the drawing. Specify an insertion point in the drawing and insert the Mapcheck Report.