To view projected bridges on sheets created with the Plan Production tools, you must project the bridges to the profile views after using the Create Sheets command. The Create Sheets command creates new profile views in the drawing to represent the chainage ranges of the view frames that are created with the Create View Frames command. To display them on the sheets, the projected bridges must be projected onto these new profile views.
- Use the Create View Frames wizard to create a view frame that encompasses the plan view of the bridge area. For best results, try to create the view frame so that a single view frame encompasses the bridge area.
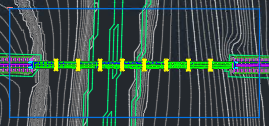
- On the Alignment page of the Create View Frames wizard, you can manually select the start and end stations of the bridge to define the station range to use.
Tip: For best results, select the start and end of the bridge area as the station range. Selecting a station range that will display the bridge area in a single view frame will produce the best results when projecting the bridge.
- On the Sheets page of the Create View Frames wizard, you may need to select a template that uses a different scale viewport.
- On the Profile Views page of the Create View Frames wizard, you can select a profile view style. The profile view style controls the vertical scale and vertical exaggeration of the profile view.
- On the Alignment page of the Create View Frames wizard, you can manually select the start and end stations of the bridge to define the station range to use.
- Use the Create Sheets command to generate the sheet.
- On the View Frame Group and Layouts page of the Create Sheets wizard, select All Layouts In The Current Drawing.
Tip: Creating the sheets in the same drawing as the model space objects makes it simpler to display projected objects on those sheets. The object projection feature requires the source object to be in the same drawing as the profile view, so if you create the layouts (and thus the profile views) in separate drawings, the objects to be projected would also have to be copied to those drawings before they could be projected.
- On the Profile Views page of the Create Sheets wizard, under Other Profile View Options, click the Profile View Wizard button to display the Profile View Height page of the Create Multiple Profile Views wizard. Clear the Split Profile View tick box.
- On the Profile Display Options page of the Create Sheets wizard, you can specify different label styles for the profiles (such as a style that does not display labels). Click Finish to return to the Create Sheets wizard.
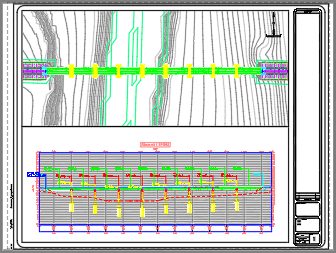
- Click Create Sheets and select a location for the profile view in the drawing.
The sheet is created in the same drawing.
- On the View Frame Group and Layouts page of the Create Sheets wizard, select All Layouts In The Current Drawing.
- Select the new profile view in the drawing and click Profile Views tab
 Launch Pad panel Project Objects to Profile View.
- Select the bridge that you want to project and press Enter to display the Project Objects To Profile View dialog box.
- Specify the bridge projection styles and label set to use and click OK.
The bridge is projected onto the profile view.
- Click the sheet name at the bottom of the application window and check the layout of the profile view on the sheet.
- If you need to make adjustments to the profile view, click the PAPER option in the status bar to switch to model space.
- Click in the profile viewport and select the profile view.
- You can adjust the vertical scale and exaggeration of the profile view by modifying the profile view style. Use the Vertical Scale settings on the Graph tab of the Profile View Style dialog box to modify the scale.
- You can adjust the level range of the profile view by modifying the profile view properties. Use the User Specified Height settings on the Levels tab of the Profile View Properties dialog box to modify the level range.