The default ShaderFX shader is set to use three lights. All three start by using the default 3ds Max light. This makes the object appear extra bright.
To improve lighting, you can either pick different light objects or set MaxNumberLights to 1 on the ShaderFX Material node.
(The ShaderFX shader supports no more than three lights, so values greater than 3 have no effect.)
You can also use the ClampDynamicLights setting to dynamically change the number of lights that the shader uses. This setting appears on the ShaderFX editor  Properties panel, and also on the Parameters rollout in the Material Editor.
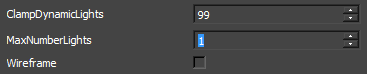
Light Controls on the Parameters rollout
Light controls for a ShaderFX shader appear on the Parameters rollout in the Material Editor. (These are the only controls on the rollout unless you add custom nodes; see Adding ShaderFX Nodes to the Material Editor.)

- ClampDynamicLights
- Dynamically sets the number of lights used by the shader. Range: 0–99. Default=99.
The ShaderFX shader can have no more than three lights, so a ClampDynamicLights value greater than 3 is equivalent to 3. Change ClampDynamicLights to 1 or 2 to reduce the amount of lighting used. A value of 0 turns off lighting altogether.
- Light 0 Type / Light 1 Type / Light 2 Type
- Sets the type of each light, as the label describes. A value of 2=spotlight, 3=omni light, 4=directional light. Default=3. Important: For lights to work correctly, the Position and Direction fields must match the Type of light you choose. (There is no need to change Direction for an Omni light.)
- Light 0 Position / Light 1 Position / Light 2 Position
- Use the drop-down list to have the shader light derive its position from a light object in the 3ds Max scene.
- Light 0 Direction / Light 1 Direction / Light 2 Direction
- Use the drop-down list to have the shader light dirive its direction from a light object in the 3ds Max scene.
This choice has no effect if the light type is Omni (3).