Use the Texture Object Mask to position and animate textures using another object as a mask. By positioning a control object against other objects, you can quickly and accurately place unique textures without having to adjust material IDs nor update UV mapping. Once in position, animate a material’s location by animating the parameters of the control object. Size, location, rotation or any other defining parameters of the control object will have a direct impact on all materials within its influence. Textures can be applied across multiple objects at once.
Note: Texture Object Mask is not supported by the
ART renderer.
Interface
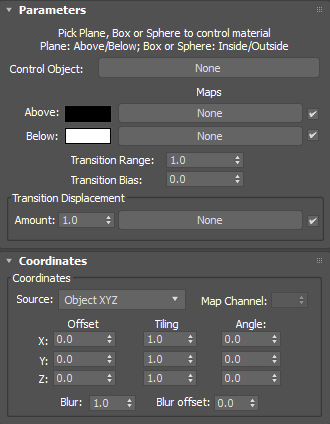
Parameters
- Control Object
- Selects a control object from the scene. Can be a plane, box or sphere.
- Above/Inside
- Selects the color of the material to be placed above the surface of the plane or inside the box or sphere. Alternatively, enable the check box to use a selected map.
- Below/Outside
- Selects the color of the material to be placed below the surface of the plane or outside the box or sphere. Alternatively, enable the check box to use a selected map.
- Transition Range
- Sets a transition for blending the colors or maps.
- Transition Bias
- Expands or contracts the masked area.
- Transition Displacement
- Displaces the masked area with a selected map.
Procedure
To use an object as a texture mask:
- Create a plane, box or sphere to use as a mask in the scene.
- In the Parameters rollout, click the Control Object button and pick the plane, box or sphere.
- Select the colors and/or maps to be used with the control object.
- Place the object against other objects in the scene to position the texture.
Tip: Right-click the control object and use the Object Properties dialog to turn off rendering and/or visibility.
- Move and transform the control object to create animated textures.