Applies colors or maps as tiles on a material.
Using the Tiles procedural map, you can create brick or stacked tiling of colors or maps. A number of commonly defined architectural brick patterns are available, or you can design custom patterns.
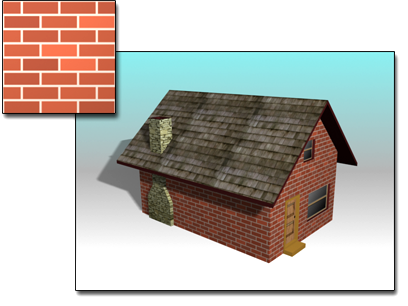
Tiles used for the walls of a house
With the Tiles map, you can:
- Assign many of the maps available through the Material Editor.
- Load textures and use colors in the pattern.
- Control the number of tiles in columns and rows.
- Control the size of the grout gap and its roughness.
- Apply random variance in the pattern.
- Control the stacking layout by shifting how the tiles line up.
Procedures
Example: To create a brick wall:
- Create a wall using a Box primitive, or use an existing surface in one of your scenes.
- On the Material Editor toolbar, click
 (Assign Material To Selection) to apply a Standard material to the wall.
- Open the Maps rollout. Click the Map button for Diffuse to display the Material/Map Browser.
- In the map list, select Tiles, then click OK.
Alternatively, use the Slate Material Editor to wire a Tiles map to the Diffuse Color component.
Now the Tiles map is assigned to the material.
- On the Material Editor toolbar, click
 (Show Map In Viewport) to see the applied map.
- On the Tiles map parameters
 Standard Controls rollout, use Preset Type to select the type of tiles for the wall. Stack Bond is the default.
- Open the Advanced Controls rollout. Under Tiles Setup, adjust Horizontal and Vertical Count. The default is eight rows high, with three repeats of the pattern in each row. Visually scale the size of the tiles to your scene. Also adjust Texture as well as Color and Fade Variance to fine-tune the appearance of the tiles.
- Under Grout Setup, adjust parameters for the texture of the grout, gap spacing between tiles, and roughness of the grout. You can also create missing bricks in the map by setting % Holes to a value above 0.
- Under Miscellaneous, you can vary the color of the tiles by using the Random Seed option.
Example: To match the tiles on the top and side of a wall:
 Select a wall object whose material uses a Tiles map.
- On the
 Modify panel, apply an Edit Mesh modifier to the object.
- Go to the Face sub-object level.
- Select the top face of the wall.
- Open the Material Editor. If you are using the Compact Material Editor, drag the wall’s tile material to an unused sample slot to duplicate it. If you are using the Slate Material Editor, select the material node, choose Select
 Select Children (Ctrl+C), then
Shift+drag the material node to make a copy of the material and its maps.
- View the parameters for the copied Tiles map. In the Advanced Controls rollout
 Tiles Setup group, adjust the horizontal and vertical count of the new material to match the side of the wall.
- Apply the new tile material to the selected faces on the top of the wall.
- In the Stacking Layout group, align the tiles by using the Line Shift option.
Interface
Standard Controls rollout

- Preset Type
-
Lists the commonly defined architectural tile bonds, or patterns, plus a custom pattern, which you design by selecting options under the Advanced Controls and Stacking Layout rollouts. The following illustrations show some of the different bonds:
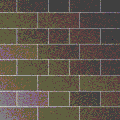
Common Flemish
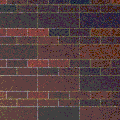
Fine Running
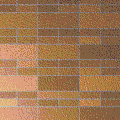
Fine Stack
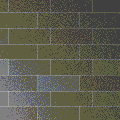
1/2 Running
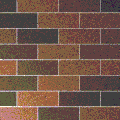
Running
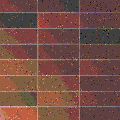
Stack
Advanced Controls rollout
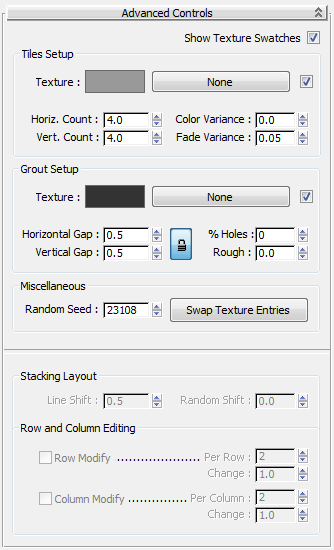
- Show Texture Swatches
- When on, the Texture swatch for Tiles or Grout updates to show the map you assign. Default=on.
Tiles Setup group
- Texture
- Controls the display of the current texture map for the tiles. When on, the texture is used as the tile pattern instead of the color swatch. When turned off, the color of the tiles is displayed; clicking the color swatch displays the Color Selector.
- [Texture button]
- Acts as a target where you drag and drop maps for the tiles. When you click this button with a map assigned,
3ds Max displays the rollout for the map. Before a map is assigned, the label reads "None."
The checkbox controls whether the map is used or not.
- Horiz. Count
- Controls the number of tiles in a row.
- Vert. Count
- Controls the number of tiles in a column.
- Color Variance
- The greater this value, the greater the color varies among individual tiles. Range: 0.0 to 100.0. Default = 0.0.

Left: Color Variance = 0.0
Right: Color Variance = 1.0
- Fade Variance
- The greater this value, the greater the color of individual tiles is "faded" or desaturated. Range: 0.0 to 100.0. Default = 0.05.

Left: Fade Variance = 0.05
Right: Fade Variance = 1.0
Grout Setup group
- Texture
- Controls the display of the current texture map for the grout. When on, the texture is used as the grout pattern instead of the color swatch. When off, the color of the grout is displayed, and clicking the color swatch displays the Color Selector.
- [Texture button]
- Acts as a target where you drag and drop maps for the grout. When you click this button with a map assigned,
3ds Max displays the rollout for the map. Before a map is assigned, the label reads "None."
The checkbox controls whether the map is used or not.
- Horizontal Gap
- Controls the horizontal size of the grout between the tiles. This value is locked by default to the vertical gap, so that both values change as you edit one or the other. To unlock them, click the lock icon.


- Vertical Gap
- Controls the vertical size of the grout between the tiles. This value is locked by default to the horizontal gap, so that both values change as you edit one or the other. To unlock them, click the lock icon.
- % Holes
- Sets the percentage of holes in the tiled surface caused by missing tiles. The grout shows through the holes.
- Rough
- Controls the roughness of the edges of the grout.
Miscellaneous group
- Random Seed
- Randomly applies patterns of color variation to the tiles. Does not require any other setting to generate completely different patterns.
- Swap Texture Entries
- Swaps the texture maps or colors between the tiles and the grout.
Stacking Layout group
 Pattern Setup
  Preset Type.
- Line Shift
- Shifts every second row of tiles a distance of one unit.
- Random Shift
- Randomly shifts all rows of tiles a distance of one unit.
Row and Column Editing group
 Pattern Setup
  Preset Type.
- Row Modify
- When on, creates a custom pattern for rows, based on the values of Per Row and Change. Default=off.
- Per Row Specifies which rows to change. When Per Row equals 0, no rows change. When Per Row equals 1, every row changes. When Per Row is a value greater than 1, the change appears every N rows: A value of 2 changes every second row, a value of three changes every third row, and so on. Default=2.
- Change Changes the width of tiles in the affected rows. A value of 1.0 is the default tile width. Values greater than 1.0 increase the width of tiles, and values less than 1.0 decrease it. Range=0.0 to 5.0. Default=1.0.
A value of 0.0 is a special case: When the Change value is 0.0, no tiles appears in that row, and the underlying material shows through.
- Column Modify
- When on, creates a custom pattern for columns, based on the values of Per Column and Change. Default=off.
- Per Column Specifies which columns to change. When Per Column equals 0, no columns change. When Per Column equals 1, every column changes. When Per Column is a value greater than 1, the change appears every N columns: A value of 2 changes every second column, a value of three changes every third column and so on. Default=2.
- Change Changes the height of tiles in the affected columns. A value of 1.0 is the default tile height. Values greater than 1.0 increase the height of tiles, and values less than 1.0 decrease it. Range=0.0 to 5.0. Default=1.0.
A value of 0.0 is a special case: When the Change value is 0.0, no tile appears in that column, and the underlying material shows through.