You can use a bitmap file or procedural map to assign a pattern or texture to a material's diffuse color. The colors of the map replace the material's diffuse color component. This is the most common kind of map usage.
-

 Material Editor > Standard Material > Maps rollout > Diffuse button (or Color button for the Strauss shader)
-
Material Editor > Raytrace Material > Maps rollout > Diffuse button
-
Material Editor > Arch & Design Material > General Maps rollout > Main Maps group > Diffuse Color button
-
Material Editor > Other materials that have a Diffuse Color component
Adding a diffuse color map to a Standard material
Using a map for the diffuse color is like painting an image on the surface of the object. For example, if you want a brick wall in your scene, you can use a bitmap with an image of bricks as the diffuse map in the material applied to the wall object.
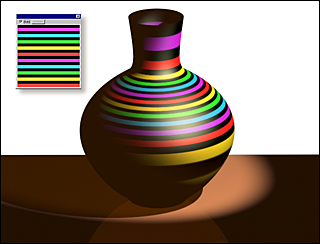
Applying a texture with a diffuse color map
Procedures
To use a Diffuse color map:
- Click the map button for Diffuse.
3ds Max opens the Material/Map Browser.
- Choose a map from the Maps group, and then click OK.
(If you choose Bitmap as the map type, 3ds Max opens a file dialog that lets you choose the image file.)
- Use the map controls to set up the map.
Alternatively, you can use the
![]() Slate Material Editor to
wire a map node to the Diffuse Color component.
Slate Material Editor to
wire a map node to the Diffuse Color component.