The Skin modifier is a skeletal deformation tool designed primarily for creating character animation by deforming one object with other objects. Mesh, patch, and NURBS objects can be deformed by bones, splines, and other objects.
When you apply the Skin modifier to a mesh and then assign bones with the modifier, each bone receives a capsule-shaped "envelope." Vertices of the modified object within these envelopes move with the bones. Where envelopes overlap, each vertex's motion is a blend of the motions of bones that affect the vertex. This is accomplished with weighting.
By default, each vertex that's affected by a single bone is given a Weight value of 1.0, which means the vertex responds only to that bone's motion. Vertices within the intersection of two bones' envelopes have two Weight values: one for each bone. And you can use Skin modifier toolsets such as the Weight Tool dialog to arbitrarily assign vertices to any number of bones.
The ratio of a vertex's Weight values, which always total 1.0, determine the relative extent to which each bone's motion affects the vertex. For example, if a vertex's weight with respect to bone 1 is 0.8 and its weight with respect to bone 2 is 0.2, then the motion of bone 1 will have four times greater influence on the vertex than will the motion of bone 2.
The initial envelope shape and position depends on the type of bone object. Bones create a linear envelope that extends along the longest axis of the bone geometry. Spline objects create envelopes that follow the curve of the spline. Primitive objects create an envelope that follows the longest axis of the object.
You can apply the Skin modifier to several objects at the same time.
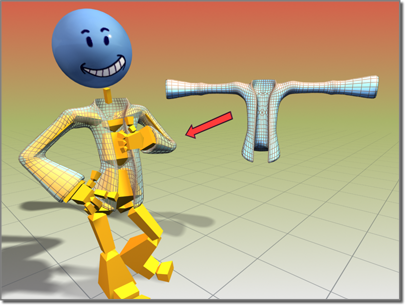
Jacket object deformed using the Skin modifier
In 3ds Max you can mirror envelope and vertex assignments from one side of the mesh to the other with commands on the Mirror Parameters rollout.
Angle Deformers
You can deform the skin mesh based on the angle of the bones. Three deformers that you add via the Gizmos rollout let you shape the mesh based on bone angles:
- The Joint Angle and Bulge Angle deformers use a lattice similar to an FFD lattice to shape the mesh at a specific angle.
- The Morph Angle deformer morphs the mesh at specified angles. You create morph targets with modifiers above the Skin modifier in the stack. Alternatively, you can create a copy of the mesh with the Snapshot tool, then deform the mesh with standard tools.