Lets you choose which particular elements you want to render, and where to save them.
-
Main toolbar >
 (Render Setup) > Render Setup dialog > Render Elements panel > Render Elements rollout
When you render one or more elements, a normal complete rendering is also generated. In fact, the element renderings are generated during the same rendering pass, so rendering elements costs little extra render time.
Rendering to elements is available when you do Production rendering.
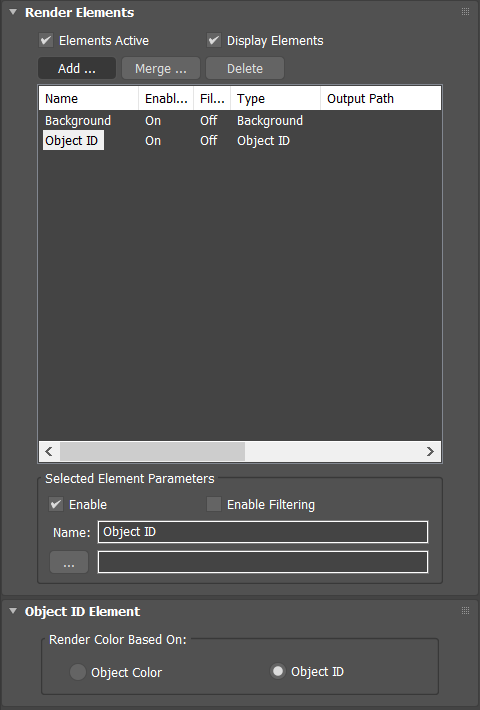
- Elements Active
- When on, clicking Render renders the separate elements. Default=on.
- Display Elements
- When on, each rendered element is displayed in its own window, which is a feature-reduced version of the Rendered Frame Window. When off, the elements are rendered to files only. Default=on.
The windows for each rendered element open cascaded on top of each other. Move one element's window to see another's.
- Add
- Click to add a new element to the list. This button displays the Render Elements dialog.
- Merge
- Click to merge the render elements from another 3ds Max scene. Merge displays a file dialog so you can select the scene file to get the elements from. The list of render elements in the selected file is added to the current list.
- Delete
- Click to delete the selected elements from the list.
[Render Elements list]
This scrollable list shows the elements to render separately, and their status. To resize the columns in the list, drag the border between two columns.
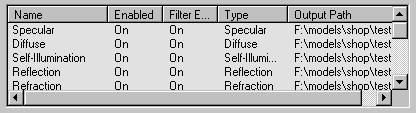
The list includes the following columns:
- Name
- Shows the name of the element. You can change the default name of elements, in the Selected Element Parameters group.
To select an element, click its name in the list. Use Ctrl+click to select additional elements, or Shift+click to select a contiguous group of additional elements.
- Enabled
- Shows whether the element is enabled.
- Filter
- Shows whether the active antialiasing filter is enabled for the element.
- Type
- Shows what type of element this is.
This field is useful if you have changed the name of an element.
- Output Path
- Shows the path and file name for the element.
Selected Element Parameters group
These controls are for editing selected elements in the list.
- Enable
- Turn on to enable rendering the selected elements. Turn off to disable rendering. Default=on.
The Enabled column of the elements list shows whether or not an element is enabled.
- Enable Filtering
- When on, applies the active antialiasing filter to the rendered element. When off, the rendered element does not use the antialiasing filter. Default=on.
The Filter column of the elements list shows whether or not the filter is enabled for an element.
Disabling antialiasing can improve rendering time, although the rendered element that results might appear jagged.
Note: Turning off Enable Filter disables only general antialiasing and map filtering. Edge blending still occurs when this switch is off. - Name
- Shows the name of the currently selected element. You can type in a custom name for the element.
This control is unavailable when multiple elements are selected.
-
 Browse
- The text box lets you enter a path and file name for the element. Alternatively, click the
(Browse) button to open the Render Element Output File dialog, which lets you choose a folder, file name, and file type for the element.
This control is available only when a single element is highlighted.
Note: If you first assign a file name and path for the complete rendering on the Render Setup dialog Common Parameters rollout, the render elements feature uses this name and path automatically as the basis for names of the various elements. It appends an underscore (_) and then the name of the element to the basic file name.
For example, if the render file name is "C:\render\image.jpg", when you add a Specular render element, the default path and file name for the rendered specular element is "C:\render\image_specular.jpg".
Similarly, when you enable output to a Combustion workspace (CWS) file, the file name you assigned is the default name of the CWS file.
For example, if the render file name is "C:\image.jpg," when you enable Combustion output, the default path and file name is "C:\image.cws".