Setting Up The Skydome & The Table
- First, we will create the SkyDomeLight. Open up the Hypershade window. In the Create Bar on the left of the Hypershade window, you should see a list of Arnold nodes. The one we want is the skydome_light. Click on it to create it. You will notice a new node for it in the Lights tab of the Hypershade window and also in the Outliner. It will appear in the viewport as a yellow wireframe sphere.
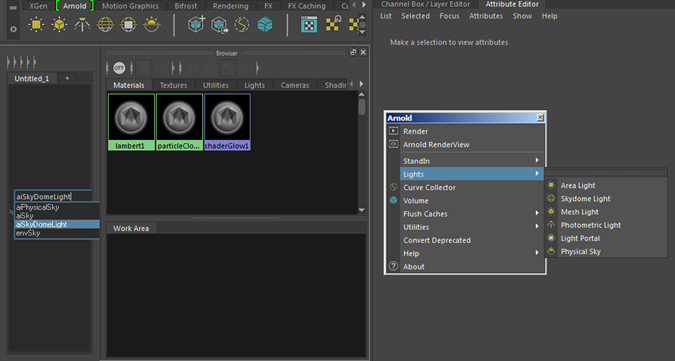
Create an Ai SkyDomeLight
- Select the skydome_light and show its attribute editor. Connect a 2d file texture to the Color attribute of the Ai SkyDomeLight. If you are using an HDR map, remember to switch the file type to 'All Types' to see the hdr file in the file open browser window. Remember to change the Format to the same format that the HDR map was captured. In this case, it was captured with a mirrored ball.
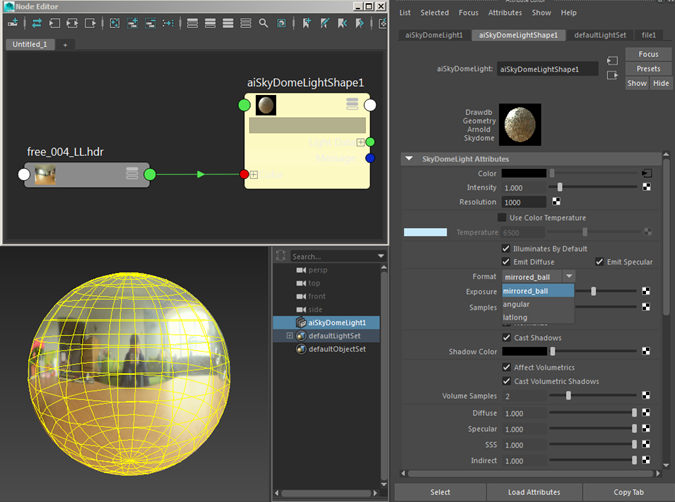
HDR map connected to Ai SkyDomeLight. Format set to 'mirrored ball'
In the attribute editor for the skydome_light, scroll down to resolution. Type in a value that matches the resolution of your HDR map. The SkyDomeLight uses importance sampling to send more rays towards important directions, and the resolution of the importance table needs to be high enough to capture small details in the HDR map, but never higher than the resolution of the HDR map itself.
To test the effect of the skydome_light we need to create a simple scene. Create a polygon plane and scale it out to around the size of the grid. Create two polygon spheres and position them on top of the plane.
In the Hypershade window create two standard_surface shaders. Assign one standard_surface to one sphere and the other to the other sphere.
We are now going to the change the second standard_surface shader to something that resembles a chrome material. Select it and open up the attribute editor. Start off by renaming it to Chrome. Increase the base_weight to 1. Increase the metalness to 1 and reduce the specular_roughness to 0, for a perfectly clear mirror like reflection.
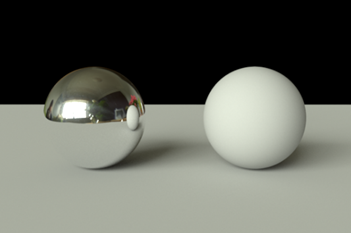
Make one sphere chrome and the other a matte material
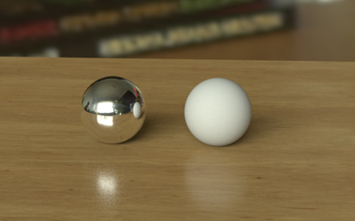
- Test render the spheres on the plane now. The HDR map that is connected to the Skydome light should now be visible to the camera. Don’t worry if you are getting noisy shadows at this stage. We will refine these later on.
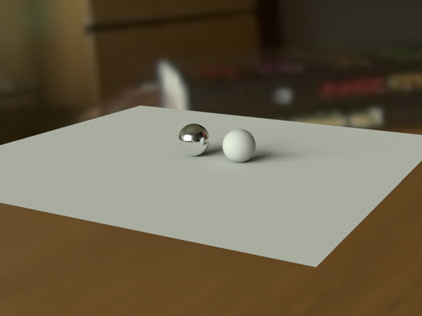
Skydome light visible in background of camera
Table Wood
Create another Standard Surface shader and assign it to the plane. Rename it ‘Wood Table’. Connect a wood color file texture to the base_color slot in the attribute editor.
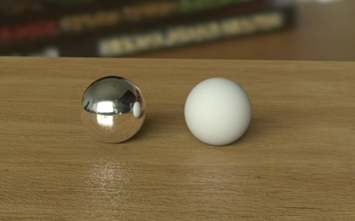
Add a specular map to the Specular Color slot in the attribute editor. Now is a good time to start an IPR render in order to fine tune the specular settings of our wood material. Change the Specular Weight value to something like 0.3. You should notice bright specular highlights underneath the spheres in the wood material. Try adjusting the roughness value. Raising the Roughness value will soften the specular highlights and lowering it will make them sharper.
Wood floor texture connected to Standard Surface on poly plane
- Open up the Bump Mapping and add a 2d bump file texture node to it. Adjust the bump value to around 0.01. Again use the IPR to interactively adjust the settings.
Add a bump map texture to the Wood shader