Setting Up The Final Render
- Now we have finished lighting and shading; we can move our camera into position ready for rendering. First, let’s add some depth of field to our camera. Create a locator and go to Display>Heads Up Display>Object Details. This will tell us how far the locator is from the camera. Move the locator where you want the focus of interest to be and make a note of the Distance From Camera value in the top right of the camera viewport.
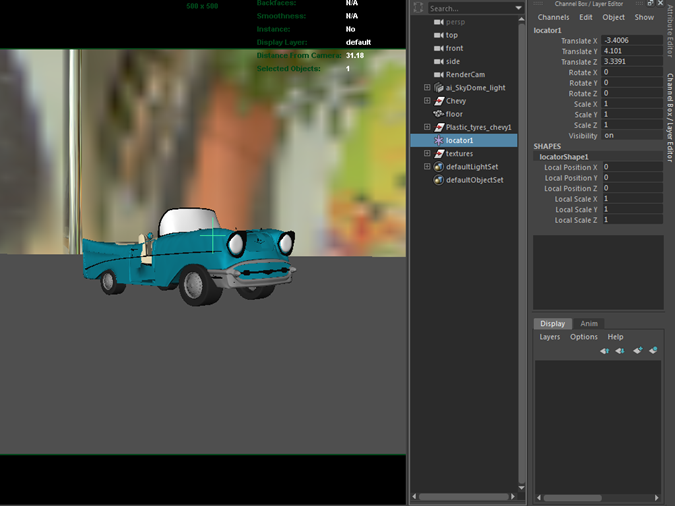
Create a locator and position it where you want the focus distance
- Select your Render Camera and scroll down to the Arnold section in the attribute editor. Select Enable DOF and type in the distance from camera value for the locator into the Focus Distance. Increase the Aperture Size to see the effect of the camera depth of field. This is where Arnold and IPR shine as you can interactively adjust the depth of field with very fast results.
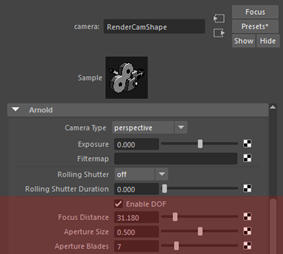
Set the Focus Distance to be the same as the Distance from Camera for the locator
Final Render
Now we have finished test rendering our scene. It is time to increase the quality settings. Start off by selecting the skydome_light. In the attribute editor, increase the samples to 3. This will increase the number of shadow samples in the scene, effectively smoothing out any shadow noise. The higher the number, the finer the result. However, you should be careful not to increase this value too high otherwise your render times will increase dramatically. If you are getting noise on the model, rather than the shadows you may need to increase the number of diffuse_samples in the Render Settings. Try increasing it to 3.
Once you are happy with the depth of field, lighting, and shading, it is time to set off a final render. Open up the Render Settings Window and click on the Arnold tab. By default, you should see the Camera AA Samples is set to 3. This is good enough for test rendering, however, for our final rendering, we will want to increase this value. Depending on how much depth of field you have in the scene, you may need to increase this value to 7 or higher. Render through your Render Camera and you are done.
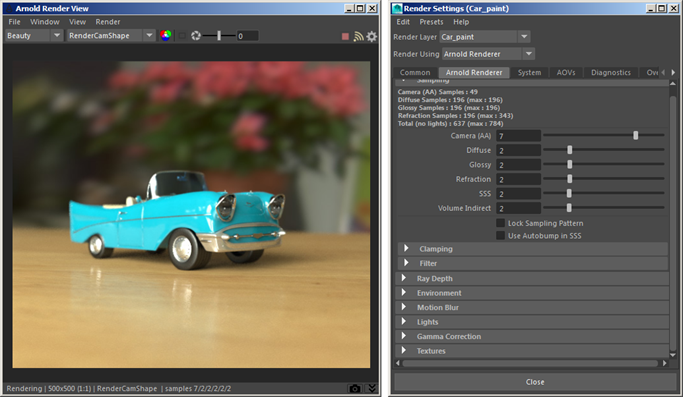
Final AA Sample is set to 7 in the Render Settings
That concludes this tutorial.