Various types of editing grips are displayed for a selected wall object. You can drag these grips as needed to reposition or resize the object, or you can enter precise distance or angle values using the Dynamic Input feature. When you select a grip that has multiple functions, you can cycle among them by pressing Ctrl.
| Grip | Description |
|---|---|
| (Lengthen) | Lets you change the length of a straight wall segment |
| (Base Height) | Lets you change the base height of a straight wall segment |
| (Width) | Lets you change the width while maintaining the baseline of a straight wall segment |
| (Width) | Lets you change the width while maintaining the opposite face of a straight wall segment |
| (Base Height) | Lets you change the base height of an arc wall segment |
| (2nd Point) | Lets you change the 2nd Point of an arc wall segment. |
| (Curve Radius) | Lets you change the curve radius of an arc wall segment. |
| (End Angle) | Lets you change the end angle of an arc wall segment. |
| (Reverse Direction) | Lets you reverse the direction of an arc wall segment. |
| (Reverse Direction) | Lets you reverse the direction while maintaining the baseline of an arc wall segment. |
Viewing Wall Grips
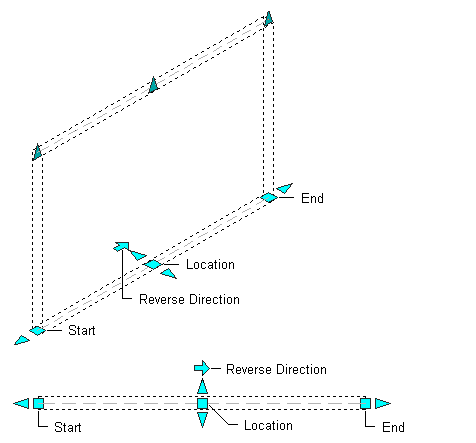
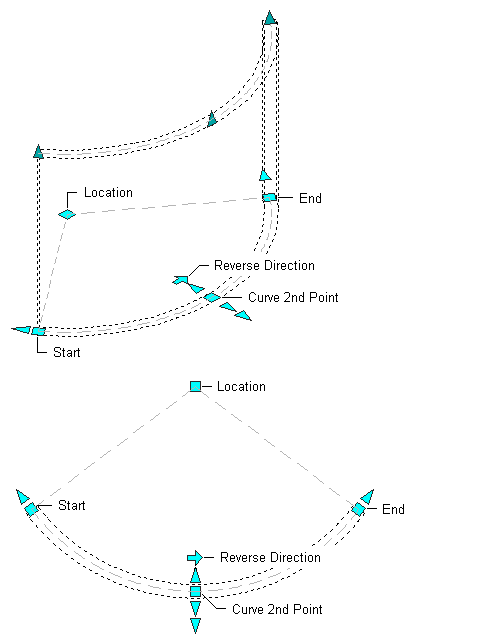
The types of editing grips available for a selected wall depend on the view direction and the wall style. Lengthen, Start, Location, Reverse Direction, Width, and End grips are displayed in both plan and 3D isometric views. Base Height grips are available only in 3D isometric views. Curve 2nd Point, Width, and Curve Radius grips are displayed in both 2D and 3D views for curved walls. Wall styles that have a fixed width do not display Width grips, while wall styles that have a variable width do.
The following illustration shows the Lengthen, Width, and Base Height grips that appear for a straight wall segment in 3D and 2D views.

The following illustration shows the Start Angle, End Angle, Width, Curve Radius, and Base Height grips that appear for a curved wall segment in 3D and 2D views.

The following illustration shows the Start, End, Reverse Direction, and Location grips that appear for a straight wall segment in 3D and 2D views.
The following illustration shows the Start, End, Reverse Direction, Curve 2nd Point, and Location grips that appear for a curved wall segment in 3D and 2D views.
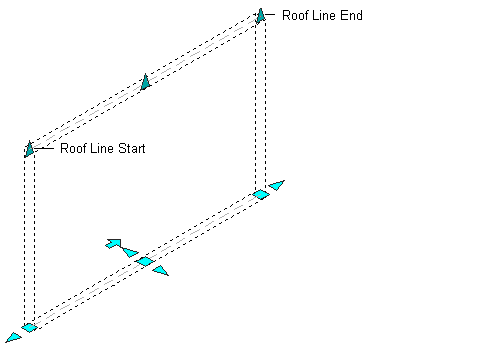
The following illustration shows the Roof Start Line and Roof End Line grips that appear for a straight wall segment in 3D and 2D views.
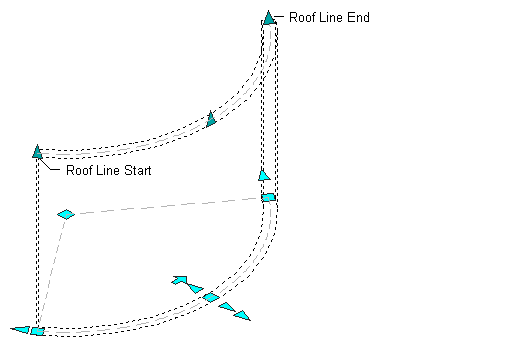
The following illustration shows the Roof Start Line and Roof End Line grips that appear for a curved wall segment in 3D and 2D views.
Changing the Location of a Wall
Use this procedure to relocate a wall by using the Location grip. There are 2 cases to consider when working with the location grip: parallel wall segments and non-parallel wall segments.
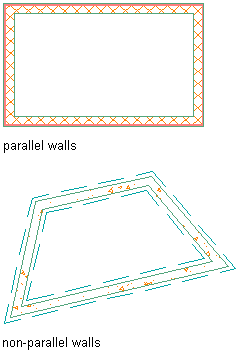
When you are working with connected walls that are parallel, the Location grip has 2 edit modes: Stretch (Parallel) and Move. The default mode is Stretch (Parallel), and the direction of the stretch depends on the orientation of walls connected to the selected wall. For example, if the walls at both ends of the selected wall are parallel to each other, with the Stretch (Parallel) mode, the move direction is limited to the direction of the parallel walls.
When you are working with a stand-alone wall segment or connected walls that are not parallel, the Location grip has 2 edit modes: Stretch (Offset) and Move. In this case, the default mode is Stretch (Offset) and the stretch direction is perpendicular to the direction of the selected wall.
In both cases, the Move location mode allows an unconstrained move of the selected wall without maintaining adjacent wall connections. You can also move a wall by changing its coordinates on the Properties palette.
The following illustration shows how to use the Location grip in Stretch (Parallel) mode to move a connected parallel wall segment and maintain adjacent wall connections.
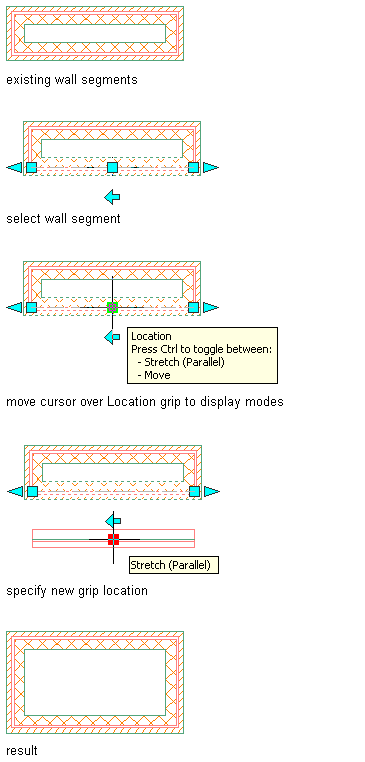
The following illustration shows how to use the Location grip in Move mode to move a parallel wall segment without maintaining adjacent wall connections.

- Select the wall you want to relocate.
- Select the Location grip.
The Stretch (Parallel) location mode is the default, or you can press Ctrl to toggle to the Move location mode.
- Move the wall to the desired location and click once, or enter a distance value and press Enter.
When you use the Stretch (Parallel) location mode, wall connections are maintained if the connecting walls use a zero cleanup circle radius. The connected walls are trimmed, extended, and reversed as necessary to maintain connections and the cleanup circle radius. Using the Move location mode results in disconnected walls.
- Press Esc, or right-click, and click Deselect All to deselect the wall and turn off all grips.