-
Click


 .
.

- Select the AEC dimension style to edit and click Next. Note: If you choose a dimension style that has its property source set to System Default, you get a warning message. If you want to edit the style, close the Wizard, open the style in the Style Manager, and set the display property source to a style override.
- Select the display representation to change. Note: If the AEC dimension style you choose to edit is based on the same AutoCAD dimension style for different display representations, the edits you make apply to all display representations. To avoid this, make sure that the AEC dimension style uses different AutoCAD dimension styles for different display representations.
- Specify line and arrow settings:
- Select new arrowhead symbols.
- Change the size of the arrowheads.
- Define a new length for the extension lines.
- Define a new distance between the individual dimension chains.
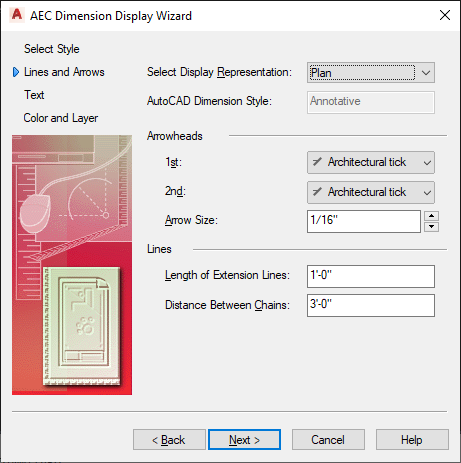
- Click Next.
- Specify text settings:
- Select a new text style.
- Enter a new text height.
- Define a new round-off precision for dimension values.
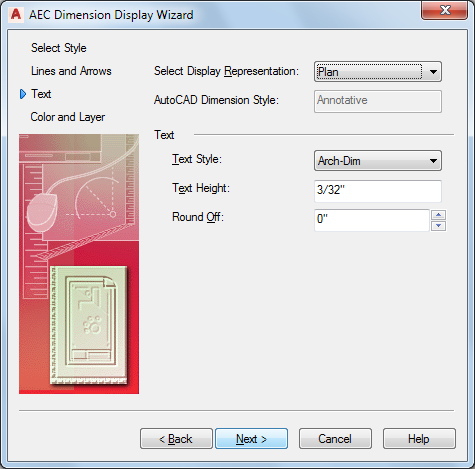
- Click Next.
- Specify Color and Layer settings:
- Select a new text color.
- Select a new dimension line color.
- Select a new extension line color.
- Select a new layer for the dimension.
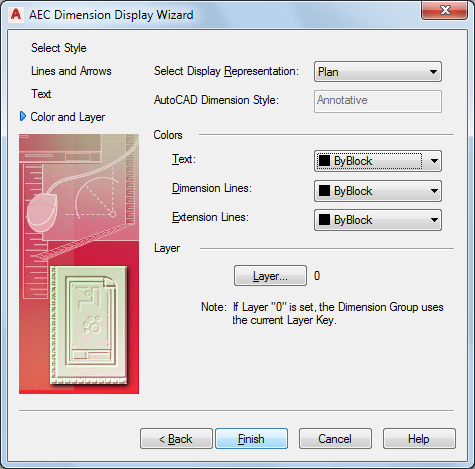
- Click Finish.