Use this procedure to create an opening with a custom shape and other settings that you specify.
Adding an opening with a custom shape
- Open the tool palette that you want to use, and select an opening tool.
If necessary, scroll to display the desired tool.
- On the Properties palette, expand Basic, and expand General.
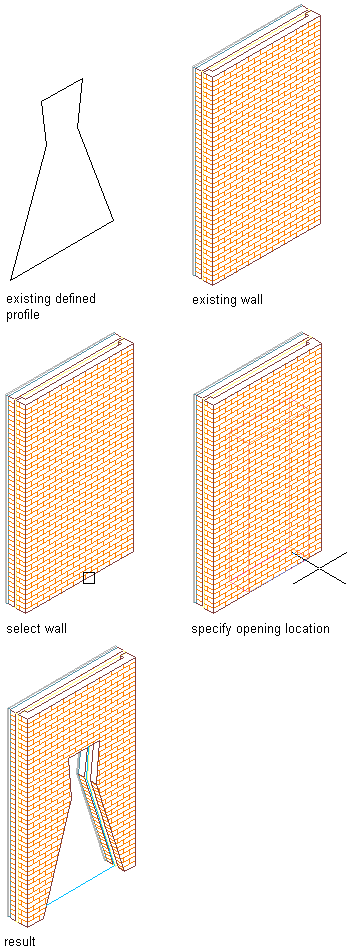
- Select Custom for Shape.
- Select the profile that provides the geometry of the shape for Profile.
- Expand Dimensions.
- Enter values for Width and Height.
- Expand Location.
- If you are placing the opening in a wall, specify the opening position:
If you want to… Then… position the edge of the opening at a specific distance from the end of a wall segment select Offset/Center for Position along wall, and enter a value for Automatic offset. center the opening on a wall segment select Offset/Center for Position along wall, and specify a point near the center of the wall segment. position the opening anywhere along the wall select Unconstrained for Position along wall. - Specify whether you want the opening to be aligned vertically by sill height or by head height:
If you want to… Then… align the opening by sill height select Sill for Vertical alignment, and enter a value for Sill height. align the opening by head height select Head for Vertical alignment, and enter a value for Head height. - Specify the insertion point for an opening in a wall or for a freestanding opening:
If you want to… Then… place an opening in a wall select the wall, and specify an insertion point along the wall. place a freestanding opening press Enter, and specify an insertion point and a rotation angle for the opening. - Continue to place openings, and press Enter.