Use this procedure to create a nested grid in a curtain wall. A nested grid is a grid within a grid. Each nested grid has its own division, cell assignments, frame, and mullions. By default, the frame is turned off for nested grids.
- Click
 .
. 
- Expand Architectural Objects, and expand Curtain Wall Styles.
- Select a curtain wall style.
- Click the Design Rules tab.
- In the left pane, select the grid in which you want to create a nested grid.
- Click New Cell Assignment.
A new cell assignment is displayed in the list of cell assignments.
- Select the cell assignment in the top right frame, right-click and click Rename, and then enter a descriptive name.
- Select Nested Grid in the Element column.
A new grid is added to the list of grids in the left pane. If you are editing the primary grid, the new grid is added at the secondary level. If you are editing a grid at the secondary level, the additional grid is placed at the tertiary level, and so on.
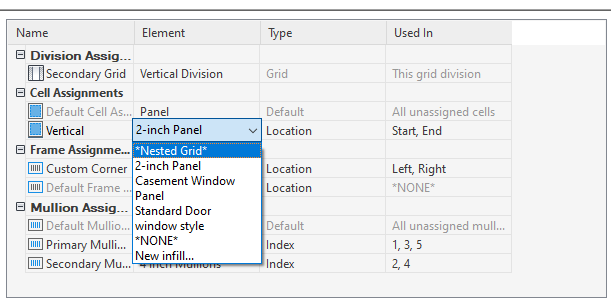
Creating a nested grid
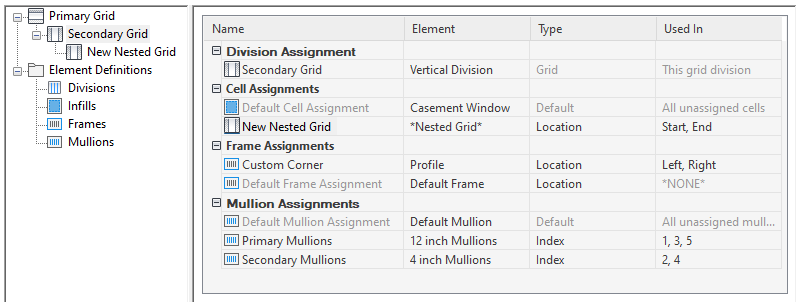
New nested grid in tree
Note: To rename a grid, select it in the right pane, right-click and click Rename, and enter a new name. - Specify the cells to contain this nested grid.
- Click OK.