Use this procedure to produce a napkin sketch in a plan, isometric, or elevation view. When you are working with three-dimensional (3D) drawings, unless your drawing is very simple, generate the napkin sketch from a two-dimensional (2D) hidden line projection, section, or elevation.
- Open a tool palette that contains a napkin sketch tool.
A napkin sketch tool is located with the Helper Tools in the Stock Tool catalog.
- Select a napkin sketch tool.
- Select the objects to include in the napkin sketch, and press Enter.
- Enter a name for the block created of the napkin sketch.
- Specify a line format for generating the napkin sketch geometry:
If you want to… Then… trace over objects once to create the appearance of a more accurate sketch select Tight. trace over objects twice to create a looser sketch select Loose. trace over objects three times to create a very loose sketch select Messy. - Clear Extend Sketch Lines At Corners if you do not want the extended lines to appear on the napkin sketch.
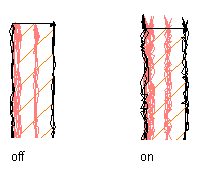
Extending sketch lines at corners
- Under Intended Plot Scale, select the scale at which you intend to plot the sketch, or select Other and enter a custom scale.
- Click OK.
The napkin sketch geometry is generated and placed as a block reference over the drawing objects that you selected. Use the Move command to relocate the sketch block reference in the drawing, or cut and paste it into a new drawing.