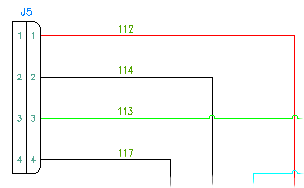
Defines and edits wire types.
Find Command entry:
AEWIRETYPE
Define a layer as a wire layer. All lines on layers defined as wire type layers are considered wires. The program saves the wire layer name and associated properties, such as wire color and size, in the drawing file. Use the grid control to sort and select wire types to modify.

The program saves the wire layer name and associated properties in the drawing file. Use the grid control to sort and select wire types to modify.
Wire type grid
Displays the wire types defined in the active drawing.
- Used
- An x in the Used column indicates that the layer name is used in the drawing. A blank value in this column indicates that the layer name exists in the drawing but it is not currently being used.
- Wire Color
- Color name assigned to the wire type. Note: The color name does not control the color of the wire itself.
- Size
- Size value assigned to the wire type.
- Layer Name
- Layer name assigned to the wire type. The default layer name is based on the format defined in Layer Name Format. Edit the value while creating the wire type, or right-click to rename the layer name.
- Wire Numbering
- If you do not want wire numbers assigned to wires on a specific layer, select No Wire Numbering for that layer. The Insert Wire Numbers command follows these rules:
- If all wires in the network are on layers set No for Wire Numbering, no new wire number is inserted.
- If any wire in the network is on a layer set Yes for Wire Numbering, the existing non-fixed wire number is updated or a new wire number is inserted.
- If a wire network already has a non-fixed wire number, it is updated regardless of the Wire Numbering setting. Use the Delete Wire Numbers command to remove the wire number.
- Row Order
- Double-click a column header to sort the grid by that column. Drag a row to change its order in the grid.
- Shortcut Menu Options
- Copy, Cut, Paste, Delete Layer, and Rename Layer. Right-click on a layer name cell to enable Rename Layer. Note: The default wire layer cannot be removed.
Option
- Make All Lines Valid Wires
- Makes all existing layers valid wire layers and displays them in the wire type grid. Select one wire row before checking this option.
If you later decide you want some layers to be wire layers and others to be line layers, you can deselect this option. All the layers are removed from the wire type grid. Add layers again using the Add Existing Layer option.
- Import
- Imports wire types from an existing drawing or drawing template. Once the drawing is specified, the Import Wire Types dialog box displays. Select the wire types to import.
Layer
Allows you to format the layer name, define or edit the layer color, linetype, and lineweight.
- Layer Name Format
- Format the layer name. The program fills the layer name automatically once you enter a value in color, size based on the format. For example, if you enter BLK for color and 10AWG for size, the layer name is filled in as BLK_10AWG based on default %C_%S format. Placeholders are supported at any place in the format (that is, "CUST%C-THIN%S).
Valid wire name format codes are:
- %C = Wire Color
- %S = Wire Size
- %1-%5 = USER1 - USER5
- Color
- Displays the AutoCAD dialog box for Layer colors election. The Select Color dialog box highlights the color corresponding to the wire type record. The default color for new records is white. Undefined colors for layers use the default color while creating the layer. Multiple wire type selection is allowed.
- Linetype
- Displays the AutoCAD dialog box for linetype selection. This Select Linetype dialog box highlights the linetype corresponding to the wire type record. The default linetype for new records is continuous. Undefined linetypes for layers use the default linetype while creating the layer. Multiple wire type selection is allowed. Note: If you need special linetypes for constructing P&ID or point-to-point diagrams, load the special linetypes from the acade.lin text file.
- Lineweight
- Displays the AutoCAD dialog box for lineweight selection. The Lineweight dialog box highlights the lineweight corresponding to the wire type record. The default lineweight for new records is default. Undefined lineweights for layers use the default lineweight while creating the layer. Multiple wire type selection is allowed.
- Add Existing Layer
- Displays the Layers for Line Wires dialog box for specifying a layer name. Enter a wire layer name in the dialog box. A wildcard used in the name selects a group of layers (for example, RED_* selects all layers that begin with RED_). Click Pick to select the layer name from the existing layer list consisting of all the layers in the drawing inclusive of the non-wire layers.
- Remove Layer
- Removes the selected layer name from the wire type grid. The layer is no longer a valid wire layer, however the layer remains in the drawing as an AutoCAD layer.
If multiple layers of one color exist in the drawing, select all layers of that color in the wire type grid to activate this button. For example, if there are multiple RED* layers such as RED_AWG18, RED_AWG20, and RED_AWG25, select all three layers in the wire type grid to enable the button.
Note: The default wire layer cannot be removed. - Mark Selected as Default
- Makes the selected layer the default layer for new wires.
OK
If added wire types do not exist on the drawing, the wire layers are created. The layer name cannot contain special characters such as / \ " : ; ? * | , = ' > < .