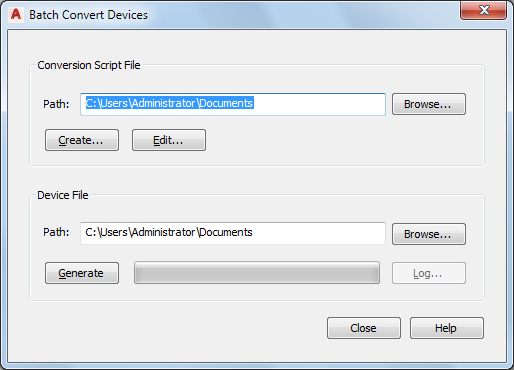
You can convert a set of AutoCAD® blocks to schematic symbol styles. The output of the conversion process is a drawing (DWG file) that contains the styles.
Typically, you use this process in 1 of 2 contexts. In the first context, you want to create schematic symbol styles using the blocks in your existing block libraries. During the process, you need to create a symbol conversion script (Custom Content File or CCF file) that contains the style settings to use to create the schematic symbol styles.
In the second context, you have already converted a set of existing schematic symbol styles to their individual components, customized the components, and now you want to create new schematic symbol styles based on the customizations. In this case, you already have a conversion script, which you can customize and reuse.
Regardless of the context, you use only one script to produce one drawing containing schematic symbol styles. For example, you would use one script to produce one drawing containing customized styles for HVAC equipment.
To convert a set of blocks to schematic symbol styles
- Click


 .
. The software displays the Batch Convert Symbols dialog box.

- In the Batch Convert Symbols dialog box, under Conversion Script File, for Path specify the symbol conversion script (CCF file) to use to convert the blocks to schematic symbol styles.
The symbol conversion script contains the style settings to use, as well as references to the drawings that contain the AutoCAD® blocks to use for the style views.
If you want to… then… create a script click Create, and create the script using the Symbol Conversion Script dialog box. For more information, see Creating Symbol Conversion Scripts. use an existing script, such as a customized version of a script generated from converting existing schematic symbol styles to blocks. click Browse, select the script, and click Open. Note: To make changes to the script prior to using it, click Edit, and modify the script using the Edit Symbol Script dialog box. For more information, see Modifying Symbol Conversion Scripts. - For Symbol File, click Browse, and specify the drawing (DWG file) to contain the new schematic symbol styles:
If you want to… then… create the drawing in the Select File dialog box, specify the location for the new drawing, enter a name, and click Save. overwrite the contents of an existing drawing in the Select File dialog box, select the drawing, click Save, and then click Yes to confirm that the contents of the drawing can be overwritten. - Click Generate.
The software creates the schematic symbol styles using the conversion script and the block definitions from the referenced drawings.
Attention: If you need to make a few changes to the new styles, modify the symbol conversion script and repeat the conversion process to apply the changes. If you make the changes using the Style Manager instead, the changes are overwritten if you subsequently repeat the conversion process. - If there are errors in the process, click Log to view them. Otherwise, click Close.