Prepare and use native Inventor data in Fusion 360 for Generative Design, Simulation, and Manufacturing.
What's New: 2022, 2023, 2023.1, 2024, 2024.1
- Sign in with your Autodesk ID
- Set up Fusion Team for your use or join a Fusion Team you have been invited to participate in as a project member.
You are entitled to a Fusion Team account with subscription to one of the following products: Fusion 360, Product Design and Manufacturing Collection, or Product Design Suite.
Prepare the Inventor data
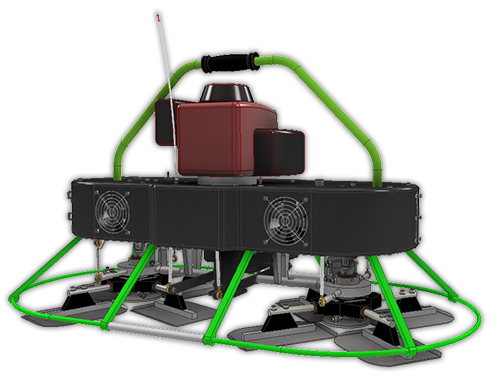
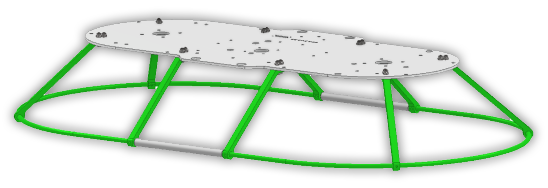
For the various studies and processes, use only the required Inventor data. If you want to reduce the data you send to Fusion, you can create Model States with the appropriate data for the selected study or process you want to run. Make sure the model state is active when you start the command.
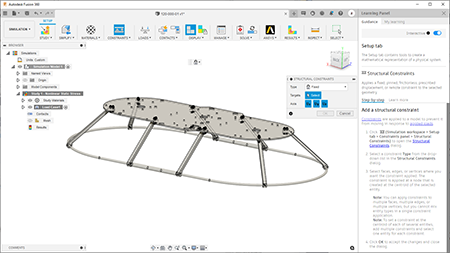
Send Inventor Data to Fusion 360 Workspaces

- When your model is ready and in the appropriate model state, in the Part or Assembly environment, click the
Fusion 360 tab. Available tools enable based on the document type.
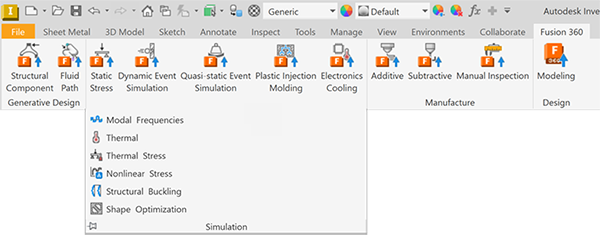
- In the ribbon, click the study or process that you want to use to get design.
Note: Inventor supports preselection of bodies for this process. Change the Selection Priority to Part Priority, then select parts.
- The Fusion 360 Interoperability panel displays an introduction page. The page explains the purpose of the selected command and may provide links to examples and learning content. You can opt to not show the page and go directly to the details page.
- Click Continue to go to the next panel where you make selections and specify the Fusion team to use.
- For
assembly models, in the Fusion 360 Interoperability panel, for
Design Scope, specify whether you are using:
- All visible parts - this is a good time to use a prepared model state. If the instance count exceeds 500, you are prompted to remove some parts to reduce the amount of data being sent to Fusion 360. In addition to the visible parts, the following items contribute to the instance count:
- Non-visible parts - hiding does not eliminate parts from the count. Parts must be suppressed to be not counted.
- Reference parts
- Disabled parts
- Active model state
- iAssembly includes only the current instance
- Selected parts - activates a selector so you can pick the parts you want to use.
Note: If you've defined a model state, you may not need to select parts individually.Note: If components are pre-selected when a command is activated, the selected parts are included. You can continue to select additional parts. Selection can occur at any time prior to clicking Upload.
- All visible parts - this is a good time to use a prepared model state. If the instance count exceeds 500, you are prompted to remove some parts to reduce the amount of data being sent to Fusion 360. In addition to the visible parts, the following items contribute to the instance count:
- Select the Fusion Team Location for the uploaded Inventor data. The selected location displays below the Projects list.
- In
Projects tree view, select the project folder where the data will be stored.
- You can add new folders to Fusion Team. Click
 and name the folder.
- If the project data or folder organization has changed, click the refresh
 button to update the displayed information.
Note: If you are the project owner, you can give collaborators permission to view or edit the contents of any folder, on a folder-by-folder basis. For more information about managing Fusion 360 project access see Manage people in projects. - You can add new folders to Fusion Team. Click
- Specify the file name or accept the default which is the active model name. If a name is already used, the specified filename is appended with an index number.
- Optionally, select Fusion Launch Options. These options activate after the data uploads to Fusion Team, you can:
- Click
View Details on Web
to open in Fusion Team.
- Click
Open in Fusion 360 to continue to work on the data in the appropriate workspace. In Fusion 360, you can display the Learning Panel (right panel) to provide guidance for the steps through the study or process.
- Click
View Details on Web
to open in Fusion Team.
- Click
Upload to send the data to Fusion Team. You are prompted to save the Inventor file. Once saved, a Fusion 360 folder is added to the Inventor browser and a node linked to the data is instanced in the folder.
Note: Access to Fusion 360 browser nodes is disabled when editing in-place. Open the model having the folder as the top node to update the Fusion 360 data.
- If an error occurs during the upload process, a message is posted in the Fusion 360 Interoperability panel, the upload is stopped, and work-in-progress models are deleted.
Note: Errors related to upload may be caused by 1) Unresolved files in the assembly; 2) Assembly or reference files being removed or renamed; 3) Assembly or folder being set to read-only.
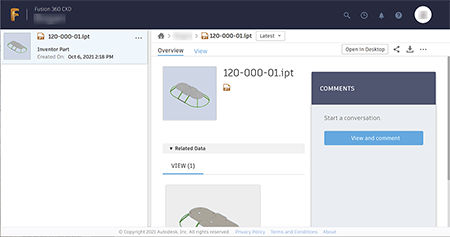
The Inventor IPT is visible in Fusion Team. When opened in Fusion 360 an associated .F3D file is generated.
- If an error occurs during the upload process, a message is posted in the Fusion 360 Interoperability panel, the upload is stopped, and work-in-progress models are deleted.
- If you didn't choose the Open in Fusion 360 launch option, you have a second opportunity to make that choice. Click Open in Fusion 360 to open the dataset in the related workspace.
- Clicking
Cancel stops the upload, deletes Fusion Team work-in-progress objects, deletes the Inventor derived part file, and deletes the Fusion 360 browser node. The Inventor command remains active.
Note: Starting another command while a Fusion 360 command is active will cancel the Fusion 360 command.
- Click Close to finish.
Updates and Actions
Later, when the Inventor model changes, you can update the linked model and rerun any studies with the updated data. To view the components included in a Fusion Exports dataset, select the node in the folder and the components highlight in the browser and canvas.

- Delete the node, breaking any association or link to the Fusion version of the data.
- Open in Fusion 360 opens the Fusion 360 model in the workspace associated with the command that created the node. If the model has changed since the send to Fusion action, you are notified that the Inventor model and Fusion 360 export are out of sync. You have the option to update to the Fusion 360 model before opening it.
- Upload new version creates a new version of the Inventor IPT using the current model view and model state. Open the updated model in Fusion 360 to generate a new F3D. Studies are not automatically re-run. Enables only if changes have been made to the model.
- Update and Open updates the selected Fusion 360 model and opens it in the appropriate Fusion 360 workspace. Enables only if changes have been made to the model.
- Edit - see below.
- View details on web opens Fusion Team in with the Fusion 360 data as the focal point.
Edit the Data Sent to Fusion 360
- In the model browser, expand the Fusion Exports folder.
- Right-click the browser node you want to modify and click Edit. The canvas switches to the model state, view representation, and positional representation (assembly only) that were active when that node was created. If the model state or a representation was deleted, the default is used.
- The Fusion 360 command panel used to define the data and browser node displays.
- Add or remove selections as needed.
- Click Upload to send the changes to the Fusion Team data. The IPT and F3D are updated. The F3D is opened in Fusion 360 and the Update notification displays. Activate the update to see the changes in Fusion 360.
- Click Close to end the edit session. The canvas returns to the state it was in before performing the edit.