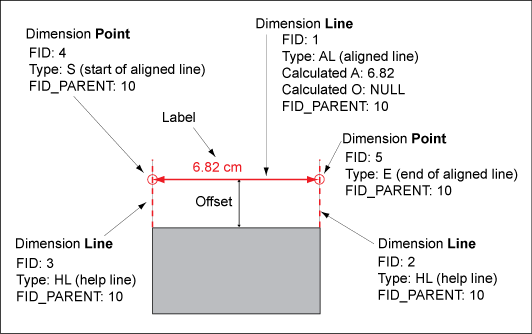
There are several types of aligned dimensioning. Depending on the dimensioning type, the system uses the LINE_TYPE attribute and the POINT_TYPE attribute to distinguish the points and lines. In the display models, you use these attributes to stylize the dimensioning layers.

Data Model: Components of an aligned dimension.
An aligned dimensioning consists of points and lines, as shown in the following table.
|
Aligned Dimensioning type |
Description |
|
AC = Aligned Complete |
Default aligned dimensioning including lines and labels. Consists of:
|
|
AA = Aligned Abscissa Only |
Aligned dimensioning where only the abscissa is drawn, but no ordinate lines. Consists of:
|
|
Aligned Text Only |
Aligned dimensioning where only the label is, but no abscissa, and no ordinate lines. For example, to display the length of a building edge in the drawing without any lines. Consists of:
|