To begin an overlay analysis, connect to the layers you are comparing and add them to a map.
To add the layers to compare
- If you have not already done so, copy the sample files for the tutorials to a directory on your hard drive.
- Start AutoCAD Map 3D toolset and create a map using the map2d.dwt template.
- Assign a coordinate system to the new map.
-
Click
 .
.
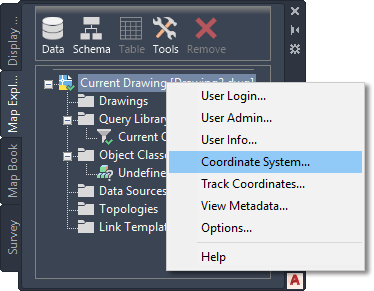
You can also right-click the current drawing to set the coordinate system for the map in Map Explorer.
- Specify the CA-I coordinate system.
-
Click
- Connect to the first data store.
-
Click .

- In the Data Connect window, under Data Connections By Provider, select Add SDF Connection.
- Click
 next to the Source File field and navigate to the folder where you copied the sample files.
 - In the Open dialog box, select FLOODZONE.SDF and click Open.
- In the Data Connect window, click Connect.
- In the Data Connect window, click Add To Map.
-
Click
- Connect to the second data store.
- With the Data Connect window still open, under Data Connections By Provider, select Add SDF Connection again.
- Click next to the Source File field and navigate to the folder where you copied the sample files.
- In the Open dialog box, select E_ZONE.SDF and click Open.
- In the Data Connect window, click Connect.
- In the Data Connect window, click Add To Map.
- Click
 Save As. In your tutorials folder, name the file AnalyzeMapOverlay.dwg and click OK.
To continue this tutorial, go to Exercise 2: Use an overlay to compare two layers.