Compare the two layers you added in the previous exercise. The overlay shows you which parts of the enterprise zone lie within the flood zone.
Note:
This exercise uses the AnalyzeMapOverlay.dwg map you created in Exercise 1: Add the layers to compare.
To use an overlay to compare the two layers
-
Click


- In the Sources and Overlay Type window of the Overlay Analysis dialog box, do the following:
- For Source, select E_zone (Polygons).
- For Overlay, select floodzone (Polygons).
- For Type, select Intersect.
- Click Next.
- In the Set Output And Settings window of the Overlay Analysis dialog box, do the following:
- Enter a location for the overlay layer SDF file.
- Enter a name for the layer. This name appears in Display Manager.
- For Sliver Tolerance, select Don’t Remove Slivers.
Slivers are tiny polygons that can result from the overlay procedure. If you want to remove slivers, click Suggest to see a reasonable setting for sliver removal.
- Leave the remaining settings as they are and click Finish.
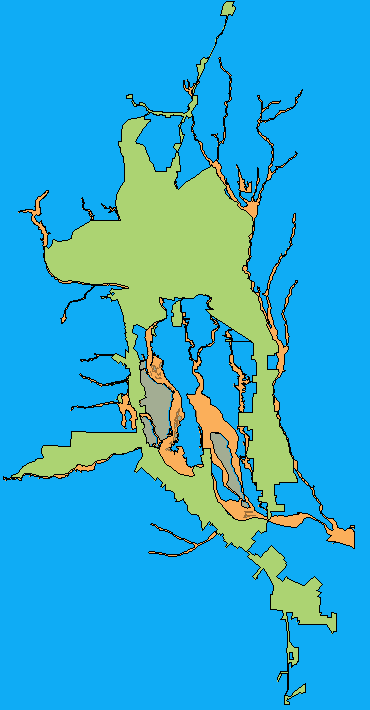
The map now displays the two original layers and a new layer, representing the overlay.
- Click the Display Manager tab on the Task Pane.
- Deselect the boxes for the original flood zone and enterprise zone layers, so that only the overlay layer displays in the map.
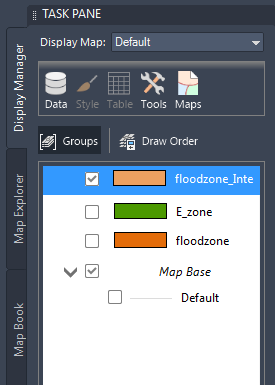
Hide all the layers except the overlay.
- Save the map.
To continue this tutorial, go to Exercise 3: Add and style a road layer.