If your organization has its own title block, you can insert that block definition into the template file and replace the default one. However, this exercise assumes that you do not have such a block and explains how to customize the one included with the template.
The title block definition has properties that define its text and appearance. You can change the values for these properties. For example, you can specify the value for text variables or the appearance of the borders of the block.
To change the title block attributes
- Double-click the frame of the title block to see the
Enhanced Attribute Editor.
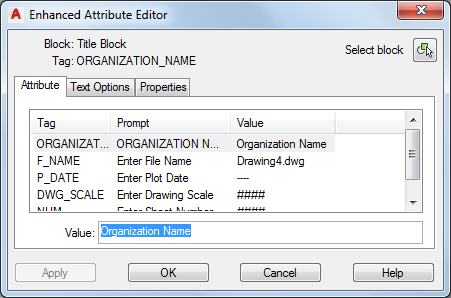
You can change any property of the title block
Note: The title block is the lower part of the block on the right side of the layout. If you double-click a viewport within the title block by mistake, right-click inside the viewport and click Minimize Viewport. - Change the organization name.
ORGANIZATION_NAME is a text field whose default value is “Organization Name.” You can replace this default value by typing a different one.
- Click the Attribute tab and click the ORGANIZATION_NAME field.
- For Value, type the name of your organization.
- In the Enhanced Attribute Editor, click Apply.
- Change the plot date entry.
P_DATE (plot date) is a variable that can update automatically, based on a field. In this example, you set P_DATE to the date that the drawing was last revised.
- Click the Attribute tab and click the P_DATE field.
- Right-click the
Value field at the bottom of the dialog box (which currently contains the value "---") and select
Insert Field.
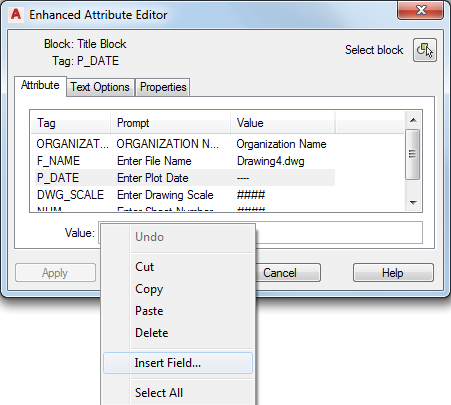
Right-click the value to insert a field.
- In the Field dialog box, under Field Names, select CurrentSheetRevisionDate.
- Under Format, select Title Case.
- Click OK.
- In the Enhanced Attribute Editor, click Apply.
- Specify a different text style.
You can format the text for various elements of the title block.
- In the Enhanced Attribute Editor, click the Text Options tab.
- For Text Style, select North Arrow Text.
- For Justification, select Center.
- Click Apply.
- Customize the lines used in the title block.
- In the Enhanced Attribute Editor, click the Properties tab.
- Select a different line type, line weight, or color for the title block.
- Click OK.
- Save the modified template.
- Click

 Save AsAutoCAD Drawing Template.
- Specify a new name (for example,
Map Book Template - Inset.dwt).
Save the template in the Templates directory if you plan to reuse it. Otherwise, save it in My Documents.
- Click
- Edit the description when it displays. Leave Save All Layers As Unreconciled selected.
- Leave the template file open for the next exercise.
To continue this tutorial, go to Exercise 3: Replace the north arrow block.