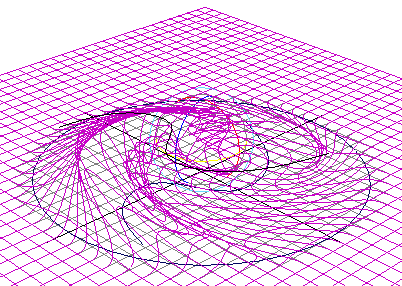
To create a wire deformer, you use the Wire Tool. The characteristics of the wire deformer you create depend on the Wire Tool’s tool settings. By default, the Wire Tool is set to create a wire deformer without holders.
To create a wire deformer
- Make sure your scene has the geometry to be deformed and a curve to act as the wire in it. (In this example, a standard poly platonic shape from the Poly
Modeling
shelf and a NURBS Circle from the
Curves shelf is used.)
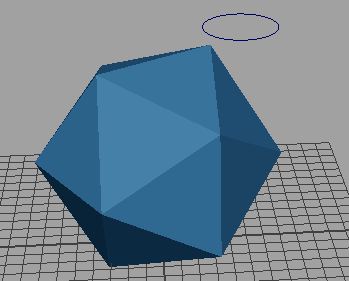
A poly platonic shape and a NURBS Circle
Position the curve where you want it; once the Wire deformer is active, you can't easily reposition the curve.
Note: You can use a freehand curve, but it must be a closed curve. - Select . The Wire Tool options window appears.
- With the Wire Tool options window open, select the geometry you want to deform and press Enter. (In this example, the poly platonic shape.)
- Next, select the curve you want to use as the Wire deformer, and press
Enter. (In this example, the NURBS Circle.)
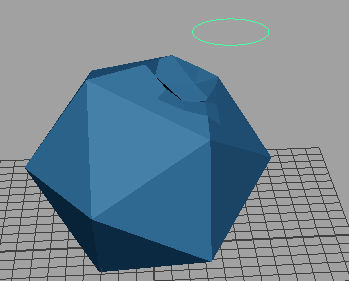
The circle "wire" makes an impression on the geometry
- In the Attribute Editor (Ctrl +
A), select the
wire1 tab. Set the Scale and Dropoff distance to the desired amount. (In this example, both settings were set to
3.0).
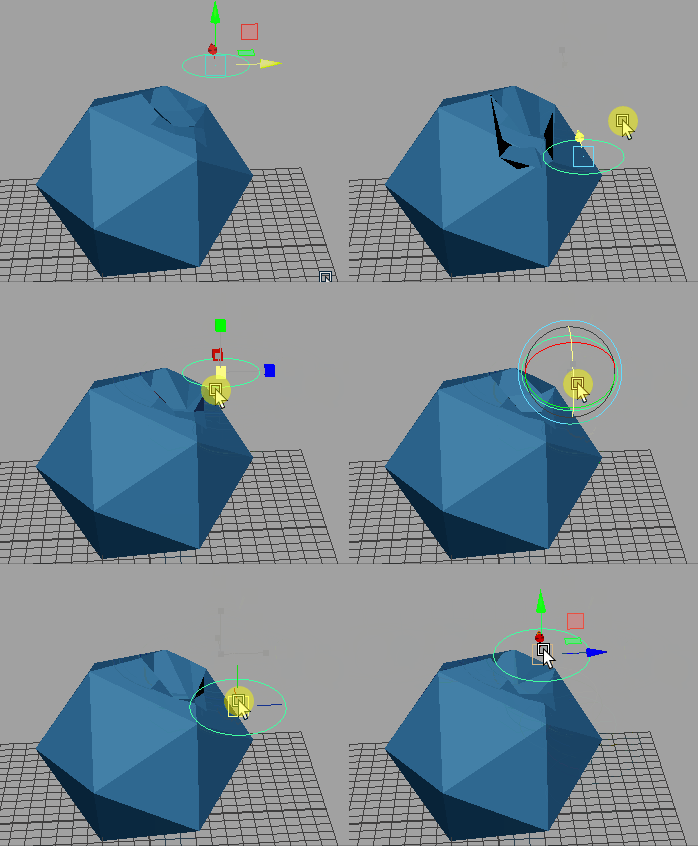
Result: using the circle to influence the shape of the object
- Translate, rotate, and scale the circle "wire" to deform the geometry.
To specify wire tool settings
- Select
.
The Wire Tool options window appears.
- Set the tool options.
To create a wire deformer without holders
- Set the Wire Tool’s Holders setting to off (the default is off).
- Create the curve(s) you want to use as influence wire(s). For best results, place them on or near the deformable object(s).
- Select
. The
Wire Tool options window appears.
The cursor changes to a crosshair icon, and the Wire Tool icon is appears in the Tool Box. You are now ready to use the Wire Tool to create a wire deformer with the Wire Tool’s current tool settings.
The Help Line displays information to lead you through the process of creating a wire deformer.
- Select the object(s) you want to deform, and press Enter (Linux and Windows) or Return (Mac OS X) key.
- Select all of the curves you want to use as influence wires.
If the only curves on the object’s surface are the curves you want to use as influence wires, drag the cursor over all the curves on the object. The Wire Tool automatically selects only the curves.
- Press the Enter or Return key.
A wire deformer is created based on the Wire Tool’s settings. The curves you selected are now influence wires that you can use to deform the object(s) you selected.
A base wire is created for each influence wire. The base wire(s) are listed in the Outliner. By default, they are not shown in the scene, but they do influence the deformation effect. The wire node calculates the deformation effect based on differences between each influence wire and its base wire.
A deformer set is created. The deformer set includes all the deformable object’s points that can be influenced by the wire deformer.
For more information on creating and editing deformation effects, see Editing wire deformation effects.
To create deformation effects
- Move, rotate, or scale the influence wire(s).
- Edit the wire deformer’s channels.
To create a wire deformer with a holder
- Set the Wire Tool’s Holders setting to on (the default is off).
- On or near the deformable object(s), create the curve(s) you want to use as influence wire(s).
- On or near the deformable object(s), create the curve you want to use as a holder.
- Select
to open the
Wire Tool.
The cursor changes to a cross-hair, and the Wire Tool icon appears in the Tool Box. You are now ready to use the Wire Tool to create a wire deformer with the Wire Tool’s current tool settings.
Note that the Help Line displays information to lead you through the process of creating a wire deformer.
- Select the object(s) you want to deform, and press the Enter (Linux and Windows) or Return (Mac OS X) key.
- Select a curve that you want to use as an influence wire, and press the Enter or Return key.
- Select a holder curve and press Enter or Return. An influence wire can only have one holder.
- Clear the selection list by selecting empty space, and then press Enter or Return.
Note: You can assign a holder to more than one influence wire. To do so, pick a curve that will be an influence wire, press Enter or Return, then select the curve that will be a holder, and press Enter or Return again. Pick the next curve that will be an influence wire, press Enter or Return, then select the same holder curve, and press Enter or Return again. Continue this process for each influence wire curve that will be assigned the holder curve.
- When you are ready to create the wire deformer, clear the selection list by selecting empty space, and then press Enter or Return.
A wire deformer is created based on the Wire Tool’s tool settings. The curves you selected are now influence wires that you can use to deform the object(s) you selected.
A base wire is created for each influence wire. The base wire(s) are listed in the Outliner. By default, they are not shown in the scene, but they do influence the deformation effect. The wire node calculates the deformation effect based on differences between each influence wire and its base wire.
A deformer set is created. The deformer set includes all the deformable object’s points that can be influenced by the wire deformer.
To create deformation effects
- Move, rotate, or scale the influence wire(s).
- Edit the wire deformer’s channels.
For more information on creating and editing deformation effects, see the next section, Editing wire deformation effects.
To add an influence wire
- Select the curves you want to add to the deformer.
- Shift-click on any wire in the deformer to select the deformer to which you want add the curves as influence wires.
- Select
. See
Wire Add Options.
The selected curves become influence wires for the wire deformer.
To remove an influence wire
- Select the curves that you want to remove as influence wires.
- Select
. See
Wire Remove Options.
The selected curves are no longer influence wires.
To reset influence wires
- Select the influence wire(s) you want to reset.
- Select . See Wire Reset Options.
To display the base wire
- Select the influence wire.
- Select .
To create a wire group
- Select the influence wire.
- Select . See Wire Parent Base Wire Options.
A wires group is created that includes the influence wire and the base wire. The wires group is named after the influence wire and listed in the Outliner.
Wire deformer quick start
This section shows you how to create a typical wire deformer as quickly as possible.
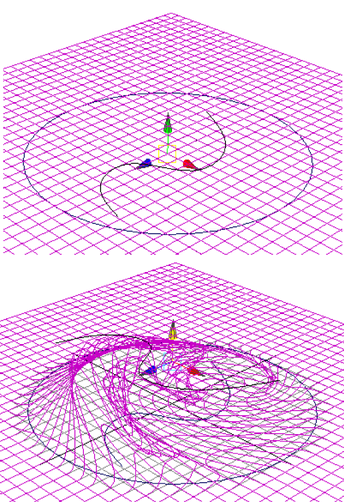
In this example, you will deform a surface with an S-shaped curve, limiting the deformation region with a circle.
Example: Create a NURBS plane
- Create a NURBS plane with Width 40, Length 40, Patches U 40, Patches V 40, and Surface Degree Cubic.
- Create a curve for an influence wire. Draw an S-shaped curve on the center area of the plane using the
CV Curve Tool or
EP Curve Tool.
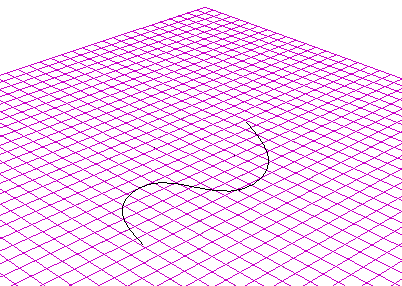
- Create a circle for limiting the deformation region. For this example, the circle surrounds the S-shaped curve on the plane.
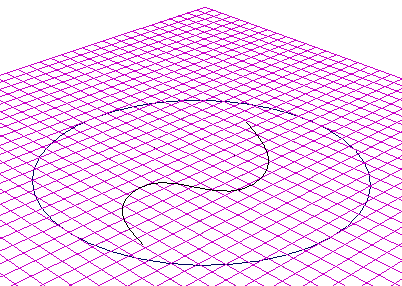
You’ll use the circle to limit the deformation region. A curve that limits the deformation region is called a holder.
- Create the wire deformer by doing the following:
- Select . This opens the Wire Tool options panel.
- In the Tool Settings window, turn Holders on (default is off).
- Close the Tool Settings window.
In the workspace, note the cursor is now cross-shaped, indicating you are using the Wire Tool.
Be sure you do the next four steps in exactly the following order.
- Select the plane and press Enter (Linux and Windows) or Return (Mac OS X).
- Select the S-shaped curve, and press Enter or Return.
- Select the circle, and press Enter or Return.
- Finally, select nothing in the workspace, and press Enter or Return.
Selecting nothing tells Maya you are done selecting holders, and tells it to create the wire deformer.
Maya now creates a wire deformer. You can now manipulate the S-shaped curve to create deformation effects. Note that only the region within the circle can be affected.
- Create deformations by doing the following:
- Select the S-shaped curve.
- Move the S-shaped curve up.
- Rotate the S-shaped curve to get a swirling “chakra” deformation effect.
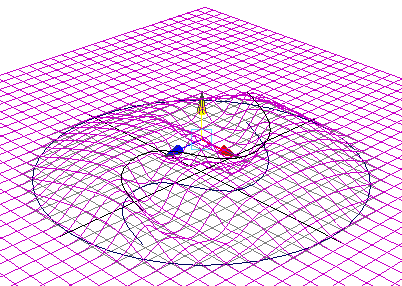
The plane deforms upwards as if attracted to the S-curve.
The wire deformer uses the S-shaped curve to influence the shape of the deformation, so this curve is called an influence wire. Meanwhile, because the circle is limiting the deformation region, it’s called a holder.
