- From the HumanIK window Start Pane, select Quick Rig Tool ()
- Select
- From the Rigging menu set, select .
- From the Rigging shelf, select Quick Rig
The Quick Rig tool lets you quickly add a rig to a biped character mesh. You can use this tool two ways: using the automatic function or a step-by-step workflow. While the automatic One-Click option is good for standard character meshes, the Step-by-Step option gives you more control over the automated rigging process.
See Create an automatic character rig for a mesh for an explanation of how to use the automated rigging process.
- Character menu
- Use the drop-down menu to select a character. A Quick Rig character is a HumanIK character that has extra metadata for the rigging data.
- Refresh Character List

- Updates the Character field with available Quick Rig characters.
- Create a new Character

- Creates a new Quick Rig character that you can use with the Quick Rig tool.
- Rename Character

- Lets you rename the current Quick Rig character.
- Delete Character

- Deletes the current Quick Rig character.
One-Click
Click One-Click to use an automatic option to rig your character mesh. This procedure works best if your Character Mesh is a biped, with a Y-up orientation and facing the positive Z direction.
Step-By-Step
- Geometry area
- This area is where you specify what mesh(es) in the scene are rigged.
-
- Add Selected Meshes

- Populates the
Geometry list with the selected meshes.
Note: Some meshes have auxiliary meshes that accompany them, for example, eyes, hair, accessories, and so on. Use the Select All Meshes
 to make sure that these are selected as well.
- Select All Meshes

- Selects all meshes in the scene to the
Geometry list.
Note: This step is the equivalent of running the select `ls -type mesh`; MEL command.
- Clear all meshes

- Empties the Geometry list.
- Add Selected Meshes
- Guides area
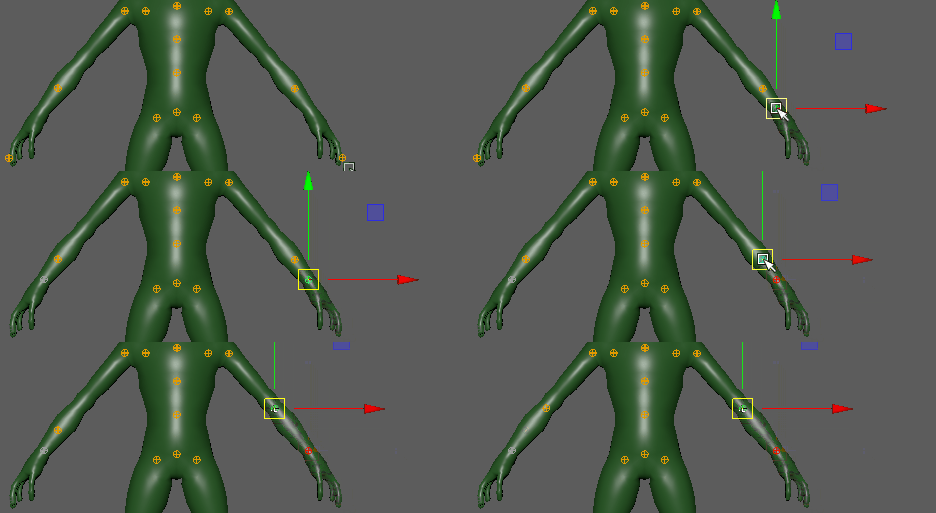
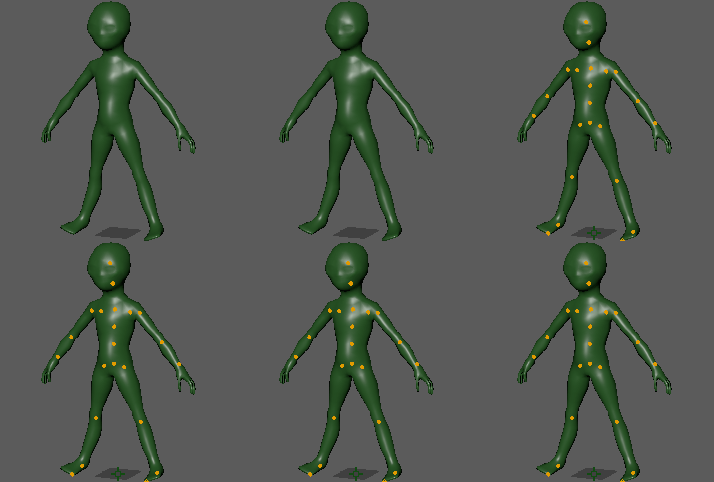
- Guides are helper markers that you use to adjust joint placements inside the mesh(es).
-
- Embed Method
- This area lets you specify what sort of mesh is used and how best to rig it. There are four options. Click the Help icon
 to see a description of the selected method.
-
- Perfect Mesh (no voxelization)
- This method works for "perfect meshes", that is, meshes that are closed, watertight, 2-manifold and without self-intersection or interior/hidden geometry. It segments the interior region of the mesh from the exterior using a pseudo-normal test. It does not use voxelization. If mesh conditions are not respected, the segmentation is likely to be wrong. This can make the segmentation process significantly longer and prevent successful skeleton embedding.
- Watertight mesh (flood fill)
- This method works for "watertight meshes", that is, meshes for which faces completely separate the interior region of the mesh from the exterior. The mesh can have degenerated faces, wrong face orientation, self-intersection, etc. The method uses surface voxelization to classify as part of the interior region all voxels intersecting with a mesh face. It then performs flood-filling from the outside, marking all reached voxels as part of the exterior region of the model. Finally, all unreached voxels are marked as part of the interior region. This method works so long as the mesh is watertight, i.e. without holes up to the voxelization resolution. Otherwise, flood-filling reaches the interior region and creates inaccurate segmentation.
- Imperfect mesh (flood fill + growing)
- This method works for meshes where holes could make the flood-filling step reach the interior region of the mesh, but that have face orientation consistent enough so filling them is possible. First, it uses surface voxelization to classify as part of the interior region all voxels intersecting with a mesh face. It then alternates flood-filling and growing steps. The flood-filling tries to reach all voxels from the outside so that unreached voxels are marked as part of the interior region. The growing step uses a relatively computation-intensive process to check for interior voxels in all neighbors to those already identified. Any voxel identified as interior is likely to fill holes, allowing subsequent flood-filling steps to identify more interior voxels.
- Polygon soup (repair)
- This method has no manifold or face orientation requirements. It reconstructs a mesh that wraps the input mesh with a given offset (3 times the voxel size) and uses this perfect 2-manifold mesh to segment the interior region from the exterior region of the model. Because of the offset, it might lose some of the details and merge parts that are proximal. However, this usually is not an issue with common models where body parts are not too close to one another.
- No Embedding
- This method returns the skeleton to its original stance before any embedding is tried on the mesh. Use this option when embedding is unsuccessful so you can create and place guides manually. This way you can still use the Quick Rig tool to create a skeleton, and so on, even when embedding fails.
-
- Resolution field
- Select a resolution from this field to use with the rig. Higher-resolutions take more time to process.
- Guide Settings
- This area lets you configure the generation of guides that help
Maya align the skeleton joints with the appropriate positions on your mesh.
Note: The guides are named for the HumanIK joint they will become. See HumanIK character structure for an explanation of HumanIK Joint names.
-
- Symmetry
- The
Symmetry menu lets you choose symmetry based on a bounding box or the hips placement. Some characters are basically symmetrical, but some may have a feature or prop that knocks their bounding box (and its center) out of alignment with the character symmetry plane.
If your character fits this description, use the Hips option to create symmetry based on the current hip position.
- Select Bounding Box to set the bounding box center as a reference for guides that map to center joints (hips, spine, and neck,) which are centered or map to symmetrical joints (shoulders, arms and legs). The center/mirror plane is the YZ plan that passes through the center of the mesh(es) bounding box. It is recommended to leave this option turned on unless your character is intended to be unequally proportioned.
- Select No Symmetry if do not want guides symmetry to be enforced during guides embedding. You will still be able to manually use mirroring tools (See User Adjustment of Guides) using the hips on the character.
- Center
- Lets you set how many guides are created, and therefore how many joints the resulting skeleton and rig will hold. The default HumanIK skeleton has 3 spine nodes, and one neck and shoulder/clavicle each.
- Hips Translation
- Let you generate a Hips Translation joint for your skeleton.
-
You can split the translation and rotation of your character’s pelvis between two different joints by specifying a HipsTranslation joint in addition to the Hips joint. By default, the HipsTranslation joint will control the translation of your character’s hips and the Hips joint will control the rotation of your character’s hips.
- Create/Update
- Click Create/Update to add guides to your character mesh.
- Delete Guides

- Clears guides from the character mesh.
- User Adjustment of Guides area
- You can manually position the guide helpers that Maya uses to create the skeleton to achieve a better match with your character mesh using the Move tool. Use the options below to help with positioning.
-
- Mirror Left to Right/Mirror Right to Left

- Uses the position of the selected guides to align the opposite side's guides. Center guides are snapped to the mirror plane
-

-
Note: The Mirror Left to Right tool uses the selected guides on the character's left side when facing the character (that is, guides on the character’s right side) and applies a mirror plane offset to its symmetrical counterpart on the character's right side when facing the character (that is, on the character’s left side).
The Mirror Right to Left tool works in the opposite way.
- Select Guides

- Selects all the guides.
- Show/Hide All Guides

- Toggles the display of guides on and off.
-

- Enable X-Ray Joints

- Turns on the X-Ray joints in all viewports.
- Mirror Left to Right/Mirror Right to Left
- Guide Color

- Click to open the Color Chooser where you can set a new guide color.
- Character Generation
- This area lets you generate the character skeleton and HumanIK control rig.
-
- Skeleton Settings
-
- T-Stance Correction
- Activate this option to characterize the new HumanIK skeleton in a T-Stance pose once its bones are resized to match the embedded skeleton, after which the control rig restores the skeleton back to the embedded pose. This is the recommended option; if the T-Stance Correction option is turned off, the HumanIK skeleton is characterized in the embedded pose, which gives unexpected results in certain situations when the embedded pose is not a T-Stance (A-Stance is a popular alternative), for example with animation retargeting.
- Align Joint X-Axis
- This setting gives you a choice how to set the joint orientation on your skeleton.
-
Mirrored Behavior This option assigns symmetrical behavior for the Z and X joint rotation axes. In order to create symmetrical behavior, Mirrored Behavior orients the joints X-axis towards the child on one side, and towards the opposite direction of the child on the other. This creates a joint's x-axis with- spine points toward the child
- left arm and leg points toward the child
- right arm and leg points away from the child
This is the default setting.
X Towards Next Joint Sets the X-axis towards the child of the node. Generally, this means orientation is up for spine joints, down for legs, right for the right arm and left for the left arm (when the character is in a T-stance). This means you will not get symmetrical behavior if you animate the X-axis rotation for the arms or legs.
World - No Alignment Creates joints that follow the World orientation.
- Skeleton and Control rig menu
- Choose whether you want to create a Skeleton with a Control Rig or only a Skeleton from this menu.
Note: Choosing Skeleton Only creates a temporary Control rig for T-stance correction, but it is then deleted. (See Prepare an existing skeleton for HumanIK for an explanation of T-Stance poses.
- Create/Update
- Click Create/Update to create a Skeleton with or without a Control Rig for your character mesh.
-

- Skinning area
- This area lets you control the way the mesh skin is attached to the skeleton.
-
- Binding Method
- Choose a skin binding method from this menu. Geodesic Voxel Binding is the default setting as it provides excellent binding for most mesh types.
- Click the Settings icon
 to open the
Bind Skin Options, where you can customize your skin binding preferences.
- Create/Update
- Click Create/Update to skin your character which completes the rigging process for your character mesh.
- Delete Skin

- Deletes the created character skin.