To place parts, select a service and a palette.
- Display the MEP Fabrication Parts palette.
The MEP Fabrication Parts palette displays by default when you create a new model in
Revit. Use any of the following methods to toggle its display on or off:
- Click Systems tab
 Fabrication panel
 (Fabrication Part)
- Right-click in the drawing area, and click Browsers
 MEP Fabrication Parts
- Click View tab
 Windows panel
 User Interface drop-down
 MEP Fabrication Parts
- Type the keyboard shortcut PB
Note: If prompted to specify a fabrication configuration, use the Fabrications Settings dialog to specify a fabrication configuration and load services. - Click Systems tab
- In the MEP Fabrication Parts palette, select a Service and a Palette from the drop-down lists.
- Click a part button.
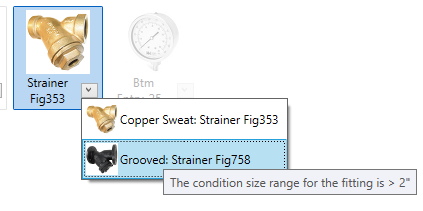
- Some part buttons have an arrow that allows you to select from a list of available parts. A tooltip for each part displays the condition for which the part will be used.

When you click the arrow, a drop-down list displays additional parts based on the size. This drop-down list is controlled by the conditions in the service definition, similar to routing preferences. For example, a bend may use a pressed bend up to a certain size, and a segmented bend above that size. When you place the cursor over a part in the list, a tooltip displays the size range based on the condition for that part.
- Some part buttons in the MEP Fabrication Parts palette are gray.

This indicates that the fabrication part is not currently supported with item content (ITM) in Revit. Currently, fabrication components for flex duct, structural members, air terminals, and mechanical equipment are not supported. In place of these components, you can use Revit Family (RFA) based components using the category's standard placement tools.
- To specify a size, some parts, such as purchased duct and pipe fittings, have a Product Entry field in the Properties palette. The Product Entry list is a catalog of available sizes for the selected part. When placing product list parts, in the Properties palette, under Constraints for Product Entry, select a size. Use the Edit Part button to modify the dimensions of generic or template parts. When placing generic parts, in the Properties palette, under Primary End, for Main Primary Width and Main Primary Depth, enter a size. Under Dimensions, specify the Length Option and a Length. Catalog parts are available in one fixed size.
- Other fabrication parts, such as rectangular ductwork, have flexible parameters. The most commonly used parameters are available on the Properties palette.
Note: When placing generic duct, you must specify a part material. In the Properties palette, under Mechanical, specify a Part Material.
- Some part buttons have an arrow that allows you to select from a list of available parts. A tooltip for each part displays the condition for which the part will be used.
- (Optional) To add insulation or lining to duct or pipe, in the Properties palette, under Mechanical, click the drop-down list for Insulation Specification.
- Place the cursor in the drawing area to position the part and click to place the part.
When you place generic parts, each part is automatically sized based on the part it is connected to.
 Tip: To create a riser, hold CTRL and press the Spacebar. When creating the riser, you must place the part by itself in free space.
 - Continue to select and place parts from the MEP Fabrication Parts palette.
Tip: Use the Show Service tool to quickly select the service and palette while placing additional parts.
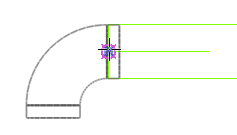
- (Optional) Show disconnect markers for connectors that are not currently connected. Click Analyze tab
 Check Systems panel
 (Show Disconnects) and select one or more of the following:
- Duct
- Pipe
- Cable Tray and Conduit
- Electrical
- Fabrication Hanger
 Video: Create an MEP Fabrication Model in Revit