Learn how to recreate the geometry of the missing analytical elements by remodeling them based on their physical counterparts.
Issue:
When upgrading a Revit model to the latest Revit 2023 version, some of the analytical panels (surfaces) are not present in the model. This issue reproduces especially when upgrading very old models, models from Revit versions 2012, 2013, 2014 to the latest Revit 2023 version. In Revit 2023 the structural analytical model was rewritten, and the previous analytical model is migrated to the new analytical model in the upgrade process. There are situations where analytical surfaces from old Revit models cannot be migrated to the new analytical panels.
Environment:
Revit 2023 and later.
Solution:
- If one of the older Revit versions (2022 or 2021) is available on the machine:
- Open the model in a previous version (Revit 2022, 2021).
- Save the model.
- Open the model in Revit 2023.
- If you do not have an intermediate version on the machine, open the model in Revit 2023.
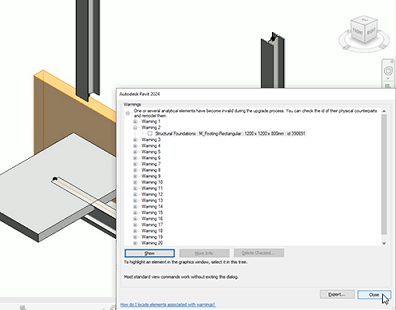
- A warning message will appear stating what happened and the steps that you need to follow to solve this issue:
"One or several analytical elements have incorrect geometry, but their physical associated elements are correct. You can recreate the geometry of the analytical elements by remodeling them based on their physical counterparts."
To recreate the missing geometry and resolve the warnings:
- In the Manage tab
 Inquiry panel, click
 (Review Warnings).
- In the Warnings dialog, click the plus sign next to the warning message regarding the model upgrade to expand the list of individual warnings.
- Click the plus sign next to each of the individual warnings to see more information about the elements.
- In the Warnings dialog, select one of the warnings, click the plus sign and select the element information.

- Click the Show button in the Warnings dialog to highlight the selected element in the model.
- After identifying the element (e.g., a wall) close the Warnings dialog.
- Select the identified element (e.g., the wall) and in the Analyze tab
 Structural Analytical Model panel, click
 (Analytical Panel).
- In the Modify | Create Analytical Panel tab
 Work Plane panel, click
 (Set).
- In the Work Plane dialog, select Pick a plane and click OK.
- Select a plane in the model.
- In the Modify | Create Analytical Panel tab
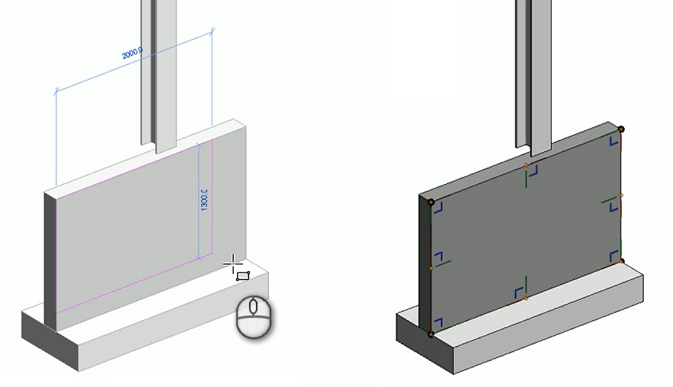
 Draw Panel, select one of the drawing methods (e.g., rectangle) and draw the analytical panel based on the shape of the selected element (e.g., wall).
- Click
 (Finish) to create the analytical panel.

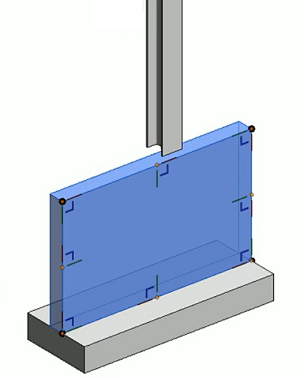
- Select the analytical panel.
- In the Modify | Analytical Panels tab
 Coordination panel, click
 (Add Association).
- Select the element (wall) to associate the analytical panel with in the model. An association between the physical and analytical element will be created.
Note: To check the association, select one of the two elements (the wall or the analytical panel) and click
 (Highlight Association) in the Modify | Analytical Panels tab
  Coordination panel.

- If you go back to the Warnings dialog in the Manage tab
 Inquiry panel and click the plus sign next to the warning message regarding the model upgrade to expand the list of individual warnings, you will see there is one less warning item in the list - it was resolved and deleted from the list.
- Do the same for each of the elements displayed in the warning message list.