In this exercise, you will modify a parts list to assign rate item codes to pipe network parts as they are created. You will also learn how to assign rate item codes to existing pipe network parts.
This exercise continues from Exercise 2: Assigning Rate Item Codes to AutoCAD Objects.
Specify the QTO command settings
- Open Quantities-3.dwg, which is located in the tutorials drawings folder.
This drawing contains a commercial site, which consists of a building footprint, a parking lot, and access roads. The site also contains a storm sewer network that has pipes and several types of structures.
- Click tab
 panel Find.
- In the QTO Manager vista, click
 .
.
- In the Quantity Takeoff Command Settings dialog box, under Compute Takeoff Options, specify the following parameters:
- Computation Type: 3D
- Pipe Length Type: To Inside Edges
These parameters specify that the pipe lengths will be reported, using the end-to-end distance, from the inside edge of each structure.
- Click OK.
Add rate item codes to a pipe network
- In the drawing, select a pipe network part. Click tab panel Find.
- In the Pipe Network Properties dialog box, on the Layout Settings tab, under Network Parts List, click
 Edit Current Selection.
- In the Network Parts List dialog box, on the Pipes tab, expand the Storm SewerConcrete Pipe category.
- In the 18 inch RCP row, click
 .
.
- In the Rate Item List dialog box, expand the
 Favorites category.
- In the Favorites category, select Rate Item ID60201-0600.
- Click OK.
- Click the Structures tab.
- Repeat Steps 4 through 7 to assign rate items to the following structures:
Structure Rate Item ID 51 x 6 x 51 inch Concrete Rectangular Headwall Mat_CONC 60103-0100 Eccentric Structure 48 dia 24 frame 24 cone 5 wall 6 floor Mat_CONC 60403-1100 60409-0500 - Click OK three times.
Add parts with rate items to the pipe network
- In the drawing, select a pipe. Click tab panel Find.
- On the Network Layout Tools toolbar, specify the following parameters:
- Structure: Eccentric Structure 48 dia 24 frame 24 cone 5 wall 6 floor Mat_CONC
- Pipe: 18 inch RCP
 Pipes and Structures: Selected
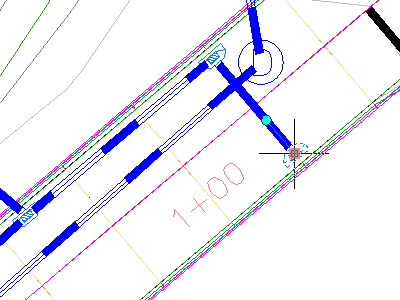
- In the drawing, click two points.
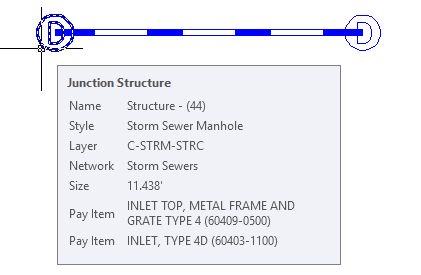
This action creates two structures that are connected by a pipe.
- Press Enter.
- Hover the cursor over one of the new structures.
The tooltip displays the description and ID of each rate item that has been assigned to that structure.
Assign rate items to existing pipe network parts
- In the drawing, select one of the gullies along the road.
- Right-click. Click Select Similar.
- In the QTO Manager vista, click
 .
.
- In the Favorites category, select Rate Item IDs 60403-1100 and 60409-0500.
- Press Enter.
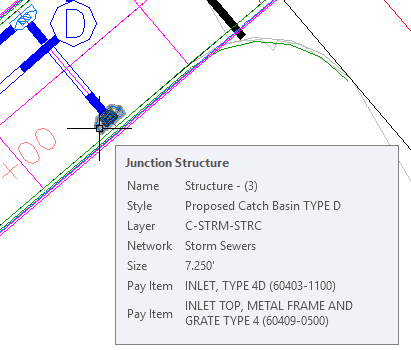
- Hover the cursor over one of the gullies.
The tooltip displays the description and ID of the rate items that have been assigned to the gully.
Further exploration: Repeat this procedure on the other structures in the network, assigning rate item codes that are appropriate for the square gullies, manholes, and headwalls.
To continue this tutorial, go to Exercise 4: Assigning Rate Item Codes to Corridors.