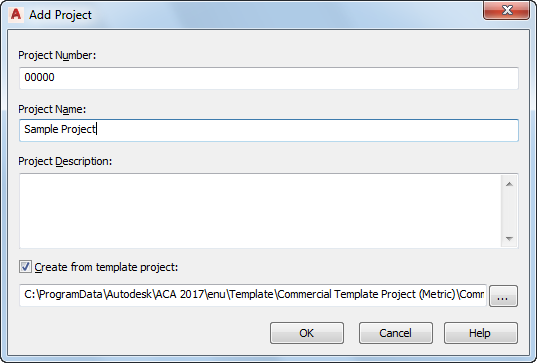
Use this procedure to create a project using an existing project as a template.
This is the quickest and easiest way to create a project with predefined settings and support files. When you use this method, the following files and structures are copied to the new project:
- All project DWG files and XML files
- Project standards files
- AutoCAD standards files
- Project standards synchronization settings
- Sheet set template
- Project details
- Drawing templates
- Keynote and detail component databases
- Project tool palette group
- Tool content root path
- Project Content Browser library
Creating a new project based on a template will copy all files that are in the project folder.
If you redirected a project folder (elements, constructs, views, or sheets) to a folder that is not beneath the root project folder (location of the APJ file), the project cannot be used as a template project.
- On the Quick Access toolbar, click Project Browser
 .
. - Right-click on an existing project or folder in the project selector, and click New Project.
Alternatively, you can click
 in the toolbar below the project selector.
- In the Add Project dialog box, enter a number for the new project.
Each project needs a unique identification number. You can use numerals, alphabetic characters, or a combination, such as 100A. The project number appears in the project header.
The number you assign here can be used as a prefix for all drawings you create in the project. You can also use the number as a property for a title block.
- Enter a name for the new project.
- Under Project Description, if desired, enter a description brief enough to be displayed in the project header.
Details about the project can be entered on a separate worksheet.
- Select Create from template project.
- Enter the path and name of an existing APJ file, or click
 to navigate to an APJ file.
 - Click OK. Note: You cannot specify all support files and paths directly when creating a new project; you can only define name, number, description, and project template. The remaining settings can only be defined after the project has been created. If you create the project based on a template, the settings of the template are used for the initial setting.