- Click

 . Find
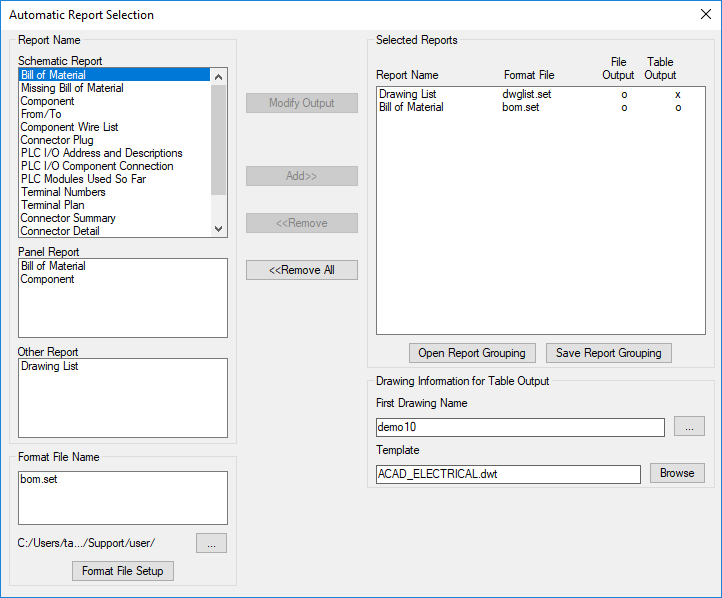
- (Optional) Click Open Report Grouping to restore a set of reports and format files saved previously in a report grouping file (.rgf).
- To add a report:
- Select the report name from the schematic, panel, or other report list.
- Specify the format file to use for the selected report. Click Format File Setup to create, edit, and save a format file.
Note: The format files must define file output, table output, or both since the reports are not displayed on the screen.
- Click Add to add the report to the Selected Reports list. The Add button is not active until both a report name and format file are selected.
- Continue adding more reports to the Selected Reports list.

For the File and Table Output options, an x indicates that the format file contains a definition for that output type, and the output type is selected. An o indicates that the format file does not contain a definition for that output type, or the output type is not selected.
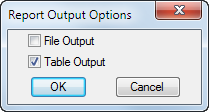
- Select a report in Selected Reports and click Modify Output to change the output options.
 Note: If the format file does not contain file or table output settings, the respective options are disabled.
 - To remove a report do one of the following:
- Select a report in Selected Reports and click Remove.
- Click Remove All to remove all selected reports.
- Click Save Report Grouping to save a file containing the list of report names and format files for reuse.
- If any of the selected reports have table output, specify:
- First Drawing Name. File name and location for the fist drawing needed for new report tables. Subsequent drawing names are generated by incrementing the file name.
- Template. Drawing template used to create drawings for new report tables.
- Click OK to generate the report output for each selected report.
Note: New drawings are added to the active project.