Quickstart Cool FEM tutorial: Mesh the mold
It is a two step process to mesh a mold. First you mesh all surfaces (mold, mold boundary, cooling channels, inserts) with triangular elements, and then you mesh the volume of the mold with 3D elements based on those triangular elements.
Surface mesh
Ensure that all layers are selected.
Click
 (Mesh tab > Mesh panel > Mold Mesh).
Select the Surface tab within the Tools panel
Enter 16 mm for the External mold surface edge length.
Enter 4 mm for the Internal mold surface edge length.
Note: A finer external surface edge length does not significantly increase the accuracy of the solution but does add to the required computational time.Enter 12 for the Target number of nodes on circumferences of cylinders.
Click Mesh, to launch the Simulation Compute Manager.
In the Simulation Compute Manager, select the solve location, then click Launch.
When the mesh is complete, uncheck the Mold External Triangles and both Channel layers.
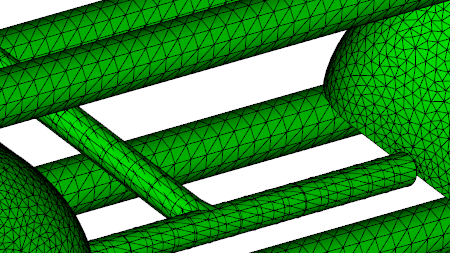
The surface of the runners and cooling system are now represented by triangles.
Volume mesh
- Turn on the Mold External Triangles and both Channel layers.
- Click (Mesh tab > Mesh panel > Mold Mesh).
- Click Mesh, to launch the Simulation Compute Manager.
- In the Simulation Compute Manager, select the solve location, then click Launch.
This will take several minutes.