Setting up a repeatable series of support actions with parameters suitable for the part geometry and the desired variations of these parameters
Preparing the script
- Select any one of the generated Bottle opener parts.
- From the main menu choose .
- In the context view, switch to the Support scripts tab.
- Click
 New script and provide a name for the new script, then click
OK.
New script and provide a name for the new script, then click
OK.
- From the support action dropdown select Bars on areas and click Add.
- Click
Save and
Execute to save the script and get an initial impression of generated supports with default values.
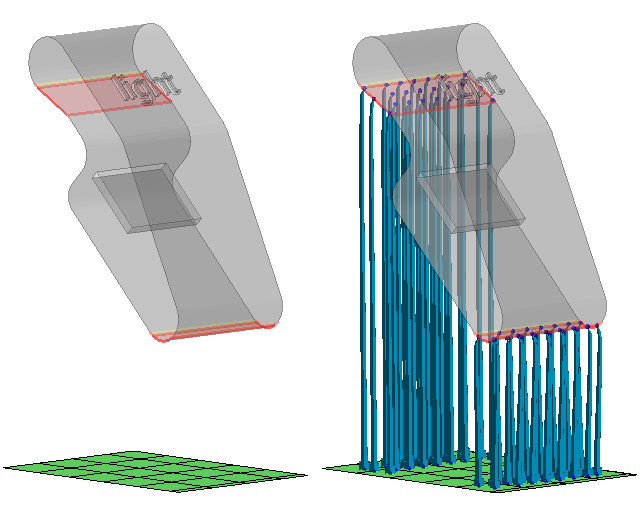
The Bottle opener part before and after supporting with default values
Setting up the parametrization
- In the context view click
 More actions > Execute parametrized script.
- In the
Execute parametrized script dialog click
 Import from CSV.
- Use the file dialog to navigate to and load the CSV script earlier in this tutorial. This populates the Parameter table with the names from the CSV script.
- Click
 Generate parameter template to open a selection dialog for parameters that can be variated.
- Check the checkbox for the parameter Lower width on part and click OK, closing the selection dialog.
- For every entry in the
Parameter table click
 Edit entry individually and adjust the
Lower width on part parameter value. Use
1 mm for
light,
2 mm for
regular, and
3 mm for
strong.
Edit entry individually and adjust the
Lower width on part parameter value. Use
1 mm for
light,
2 mm for
regular, and
3 mm for
strong.
- With the values set up, leave the dialog using the
Save button.
Attention: Do not use the Execute button at this time.
- From the main menu choose
Close supporting to leave the support editor without actually generating any supports.
Attention: Do not use the Apply supports button at this time.