Probe the rack to identify its position on the measuring device and creates a rack coordinate system relative to the machine coordinate system.
To locate a rack
- Calibrate the active probe tool.
- In the
CNC racks area of the
Machine tab, select the rack you want to locate, and then click
Locate. The
Rack Locate dialog is displayed.
For example, the Rack Locate dialog for the MCR20 rack:
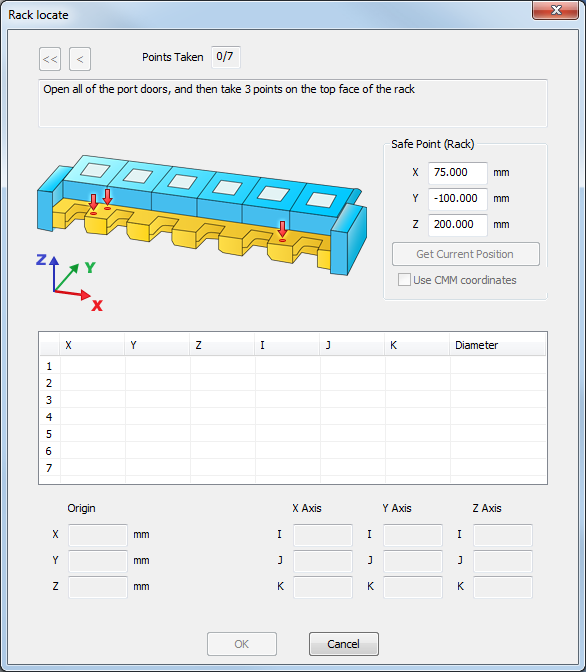
- Follow the diagram and instructions in the dialog to probe the points.
As you take each point, the dialog displays its XYZ machine coordinates, IJK vectors, the Diameter of the probe, and the number of points remaining. When you have taken all seven points, the dialog displays Locate was successful to indicate that the rack has been located on the measuring device. It also shows the Origin of the rack coordinate system in machine coordinates, the rack's orientation in IJK vectors, and the position of the Safe Point.
To delete the last point, click
 . To delete all points, click
 .
.
- To display the Safe Point in machine coordinates, select the Use CMM coordinates check box. Deselect the check box to use rack coordinates.
- To enter a new Safe Point, overtype the values in the X, Y, and Z boxes, or click Get current position to use the current quill mounting location.
To locate a port or insert
When you locate a rack, PowerInspect calculates the position of its ports and any inserts. If a port's or insert's position is inaccurate, you can correct these by locating the port or insert within the rack.
- Calibrate the active probe tool.
- In the CNC racks area of the Machine tab, select the rack whose ports or inserts you want to locate, and then click Edit. The Rack dialog is displayed.
- In the
Ports area, select the port you want to adjust, and then click
Locate Insert. The
Port Locate dialog is displayed. The following example shows the
Port Locate dialog for a PA25 insert in an FCR25 rack:
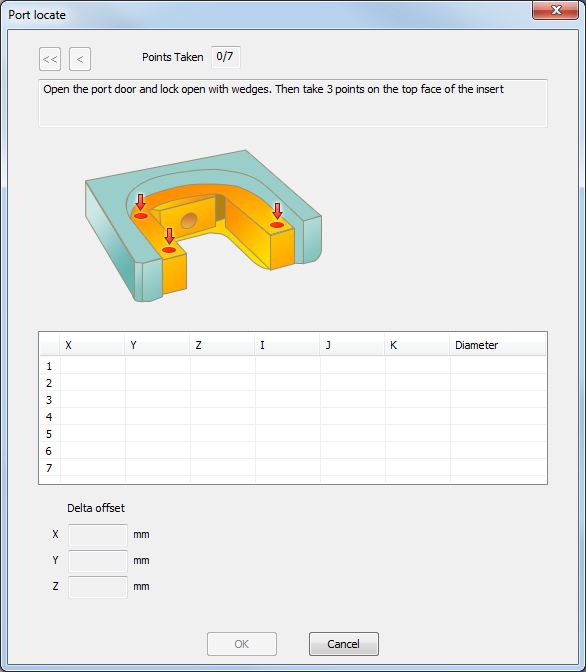
- Follow the diagram and instructions in the dialog to probe the points.
As you take each point, the dialog displays its XYZ machine coordinates, IJK vectors, the Diameter of the probe, and the number of points remaining.
When you have taken all seven points, the dialog displays Locate was successful to indicate the port, or insert, has been located within the rack. It also displays the Delta Offset from the original calculated position.
To delete the last point, click
. To delete all points, click
.
- Click OK to save the location and return to the Rack dialog.
- Repeat steps 3 to 5 to continue locating ports or inserts.