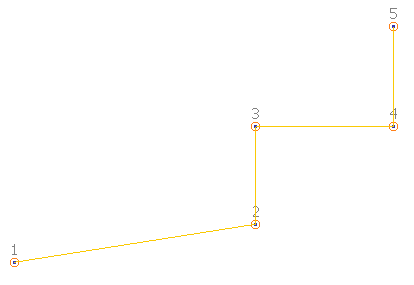
To edit a curve in 2D:
- Ensure a planar, composite curve is selected. For example:
- Click Curve Tools tab > Mode panel > Edit 2D On/Off to turn the 2D editing mode on.
- Select point
 , and click Curve Tools tab > Size panel > Radius.
- Enter a
Value of
15 in the
Radius dialog.
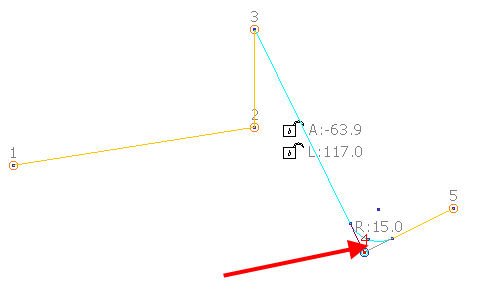
The radius of the selected point is changed to 15, and span
 and radius
 values are displayed:
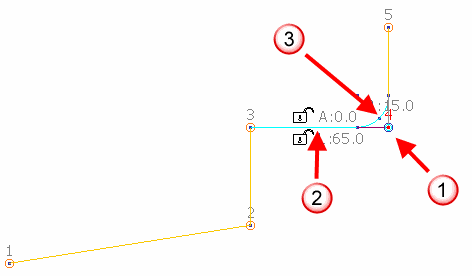 Note: When editing the Radius, an arc will be added if one does not already exist.
 - With point
still selected, click Curve Tools tab > Drag Mode panel > Single Drag.
- Click and drag point
as shown below:
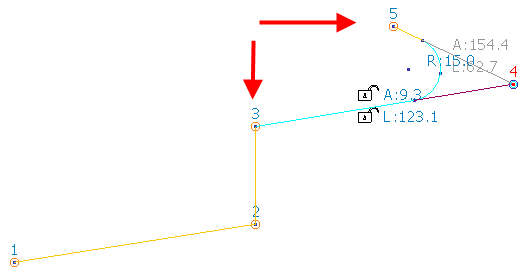
This mode enables a single point to be dragged. The points either side of the dragged point retain their original position as indicated by arrows on the diagram.
- With point
still selected, click Curve Tools tab > Drag Mode panel > Group Drag.
- Click and drag point
as shown below:
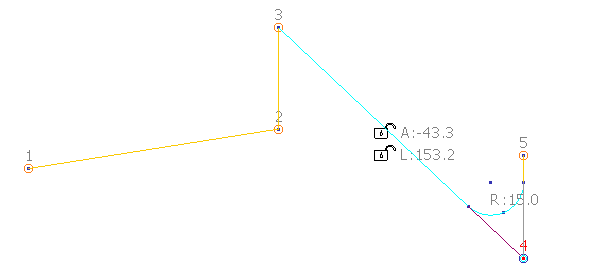
In this mode, the points either side of the selected point will be dragged, whilst maintaining the radius of the arc between the two adjacent points or angles where possible.
- With point
still selected, click Curve Tools tab > Drag Mode panel > Group/Angle Drag.
- Click and drag point
as shown below:
In this mode, the points beyond the selected point will be dragged, whilst maintaining the angle between the spans adjacent to the selected point. The constant angle is indicated by the arrow on the diagram.
- Try changing the curve using the following:
- Click Curve Tools tab > Modify panel > Add Span to add a span to the end of the previous span.
The new span will have the same length and will be in the same direction as the previous span.
- Click Curve Tools tab > Modify panel > Delete Span to delete the previous span.
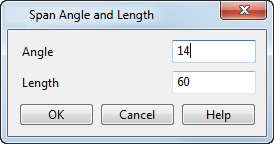
- Click Curve Tools tab > Size panel > Angle & Length to display the
Span Angle and Length dialog.
Use the dialog to edit the angle and length of the selected span.
- Click a span to display its angle and length dimensions. Click the padlock icon next to the dimension values to interactively lock and unlock the dimensions.
Locked dimensions are shown in red and unlocked dimensions in white. You can lock as many points on the curve as required.
If you double click a span, the dialog that is displayed will depend on the values that are locked. The possible options are shown below:
Angle locked and Length locked
No dialog displayed
Angle locked and Length unlocked
Span Length dialog displayed
Angle unlocked and Length locked
Span Angle dialog displayed
Angle unlocked and Length unlocked
Span Angle and Length dialog displayed
- Click Curve Tools tab > Modify panel > Add Span to add a span to the end of the previous span.
- To add or remove points, Click Curve Tools tab > Mode panel > Edit 2D On/Off to exit 2D editing mode, and use the 3D editing options.