Flexible box morphing allows you to distort all or part of a solid model by manipulating a flexible box. The flexible box can also be used to bend or twist a model around an axis defined by the workplane.
Use the Flexible Box tab of the Morphing dialog to select the faces of the solid that you want to distort, and specify the morph.

The distortion buttons on the dialog let you edit the model dynamically by manipulating the drag handles on a box. As you move the drag handles, you distort the box. You can select different slices within the bounding box and morph the section using a combination of twist, bend, stretch and shear until you achieve the desired result.
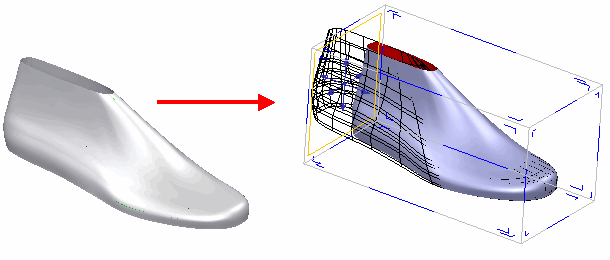
The following example shows the change of shape that can be achieved by using the drag handles to manipulate the model.

- Select the
Select faces option, then select the region of the model that you want the morph to affect. The entire model is selected by default, but you can select smaller regions of the model.
The flexible box is big enough to contain all the faces you selected and is aligned to the current workplane.
- Enter the number of controlling slices in the Number of slices box.
The flexible box is distorted by moving drag handles attached to the control slices through the box.
- If you want to bend or twist your model around a known axis (defined by a workplane), select the
Around workplane option, then select a workplane that specifies an axis for bending or twisting the box.
Ensure the principal plane you selected is correct for the axis of the workplane you want to use.
- Enter a value to specify the
Angle of the twist or bend, or click
 to display the
Position
dialog.
to display the
Position
dialog.
- Click
 to display the
Scale Morph dialog. Use this dialog to scale the morph:
to display the
Scale Morph dialog. Use this dialog to scale the morph:
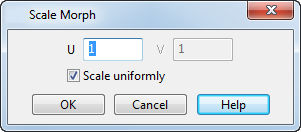
- Enter values to scale the morph in U and V direction, where U and V are the axis tangent to the edges of the morphing bounding box
- Select Scale uniformly to scale the morph by the same amount in all directions. Deselect to scale by different amounts in each axis.
- If you want to edit the model dynamically, by distorting the flexible box using drag handles, select one of the buttons on the dialog:
-
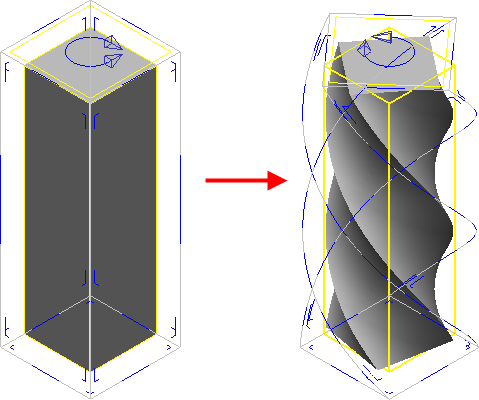
 —
Twist the model interactively.
—
Twist the model interactively.
-
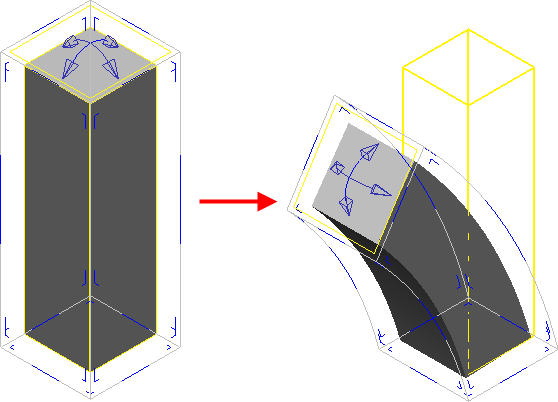
 —
Bend the model interactively.
—
Bend the model interactively.
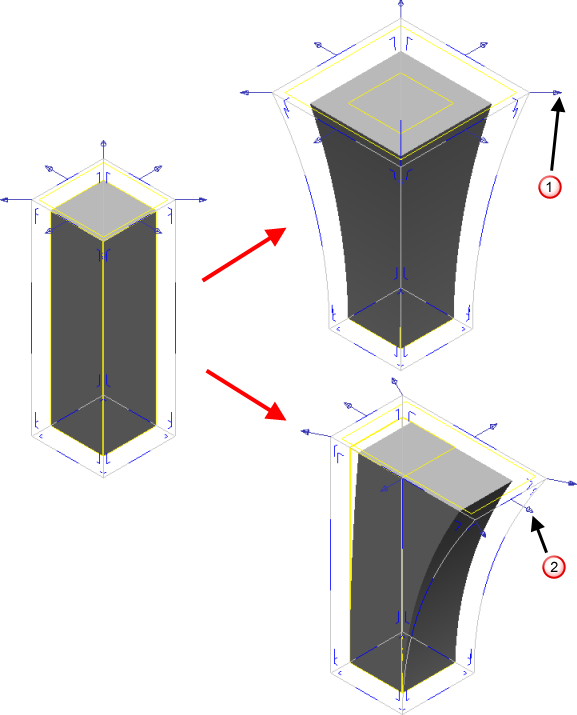
-
 — Stretch the model. Two kinds of stretching can be used:
Symmetric — Scales each selected slice around its centre
Asymmetric — Stretches the slice only in the direction of the arrow .
.
 .
.
-
 —
Shear. This lets you move control surfaces in 3D. To make this easier, the handles in the plane of the control surface only move the slice in that plane. Handles normal to the control surface move the surface normal to itself.
—
Shear. This lets you move control surfaces in 3D. To make this easier, the handles in the plane of the control surface only move the slice in that plane. Handles normal to the control surface move the surface normal to itself.
You can swap between the different drag handles at any time and make as many different edits to the box as you like before applying the morph.
There are a number of things to notice at this point:
- One slice through the box is drawn in yellow. This is the Active slice.
- The drag handles that allow you to distort the box are drawn on the active slice.
- Other slices in the box are hidden. The hidden slices are represented as blue sections of the outline of the box.
- Slices that represent the faces of the box are drawn as the small 'L' shaped sections on the faces of the box.
- You can change the active slice by clicking on this instrumentation.
- You can select multiple slices by holding the Shift key and clicking the instrumentation. The slices must all be in the same direction across the box. The last slice you click becomes the active slice.
- You can add new slices into the box by holding the Ctrl key and dragging the active slice along the edge of the box
- If you previously selected Around workplane, you can deselect this and continue free form editing of the block.
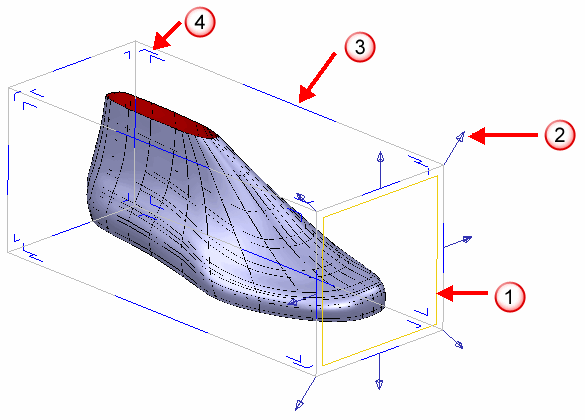
The numbers on the diagram below, correspond to the following features of the flexible box:
— Active slice.
— Drag handles for distorting the box. These are drawn on the active slice only.
 — Hidden slice.
 — For selection of slices at the edge of the box.
-
- The model is updated dynamically as you make changes. Click Preview if the model is distorted by a large amount, to ensure the model reflects all the changes.
- Click OK to save the changes.