Before performing energy optimization of massing, create an energy analytical model from masses that represent the architectural model and surrounding structures.
- Create one or more masses to represent the overall building shell, and surrounding buildings that will shade the building.

- For all masses that represent the building shell,
create mass floors, as appropriate.

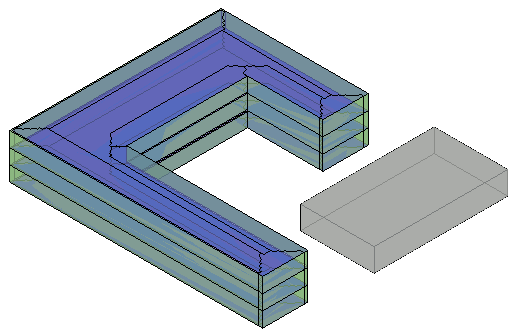
- For all masses that represent surrounding buildings, ensure that mass floors are not enabled.
For example, in the image above, the gray rectangular mass represents a nearby structure that may shade the building. It does not have mass floors enabled.
- Click Analyze tab
 Energy Optimization panel
 (Energy Settings).
- In the Energy Settings dialog, check the following settings:
- Ground Plane is set to the level of your ground plane.
- Project Phase is set for the project phase to which the masses are assigned.
- Perimeter Zone Depth is set to 15' or 4572 millimeters.
- Perimeter Zone Division is enabled.
- Click Analyze tabEnergy Optimization panel
 (Create Energy Model).
A message explains that creating the energy analytical model may take considerable time, during which Revit is unavailable.
- In the dialog, select
Create the Energy Model.
When the energy analytical model is ready, the 3D Energy Model view displays it.
Some elements (like mass) may not be visible in the current view. Modify the Visibility/Graphics Overrides if desired.
- When you are satisfied with the energy analytical model, go to the next step: generate the energy analysis.