In this exercise, you add dimensions to the building model to dimension the footprint of the main building.
|
Before you begin, download the GSG_11_dimensions.rvt file. Download this zip file (if you have not already downloaded the exercise files for the tutorials.)
Objectives
- Dimension the width of the building.
- Use the intersecting grids option with an alined dimension to automatically include grid intersections when dimensioning exterior walls.
- Use the Openings option with an aligned dimension to automatically include window openings when dimensioning the exterior wall.
 Watch the video
Add Dimensions
- Open project GSG_11_dimensions.rvt.
- Verify that the 01 - Store Floor floor plan is open.
- Click Annotate tab
 Dimension panel
 (Aligned).
- On the Options Bar, select Wall Faces, and for Pick, select Individual References.
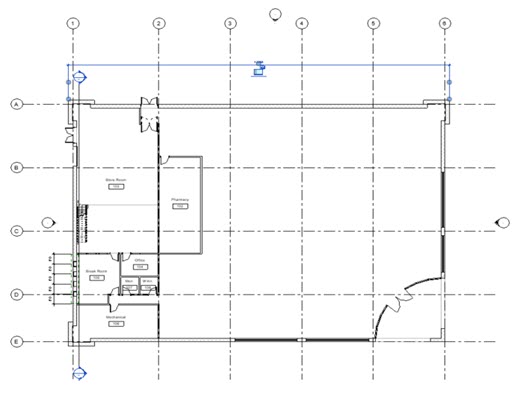
- Dimension the building width:
- Click the exterior face of the west wall.
- Click the exterior face of the east wall.
- Move the cursor above the building, and click to place the dimension.
Dimension Grids
- On the Options Bar:
- Click Annotate tabDimension panel (Aligned).
- For Pick, select Entire Walls.
- Click Options.
- In the Auto Dimension Options dialog, select Intersecting Grids, and click OK.
- Click Annotate tab
- Dimension the window openings and intersections for the south wall:
- Click the inset north exterior wall.
- Click the east and west walls.
- Move the cursor above the building, and click to place the dimension.
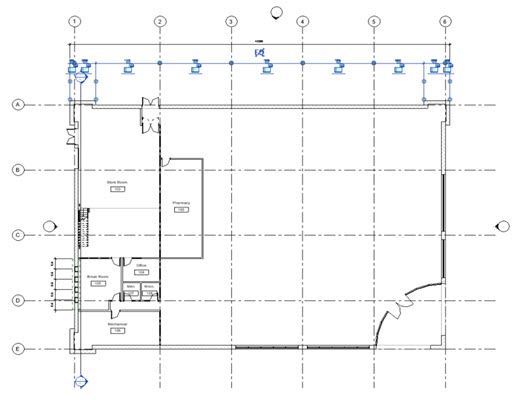
- Click Modify.
Dimension Openings
- On the Options Bar:
- Click Annotate tabDimension panel (Aligned).
- For Pick, select Entire Walls.
- Click Options.
- In the Auto Dimension Options dialog, select Openings, and click OK.
- Click Annotate tab
- Dimension the window openings and intersections for the south wall:
- Click the inset north exterior wall.
- Click the east and west walls.
- Move the cursor above the building, and click to place the dimension.
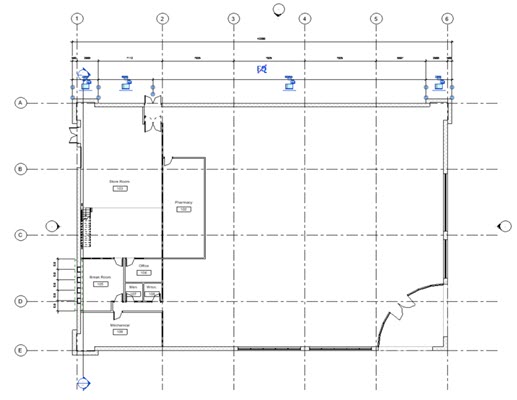
- Click Modify.