In this exercise, you work on different levels to add exterior walls, interior walls and a corridor to the project.
|
Before you begin, download the GSG_02_Create_Walls.rvt data file. Download this zip file (if you have not already downloaded the exercise files for the tutorials.)
Objectives
- Add exterior walls by drawing them using selected points.
- Add interior walls to the lower level using the Wall tool.
- Use the Trim/Extend tool to create an opening for a corridor.
 Watch the video
Create Exterior Walls
- Open project GSG_02_Create_Walls.rvt.
Note: Grids have been added to this data set to help you in the lesson. For more information about adding grids, see Add Grids.
- In the Project Browser, under Floor Plans, double-click 00 - Foundation to open the view in the drawing area.
- Click Architecture tab
 Build panel
 (Wall).
- On the Properties palette, click the Type Selector drop-down list, and select Basic Exterior - Render on Brick on Block.
- On the Options Bar:
- For Height, select 03 - Lower Parapet.
- For Location Line, select Finish Face: Exterior.
- Verify that Chain is selected.
- Click Modify | Place Wall tabDraw panel
 (Line).
- Draw walls starting at point 1 in the drawing area and ending at point 18, then add one more wall from 18 to 1.
These points were added to the project to make it easier to draw the walls to specific locations.
Note: Use the mouse scroll wheel to zoom in and out or pan as you place walls.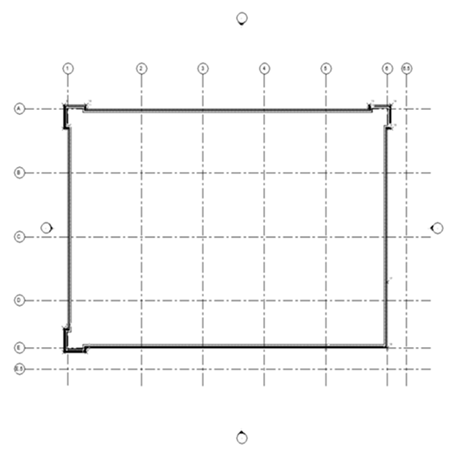
- Press Esc to exit the Wall tool.
- Click View tabCreate panel
 (Default 3D View).
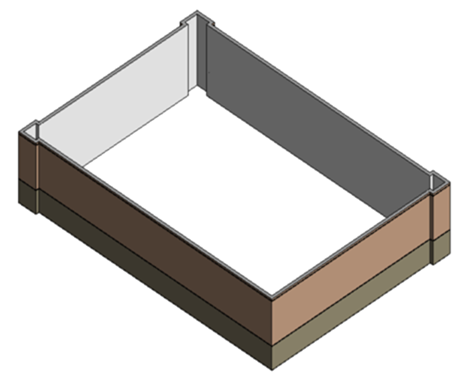
Modify Exterior Walls
- Working in the 3D view, select the walls in the corners of the building. Use a containing window selection and hold CTRL to add walls to the selection.
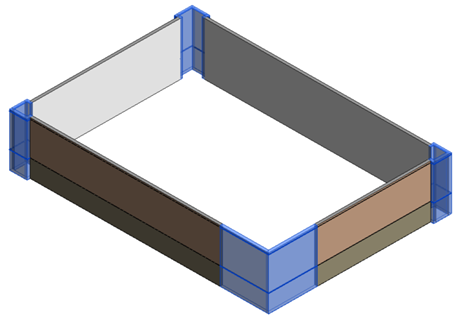
- On the Properties palette, for Top Constraint, select 04 - Upper Parapet and click Apply.
- Press ESC to deselect the walls.
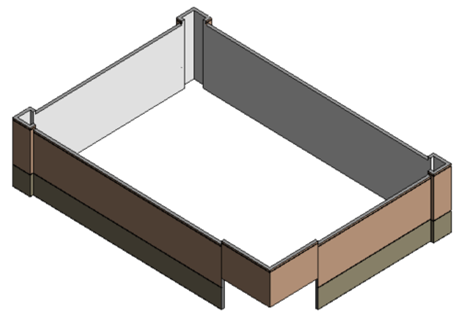
- Select the two walls at the front right corner of the building. On the Properties Palette, set the Base Offset to 4250mm.
- On the Type selector, change the wall type to Exterior - Render on Brick on Block @ Entry.
Add Interior Walls
- In the Project Browser, under Floor Plans, double-click 01 - Store Floor.
- Click Architecture tabBuild panel (Wall).
- In the Type Selector, select Interior - 138mm Partition (1- hr).
- On the Options Bar:
- For Height, select 03 Lower Parapet.
- For Location Line, select Wall Centerline.
- Using the following image as a guide, place interior walls to create rooms:
- Exact placement is not critical.
- When laying out walls, It may be useful to enable or disable the Chain option. Chain allows you to place multiple walls end to end. With Chain disabled, both endpoints of each wall must be specified. Experiment with both settings.
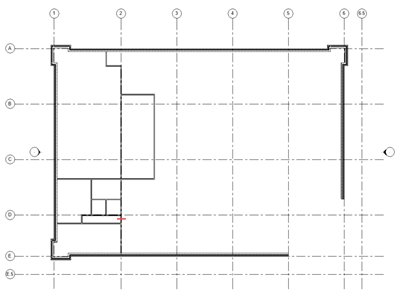
- Modify walls to create a corridor:
- Click Modify tabModify panel
 (Split Element).
- Click on the wall at the location indicated by the short red line in the previous image.
- On the Modify panel, click
 (Trim/Extend to Corner).
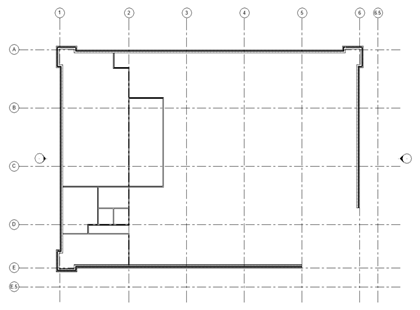
- Trim the split wall to create a corridor as shown.
Note: When trimming in Revit, select the portions of the elements you want to keep.
- Click Modify tab
- Click
 (Modify) to complete the command.