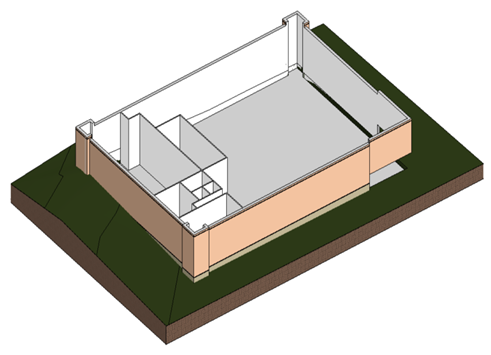
In this exercise, you add topography to the building site.
|
Add points at different elevations to create the terrain and create a building pad based on the foundation walls of the building. Before you begin, download the GSG_03_Terrain_Pad.rvt tutorial file. Download this zip file (if you have not already downloaded the exercise files for the tutorials.)
Objectives
- Create a toposolid by defining points at different elevations.
- Create a building pad and fill based on the footprint of the foundation walls.
 Watch the video
Add a Toposolid
- Open exercise file GSG_03_terrain_pad.rvt.
- In the Project Browser, under Floor Plans, double-click Site.
- Click Site tab
 Model Site panelToposolid dropdown
 (Create from Sketch).
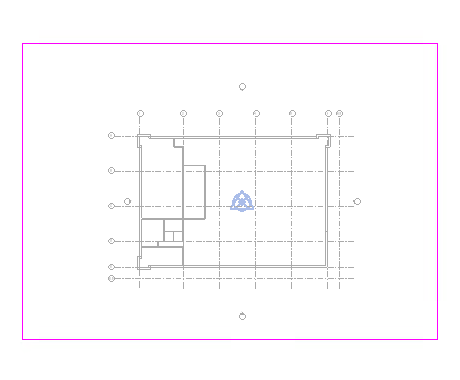
- On the Draw panel, select a the rectangle tool.
- Sketch a rectangle around the building.
- On the Draw panel select
 (Pick Walls).
- On the Options Bar, clear Extend into wall (to core).
- Select the exterior walls. Use Tab to select a chain of walls.
- Use
 flip controls to be sure the sketch is on the inside face of the walls.
- Use
- On the Type Selector choose Building Pad.
- Click
 (Finish Edit Mode).
Shape the Toposolid
- Select the toposolid.
- Click Modify | Toposolid tabShape Editing panel
 Add Point.
- Add points at selected elevations.
- On the Add Point panel, set the elevation to 2500 and add points as shown.
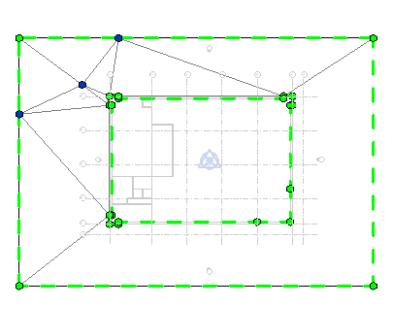
- Change the elevation to 1000 and add points as shown.

- On the Add Point panel, set the elevation to 2500 and add points as shown.
- Click Modify | Toposolid tabShape Editing panel
 Modify Sub Elements.
- Select the toposolid boundary on the right.
- On the Modify | Toposolid tabModify Sub Elements panel, set the Elevation to -500 and press Enter.
- Click Modify to complete the Toposolid.
Create Fill and Building Floor
- Click Site tabModel Site panelToposolid dropdown (Create from Sketch).
- On the Draw panel select
(Pick Walls).
- On the Options Bar, clear Extend into wall (to core).
- In the Type Selector, select Pad Fill.
- In the Properties Palette, set the Height Offset to -150.
- Select the exterior walls. Use Tab to select a chain of walls.
- Use
flip controls to be sure the sketch is on the inside face of the walls.
- Use
- Click
(Finish Edit Mode).
- Click Architecture tabBuild panel
 (Floor).
- On the Draw panel select
(Pick Walls).
- On the Options Bar, clear Extend into wall (to core).
- Select the exterior walls. Use Tab to select a chain of walls.
- Use
flip controls to be sure the sketch is on the inside face of the walls.
- Use
- Click
(Finish Edit Mode).
- On the Quick Access Toolbar, click
 (Default 3D View).
- On the View Control Bar, click Visual Style: Hidden LineShaded to view the materials.