In this exercise, you load door types into the project, and then add interior and exterior doors to the model.
|
Before you begin, download the GSG_06_place_doors.rvt, M_Door-Exterior-Double.rvt, M_Door-Overhead-Sectional, M_Door-Passage-Double-Flush-Dbl_Acting, and M_Door-Passage-Single-Flush tutorial files. Download this zip file (if you have not already downloaded the exercise files for the tutorials.)
Objectives
- Load door families.
- Use the Type Selector to change door types.
- Place doors in the model.
- Use the space bar to change the swing of the door before placing the door.
- Use the
 flip controls to change the orientation of the door after placing it.
 Watch the video
Load Families
- Open project GSG_06_place_doors.rvt.
- Click Insert tab
 Load from Library panel
 (Load Family).
- In the Load Family dialog, navigate to the folder where you saved the family files for the exercise.
- While pressing Ctrl, select the following files, and click Open.
- GSG_06_M_Door-Exterior-Double.rfa
- GSG_06_M_Door-Overhead-Sectional.rfa
- GSG_06_M_Door-Passage-Double-Flush-Dbl_Acting.rfa
- GSG_06_M_Door-Passage-Single-Flush.rfa
Place Doors
- In the Project Browser, under Floor Plans, double-click 01 - Store Floor.
- Click Architecture tabBuild panel
 (Door).
- In the Type Selector, verify that M_Door-Passage-Double-Flush-Dbl_Acting is selected.
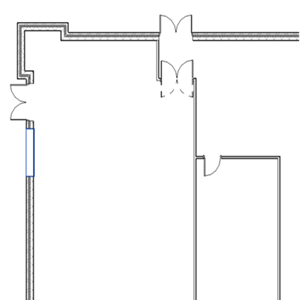
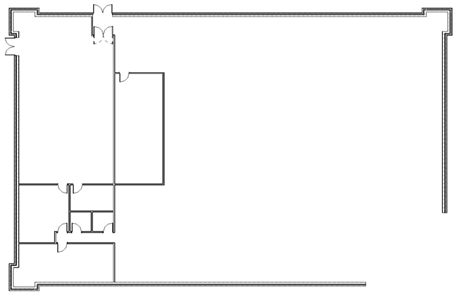
- Click to place a door at the entrance to the store room, as shown.

- In the Type Selector, select M_Door-Exterior-Double 1800 x 2000.
- Click to place doors in the lower exterior walls, as shown.
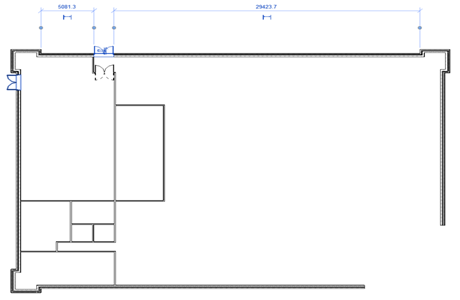
- In the Type Selector, select M_Door-Passage-Single-Flush 900 x 200.
- Place additional doors as shown.
 Note: To change the swing direction or hinge side as you place the door, press the space bar. To change the direction after a door is placed, click the
flip controls.
Note: To change the swing direction or hinge side as you place the door, press the space bar. To change the direction after a door is placed, click the
flip controls.
- Use the Type Selector to choose the M_Door_Overhead Sectional Door and place the west wall of the store room.