Duct fittings provide a set of controls that let you change fittings in a view.
- The duct fitting size displays near the connector for each leg. You can click the size and enter a value to specify a size. Transitions are automatically created when necessary.
- When a fitting can be flipped without disconnecting it from the system, you can click the
 symbol to flip the fitting horizontally or vertically in the system to orient the fitting relative to air flow.
 - When a fitting can be rotated without disconnecting it from the system, you can click the
 symbol to change its orientation in the system.
 - A plus symbol next to the fitting indicates that you can upgrade a fitting. For example, an elbow can be upgraded to a tee; a tee can be upgraded to a cross.
- A minus symbol next to an unused leg lets you downgrade the fitting. For example, a cross with an unused leg can be downgraded to a tee; a tee with an unused leg can be downgraded to an elbow.
Changing duct fitting sizes
- Select a fitting in the duct system.
- Click the size control, and enter a value for the required size.
For rectangular and oval ducts, the width and height size controls must be entered separately. In the following illustration, the rectangular elbow fitting is being resized from 12" x 12" to 8" x 12".
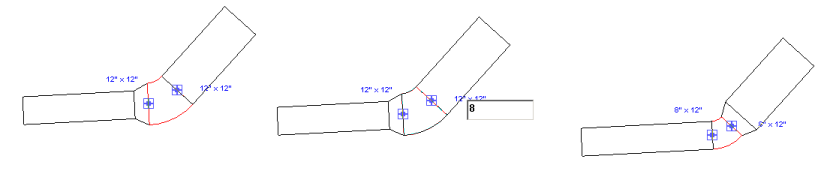
Transitions are automatically inserted to maintain connections in the system, if possible.
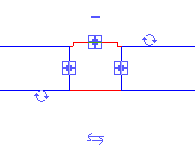
Upgrading or downgrading fittings
- Select a fitting (tee, elbow, or cross) in the duct system.
The duct fitting controls appear in blue near the fitting. When all of the available connectors are in use, other potential legs are marked with a plus sign. Unused legs have a minus, which allows removing the leg to downgrade the fitting.
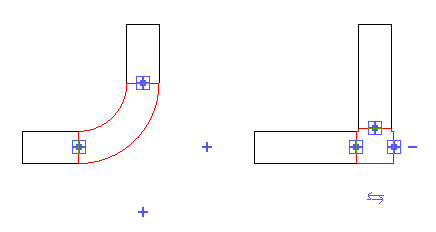
- Click a plus sign to add a leg. In the example above, the elbow is upgraded to a tee. If you connect a duct to the open leg of the tee, a plus sign is added to the remaining potential leg, as shown in the tee connector to the right.
Rotating a fitting
- Select a fitting (tee, elbow, or cross) in duct system.
- Click
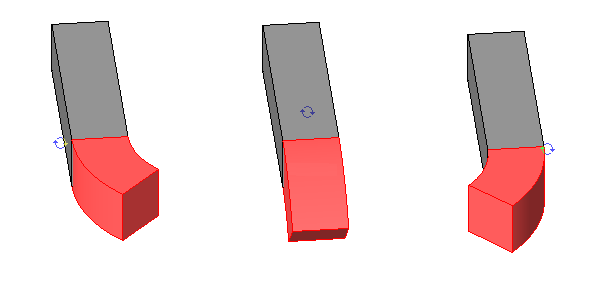
 to change the orientation of a fitting.
 - Click again and the elbow rotates another 90 degrees.
Each click rotates the fitting 90 degrees. In the following illustration, the first click rotates the elbow 90 degrees; the second click rotates the fitting another 90 degrees.
Flipping a fitting
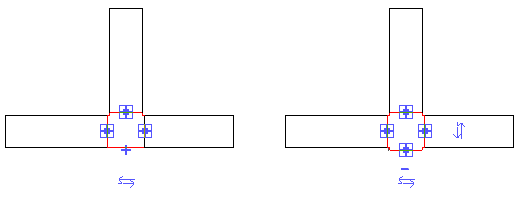
- Select a fitting (tee or cross) in the duct system.
- Click to change the horizontal or vertical orientation of a fitting.
Each click flips the fitting 180 degrees.