OCIO and Color Grading
Try the upgraded OpenColorIO 2.4 color management solution added to 2025.3 for a more flexible way to manage color transformations when working with high-fidelity color imaging. To further improve the look of your work, check out the new color grading with advanced color correction. Color grading enables you to correct color balance and exposure, while also impacting the mood, tone, and the overall visual appeal of your project.
Video captions: Our new color management system, called OpenColor IO, gives us the opportunity within the physical camera to include support for ACES 2.0, Kronos PBR Neutral, and an un-toned view transform.
And second, you can now apply brand new color grading methods to your cameras. When you select a camera, you will find a new frame within the Image Processing tab, called Grading. This Grading contains four new entries for Primary, Tone, RGB Curves, and LUTs.
You will also recognize the new checkboxes, so you can now temporarily enable or disable single settings without the need to expand the frame.
Under Primary, you will find 3 new color wheels for Exposure, Contrast, and Offset. You can also use the vertical sliders to adjust the values. And, if you want to reset your values, just use the reset button.
The Tone menu is very similar with 5 different colors wheels for Blacks, Shadows, Midtones, Highlights, and Whites.
The RGB Curves frame allows adjusting the tones using a B-Spline curves, where you have a curve for R, G, B, and one master curve. Use either the existing 3 control points of the curve to change the look, or just add additional control points by just clicking into the curve or by using the pipette to search for a specific color within the viewport. You can also delete control points or use the rest button to get back to the default curve.
And the LUT area gives you the option to use one of the preinstalled LUTs or load a custom LUT from your disk. And if you want to mix the LUT grading, you can use the Weight control.
After you have done all your settings, you maybe want to save these as a custom preset to reuse and share this in other projects. The default folder for your presets can be changed here in the preferences. This is also the area where you can set the folder for your LUT collection. So, you might want to set it to a folder where all team members have access to.
You can also copy paste all settings from one camera to another. And the Settings will also be available in the Python API.
Also, new is a color picker for the white balancing in your scene. Just activate the new picker tool and select a point in your scene that you consider to be white. This makes finding the right white balancing in your scene so much more comfortable now and its less guesswork.
OCIO
We upgraded our color management solution from SynColor to OpenColorIO 2.4 for a more flexible way to manage color transformations when working with high-fidelity color imaging. When a camera is selected, this this is available in the Camera Editor > Image Processing tab.
Use the OCIO color management to unlock new capabilities in the Physical Camera. With Tonemapper set to Physical Camera, choose OpenColorIO 2.4 from the Sensor Response option.
We also added support for more tonemapping curve view transforms, such as ACES 2.0, Khronos PBR Neutral, and an un-tone-mapped. Find these under the View option.
View - Sets the tonemapping curve used for transforming the view. Choose from the following:
ACES 2.0 - Improves the consistency of an image's tone and minimizes color distortions.
ACES 1.0 - Uses sensor response behavior, as defined in the Academy Color Encoding System, for a filmic color shift.
PBR Neutral - Uses PBR color accuracy to achieve an accurate physical simulation rendering that is optimally illuminated and uses an exact sRGB color representation for grayscale lighting conditions that is neutrally depicted under colored light, such as sunlight.
- Un-tone-mapped - Use when wanting to see an image's source color texture values as they appear during editing without tonemapping.
Additionally, you can now apply specific look modification transforms, such as ACES 1.3 Reference Gamut Compression or LMT - Blue Light Artifact Fix. Find these under the Look option.
Look - Sets the specific look modification transform used when tonemapping. Choose from the following:
None - No look modifications are made.
ACES 1.3 Reference Gamut Compression - Corrects artifacts in source images. This is the replacement created for the Blue Light Artifact LMT. It uses a simple RGB ratio-based algorithm that compresses values based on their distance from the neutral axis.
- LMT - Blue Light Artifact Fix - Increases any blue light exposure to white, instead of magenta, fixing blue light artifacts.
Basic Color Correction
Color Correction is now Basic Color Correction and we added a color picker ![]() to the White Balance option. Use it to adjust the white balance by quickly clicking an area of the image that should be neutral grey. VRED will adjust the white balance based on your selection.
to the White Balance option. Use it to adjust the white balance by quickly clicking an area of the image that should be neutral grey. VRED will adjust the white balance based on your selection.
Basic Color Correction
Color Correction is now Basic Color Correction and we added a color picker ![]() to the White Balance option. Use it to adjust the white balance by quickly clicking an area of the image that should be white. VRED will adjust the white balance based on your selection.
to the White Balance option. Use it to adjust the white balance by quickly clicking an area of the image that should be white. VRED will adjust the white balance based on your selection.
Color Grading
In the Camera Editor Image Processing tab, we added the Color Grading section with options to help with exposure and impact the mood, tone, and the overall visual appeal of your project. Use the QuickAccess Bar tool ![]() to instantly enable or disable any color grading options.
to instantly enable or disable any color grading options.
Presets - Provides an extensive list of presets.
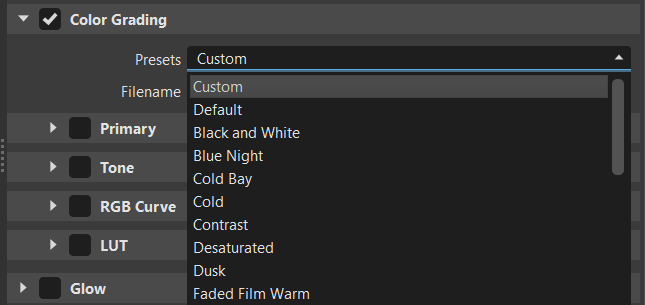
Default Film Warm Preset 

Filename - Provides options for saving and importing color grading presets into your project. Click
 to locate the file, which is stored here,
 C:\ProgramData\Autodesk\VREDPro-17.3\data\OpenColorIO\Presets, by default. Select the file and click Open. When using one of the provided presets, select Default.
Creating a Preset
To create your own presets, select Custom from the Presets option. Use the various color grading section options, then click the Filename ![]() option to generate a
option to generate a .json file, which can be exported and shared with others or used in other scene.
Color Grading Sections
Within the Color Grading section are additional sections, Primary, Tone, RGB Curves, and LUT.
To enable the options in a section and make them editable, add a check in front of it.
To disable all options in a section instantly, unchecking the section.
Each section contains several new controls, including color wheels, vertical sliders, and a new curve editor, to help you fine-tune the color balance of your rendering that are grouped within a frame.
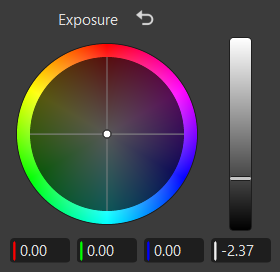 |
|---|
| The color wheel controls within the Exposure frame |
Using the Color Wheel Controls
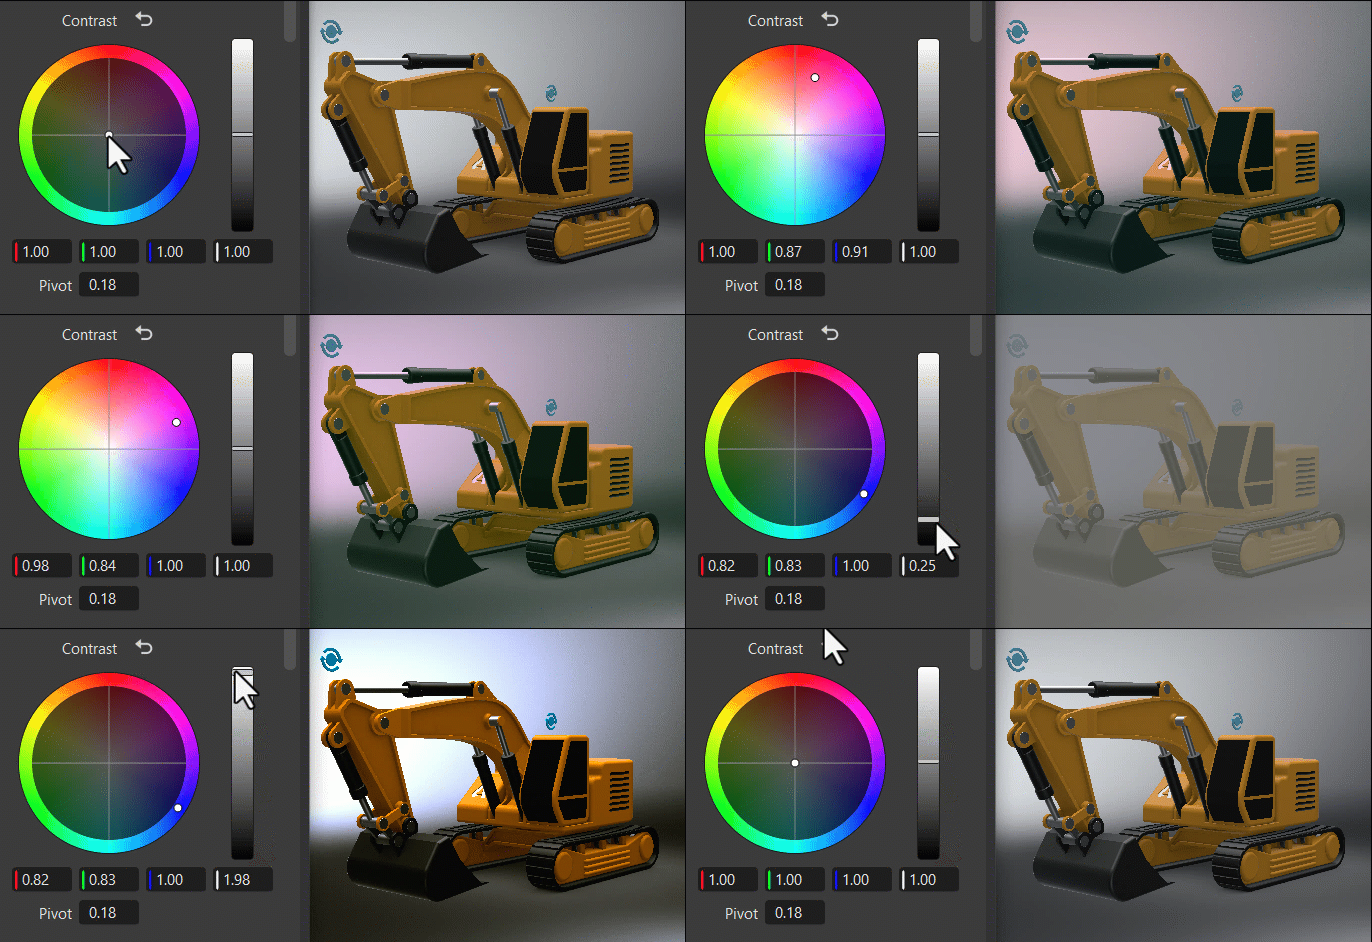
Within the color wheel, click-dragging the center control toward the edge to adjust the grading, increasing the tint and intensity. This slowed mouse movement is intentional, as it provides more granular control in a relatively small control field. Clicking a specific location instantly jump to that position.
The vertical slider to the right of the wheel is the main control. For example, dragging the Contrast main slider up would increase difference between the brighter and darker parts, sharpening the entire image; whereas dragging it down would decrease the difference, softening the entire image.
The fields below the color wheel display the color transforms made in the color wheel, representing the individual RGB and Luminance values.
Clicking ![]() , found next to the frame title, reverts all color wheel controls for that frame to their original default state.
, found next to the frame title, reverts all color wheel controls for that frame to their original default state.
The first time color grading options are used, it can take a while to compile.
To enable the options in a section and make them editable, add a check in front of it.
To disable all options in a section instantly, unchecking the section.
To reset values for a specific controller in a section, click the
 .
.
Primary
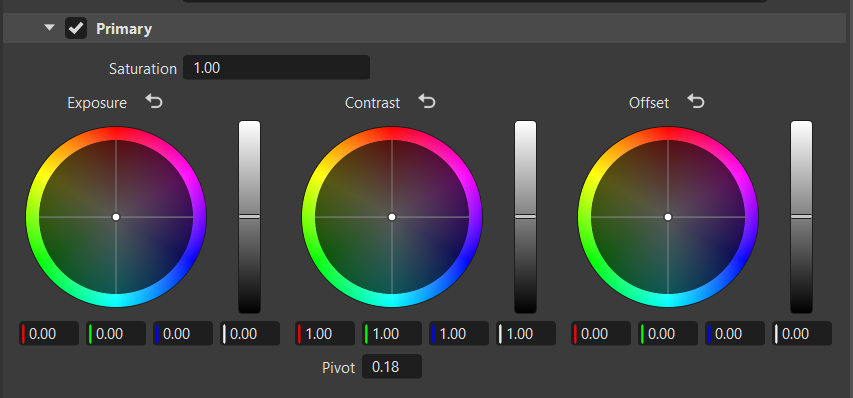
The Primary frame offers color wheel controls to allow broad adjustments made to the overall image. This includes adjustments to the entire image's saturation, exposure, and offset.
The Saturation slider adjusts the intensity and vividness of the image colors. Increasing the saturation makes colors more vibrant, while decreasing it brings them closer to black, white, or gray.
The Pivot adjusts the contrast balance and location of the center point used for making changes. Use it to fine-tune your contrast adjustments. Increasing the pivot value, darkens the image, while decreasing it brightens it.
Tone
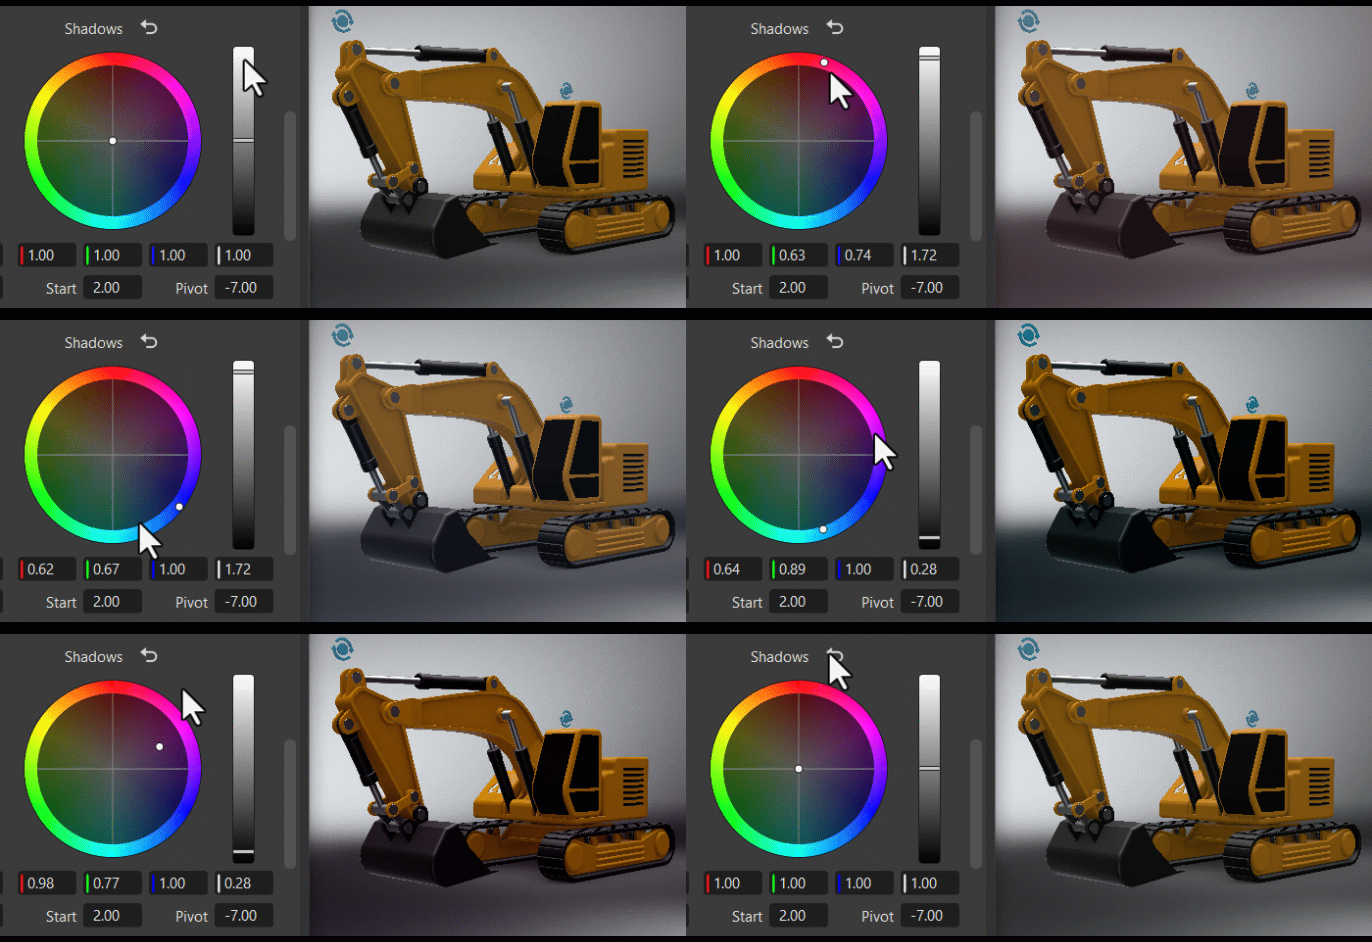
The Tone frame changes the image's color tone, helping to establish a mood or visual tone. Use the controls to color your blacks, shadows, midtones, highlights, and whites.
The S Contrast is a contrast curve. Use it to increase the image's contrast by darkening shadows and brightening highlights.
The Start and Width sets the range used for the contrast between the deepest blacks, modtones, and brightest whites. The higher the value, the larger the dynamic range.
The Pivot adjusts the contrast balance and location of the center point used for making changes. Use it to fine-tune your contrast adjustments. Increasing the pivot value, darkens the image, while decreasing it brightens it.
RGB Curve
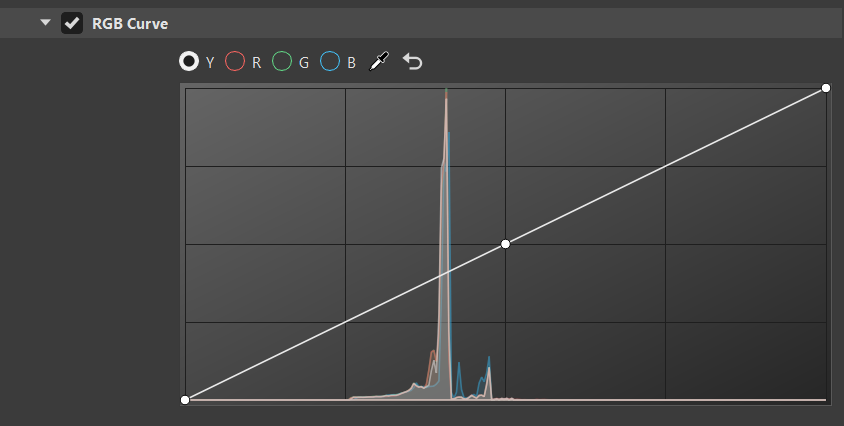
The histogram is purely based on the rendered image before any tonemapping or color correction. Its grading curves update as you move the camera around.
Along the top of the histogram are the following options:
Y for selecting luminance curve
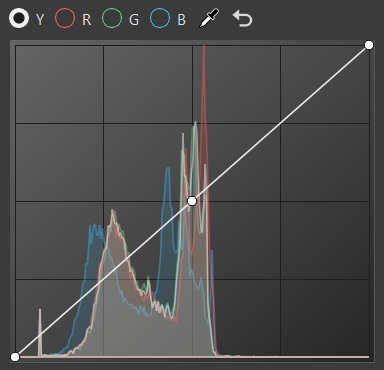
R for selecting red curve
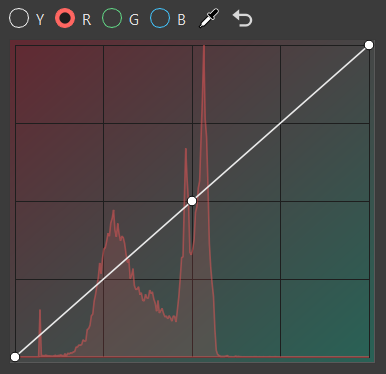
G for selecting green curve
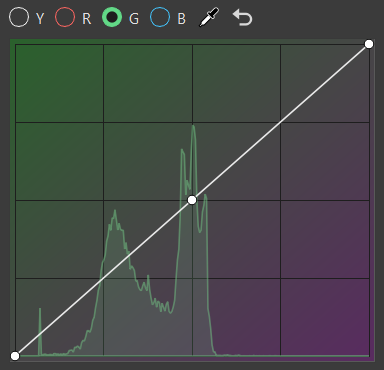
B for selecting blue curve
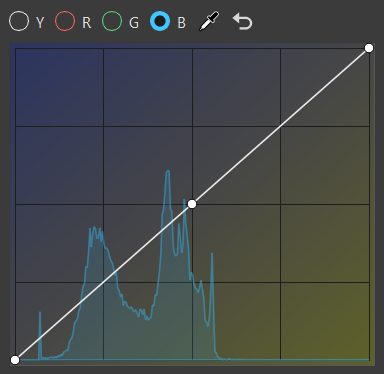
 for picking a color from the viewport and adding a new control point to the curve
 for returning fields to their default values
Click the curve to add a new point and increase the contrast or pick a certain color and add a point to the graph that explicitly affects that range.
LUT
A LUT is a look up table that's used to tell VRED what color to make things. This can save a lot of time when color grading your content.
If rendering with HDR values, your LUT must work with logarithmic space and output to the same.
Available LUTs - Provides a list of LUT presets, as well as a custom LUT option.
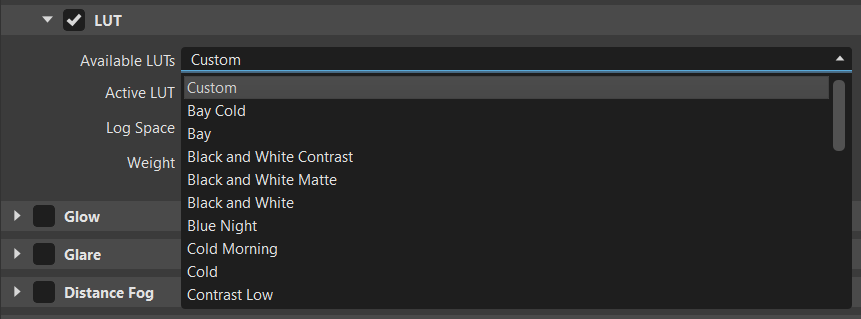
Bay Cold LUT Vintage LUT 

Active LUT - Displays the current active LUT and provides options to open, import, save, update, or remove a LUT.
Log Space - Provides a list of logarithmic spaces to be applied to the LUT.
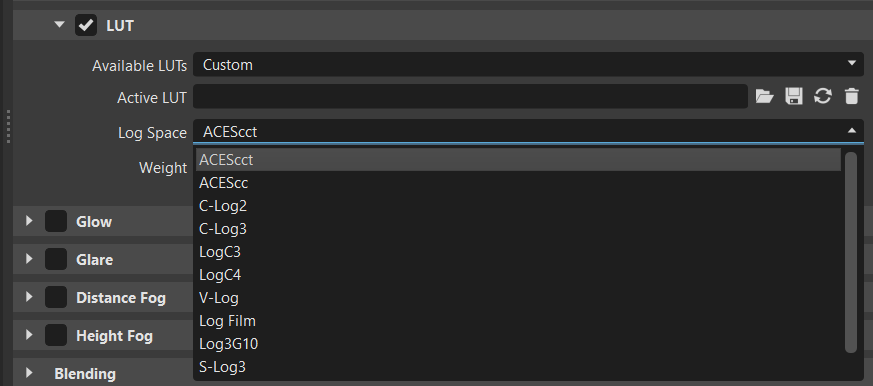
Weight - Sets the influence of the LUT on the overall color grading of the image.

As the Weight value is decreased, so is the Active LUT's influence on the image's color grading.
Loading a LUT
If a preset is selected from the Available LUTs list, it is automatically set as the active LUT. However, if you want to either load a custom LUT or import a shared LUT, use ![]() . Locate and select the LUT, then click Open.
. Locate and select the LUT, then click Open.
Creating a Custom LUT
If you want to create your own LUT, select Custom from the Available LUTs list. Click the Active LUT ![]() tool to locate a LUT, which is stored here,
tool to locate a LUT, which is stored here, C:\ProgramData\Autodesk\VREDPro-17.3\data\OpenColorIO\LUTs, by default. Make mofications to it using the assorted options in the Color Grading section. When finished, click ![]() , rename the file, and click Save.
, rename the file, and click Save.
Saving a LUT
After a LUT has been loaded and modified, it can be saved for future use.
To save a LUT, click the Active LUT ![]() tool. Name the file and click Save. The LUT is saved at
tool. Name the file and click Save. The LUT is saved at C:\ProgramData\Autodesk\VREDPro-17.3\data\OpenColorIO\LUTs, by default, as a .ctf.
Updating a LUT
When using a shared LUT, keep in mind, that changes may have been made to it. Use ![]() to load the latest version of the file.
to load the latest version of the file.
To update a LUT, use the Active LUT ![]() tool and load the LUT, then click
tool and load the LUT, then click ![]() .
.
Deleting a LUT
To change the active LUT, either use ![]() and select another LUT or use
and select another LUT or use ![]() , which clears the LUT from the Active LUT field, but doesn't delete it from the list of LUTs.
, which clears the LUT from the Active LUT field, but doesn't delete it from the list of LUTs.
Copying and Pasting Color Grading Attributes
We have added support for copying color grading attributes from one camera and pasting them onto another using the right-click context menu.
To copy color grading attributes of a camera, in the Camera Editor, select the camera, right-click, and select Edit > Copy.
To paste color grading attributes to another camera, in the Camera Editor, select a different camera, right-click, and select Edit > Paste Attributes > Color Grading.