Learn about how to create new design objects by copying existing data within a vault.
Copy design allows you to copy, copy to a new location, rename, reuse, and replace parts and drawings from any working folder in the vault. Copy Design can be used on any file format saved in the vault allowing the copying and renaming of standard documents to kick start a project.
Copy Design is one of the most powerful features of Autodesk Vault. Engineers are leveraging existing designs by reusing them to save design time or by copying and updating an existing design to reduce design time. Besides the reduced modeling time, design reuse impacts the cost and time savings in downstream engineering, manufacturing, and purchasing.
Let's get into the details of the Copy Design feature.
Depending on which design application you are using, copying a design involves copying a drawing and its related files, copying an entire design structure along with the related 2D drawings for 3D models, or copying components of a design.
How to access Copy Design?
- Vault Client
Perform one of the following tasks to launch Copy Design in the Vault Client.
- Select the top-level assembly drawing and right-click to select the Copy Design command.
- Right-click on a file or group of files in the main view and select Copy Design.
- Select a file or group of files in the main view and click Edit > Copy Design.
- Inventor and AutoCAD Add-in
- Stand-Alone Application
Go to Start > Autodesk > Autodesk Copy Design <release>
Interface
Copy Design is a modeless dialog with a toolbar. It remains open while you use the Vault client for other commands as well as add files to be copied.
Copy Design has three significant areas in the interface - Toolbar, Main View, and Navigation Panel.
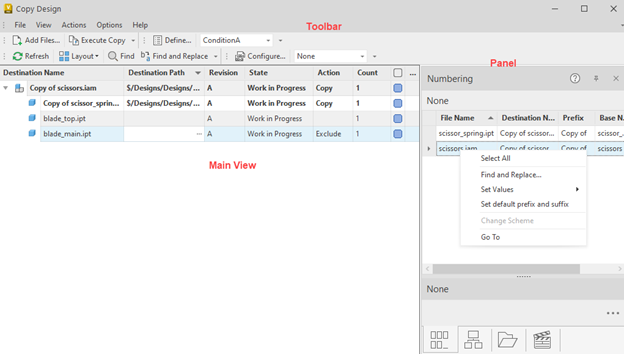
The selected files appear in the Main grid, allowing you to select the files and right-click to manage how they are used. When a file is selected and set to a function, it appears in the right panel (navigation panel). You can check and amend the file using right-click on the selected file.
You can also select multiple files by holding down the shift key. See Shortcut keys available for all options in the Copy Design dialog.
Menus and Toolbar
The toolbar consists of the File, View, Actions, Options, and Help menus.
See Copy Design Interface for details on each operation you can perform under these menus.
Main View
The main grid displays information about the files on which you can perform the Copy Design operation. You can set a specific action on each file displayed in the grid. See Copy Design actions that you can perform on files in the Copy Design dialog.
- Tree View: Displays the assembly in an organized configuration showing the assembly's hierarchy and associated files in the copy process. It enables you to understand the relationship of all files involved in the copy process.
- List View: Displays all the files associated with the file selected in the copy process.
- Folder View: Displays the destination folder where the new files are placed after the copy process is complete.
You can also customize how the main grid looks. See Customize the View for more information.
| Feature | Tree View | List View | Folder view |
| Find | x | x | |
| Find & Replace | x | x | |
| Edit the File Name | x | x | x |
| Edit the File Path | x | x | x |
| Set Numbering Scheme | x | x | |
| Drag & Drop to Folder Panel | x | x | |
| Set Copy Action | x | x | x |
| Drag & Drop to Numbering Panel | x | x | |
| Column Filtering | x | ||
| Grouping | x |
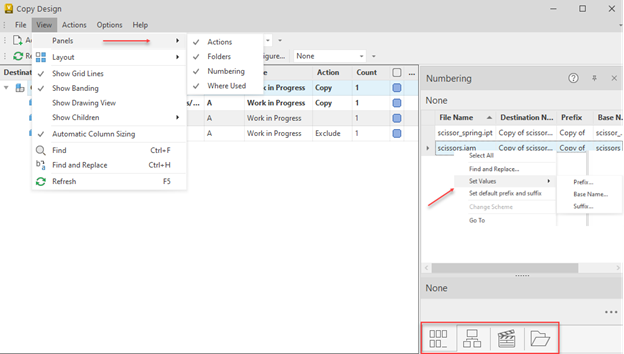
Right Panel (Navigation Panel)
- Numbering Panel - Lists all the files selected for the copy operation. It also shows the original and new file names for each selected file. You can also edit certain fields and individual numbering schemes.
- Hidden Panels:
- Folders Panel - Review the source and destination folders for the copy design operation.
- Where Used Panel - Track the copy objects' origin and destination.
- Actions Panel - Review which operations are assigned to be performed on files in the main view.
The features in these panels can also be performed in the main grid. See Copy Design Interface for more information.
Copy Design Actions
The following list describes the actions you can perform on files in the Copy Design dialog.
| Copy All | Sets the Copy action on all files in the Copy Design dialog. |
| Copy Top Nodes | Sets the Copy action on all files at the top node in the Copy Design dialog. |
| Copy | Sets the Copy action on all selected files. Hold the Ctrl key to select multiple files at once. |
| Copy To | Sets the Copy action on all selected files, and the selected files are placed in the specified folder.
Note: The original folder structure is not maintained for files with this action. |
| Copy Branch | Sets the Copy action on the selected files and the entire file structure (branch) beneath it. |
| Copy Branch To | Sets the Copy action on the selected files and the entire file structure (branch) beneath and sets the destination path to the specified folder. Note: When the copy operation completes, the copied files are placed in a specific folder maintaining the original folder structure. |
| Reuse | Sets the Reuse action on the selected files. The selected files are reused instead of creating a copy. This is a great way to minimize duplicates of a file that must be used in more than one location of a design. |
| Reuse All | All files in the Copy Design dialog are set to Reuse. |
| Reuse Branch | Sets the Reuse action to the selected file and the entire file structure beneath it. |
| Replace | Replaces the selected file with the specified file. The name of the original file changes to the replacement file's name. |
| Exclude | Sets the Exclude action on the selected files. This action can only be used on parent documentation files. If this is set on any other file in the structure, that file is reused during the copy operation. |
| Go To | You can go to the original file in the Vault Client using the Source Folder option. After the Copy operation, you can go to the newly copied file in the Vault client using the Destination option. |
Copy Design Options
Copy Design has several settings which affect the copy process. Let's take a look at these options.
| Numbering Schemes | Select Numbering Schemes to set which naming schemes are valid for use in your copy design configuration. |
| Action Rules | Select to create, edit, and delete rules that apply to your copy operations. Each Rule Set contains several file behavior and property settings that can be applied to the copied file based on the source file. |
| Automatically Copy Parents | When this option is turned on, the parent of each copied component is also copied. Disabling this option results in source assemblies being edited to include the new copied part. |
| Link Drawings with Models | When selected, the drawing connected to a model is copied to the same location and shares the same new file name as the model. |
| Remove All Attachments | When selected, all attachments are removed from the newly created files. By default, all file attachments are attached to the new file. |
| BOM Objects |
Remove All BOM Objects - When this option is turned on, the BOM information inside of newly created files is removed during the copy operation. Remove BOM Objects from Parents Only - When this option is turned on, the BOM information inside of the newly created parent files is removed during the copy operation. By default, Remove BOM Object from Parents Only is turned on. Note: These files are not assigned to an item until they are updated inside of the CAD application. |
| Select References | By default, all component references are copied. When this option is turned on, you can choose which references of a component are copied. |
See Copy Design Interface - Options for details of how they are used.
Action Rules
Action Rule sets are a collection of rules which define property behaviors on newly created files during the copy process. Rule sets can be used to reset the category of a target file, map file properties, or clear or reset file properties.
Only one rule set can be applied to the selected data set during a copy operation. For this reason, a rule set can contain several rules that determine the settings of multiple file types based on extension, properties, or use.
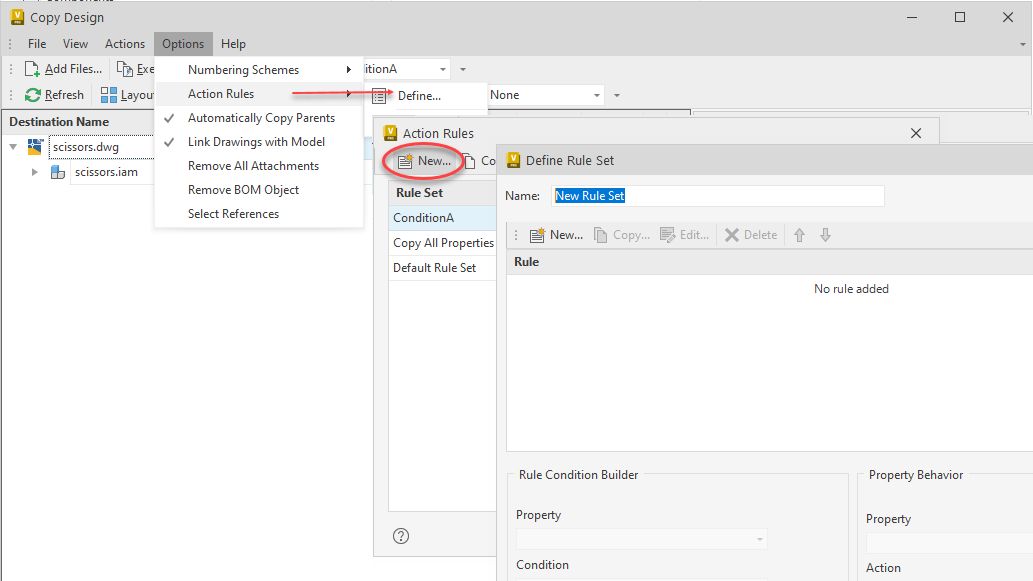
- In the toolbar, click Options > Action Rules > Define to open the Action Rules dialog.
- Click New to define an Action Rule Set. See Define an Action Rule Set for more information.
- While editing a rule within a rule set, define the condition a rule must meet before the property behaviors are executed. If multiple conditions are defined for a rule, all conditions must be met before the property behaviors are executed.
- All rules in a rule set are run in priority order from top to bottom. The first rule in which the condition is met is executed on a file; the subsequent rules are not checked on the same file.
Copy Design Walkthrough
Let's now go through a typical copy design workflow.
- Configure Copy Design options settings.
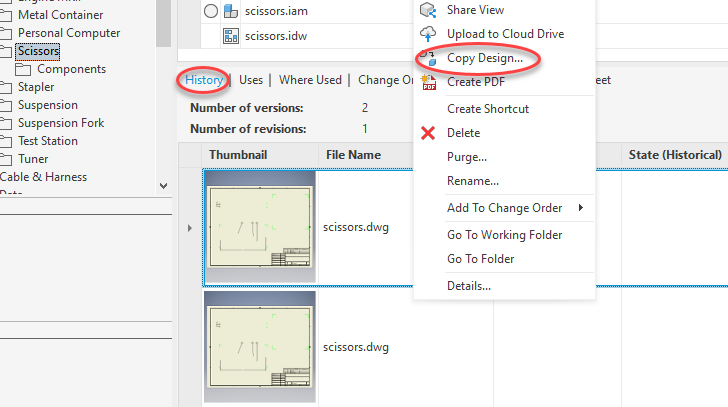
- In the Vault Client, right-click on the file you want to copy and select Copy Design.
If you want to copy a particular version of a file, right-click on the version from the History tab and select Copy Design.
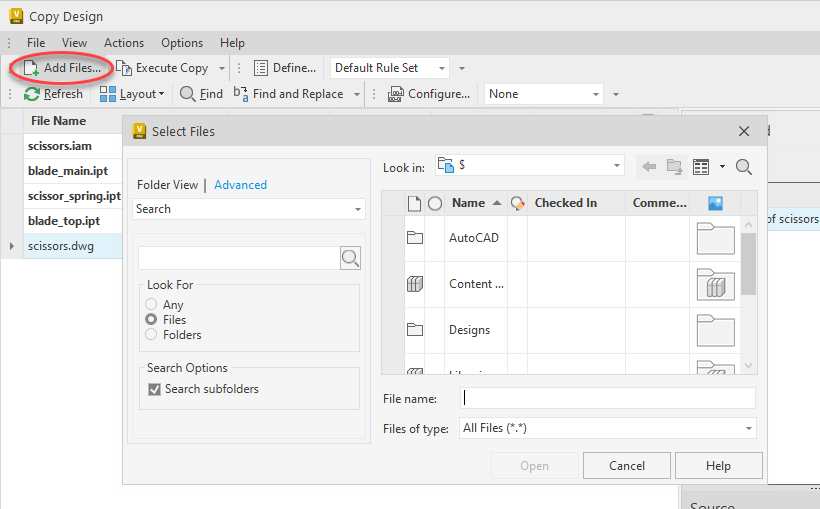
Click Add Files
 from the
File menu on the toolbar to add additional files for copying. Select the files that you want to copy and click Open. The files are added to the
main view of the Copy Design dialog.
from the
File menu on the toolbar to add additional files for copying. Select the files that you want to copy and click Open. The files are added to the
main view of the Copy Design dialog.
Tip: Click Refresh at any time to capture the latest version of the listed files and file structure.
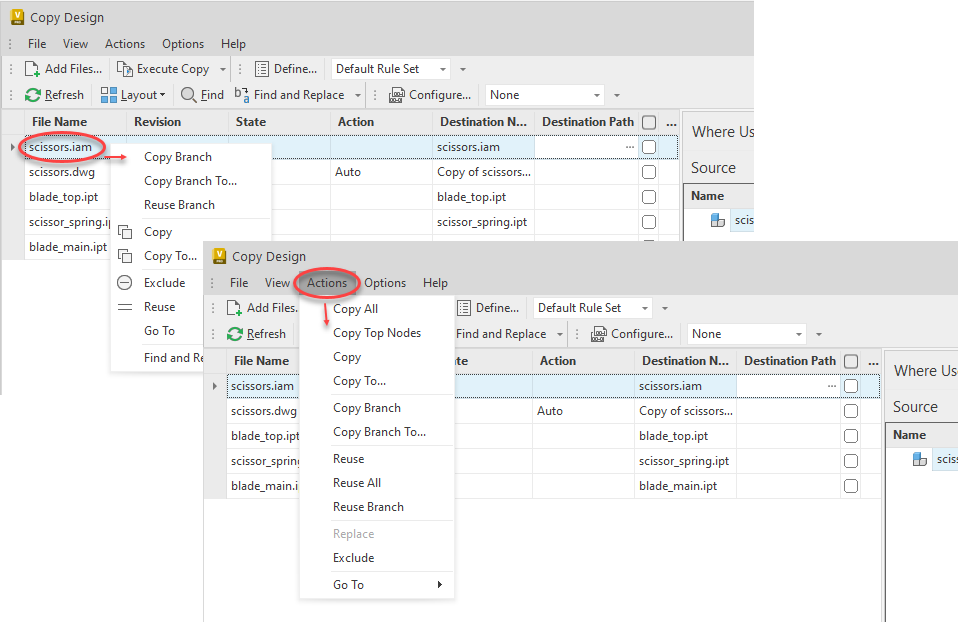
- Select the file that you want to copy, right-click on the file and select the
action from the context menu.
Alternatively, select the file that you want to copy, click Actions in the Toolbar, and then select the action to be performed.
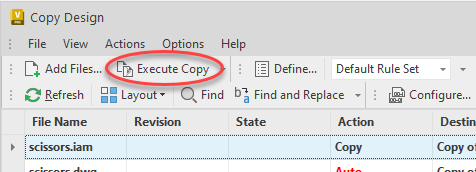
- Click
Execute Copy
 on the toolbar to start the copy operation.
 Several pre-checks are performed to ensure that:
- All files have unique names (by Folder)
- Vault unique file name rules are met
- Selected files still exist
- Files requiring edits are write-enabled
- Files requiring edits are owned by the workgroup site
All successful copy operations receive a green check in the main view. If a copy operation failed, a red cross is displayed. Hover over the red cross icon on each highlighted row to view the warning detail. You can export the restricted file list to an external file (xls, xlsx, txt, htm, html) for reference.
To perform another copy operation, modify your settings and click Execute Copy.
Copy Design Report
- Click File > Export.
- Select a file name, file type, and destination folder to save the report.
Only columns shown in the dialog at the time of the operation are exported in the report.