Exercise 14
Previous: Chapter 20 | Next: Chapter 21
This exercise teaches how use Autodesk® CFD to create images and views that effectively demonstrate the performance of your designs.
Right click off the model, choose Open view settings…. Select the file called traces.xvs.
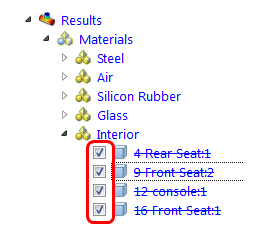
Note: The following steps use the items listed in the Materials sub-branches of the Results branch of the Design Study bar.Display the interior components:
In the Design Study Bar, expand the Results branch, and the Materials sub-branch.
Expand the Interior branch.
Check the boxes for the parts under the Interior branch:
Display the interior components as shaded:
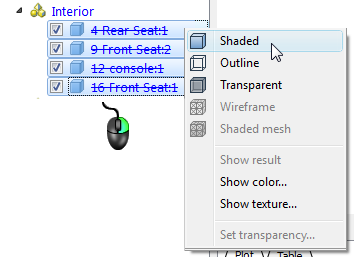
Hold keyboard Ctrl, and left click on the parts under the Interior branch.
Right click on the selected part names, and select Shaded.
Display the tires as shaded:
Expand the Silicon Rubber branch, and check the box adjacent to each part under the branch.
Right click on the material name Silicon Rubber, and select Shaded.

Right click on the Silicon Rubber branch and select Show color…
Select Black from the palette and select OK.
To shade the car body, check the box beside the Car Body part under the Steel branch of the Results > Material branch. Right click on the selected part name, and select Shaded.
In the Graphics window, right click on the car body, and select Transparent.
Right click on the car body again and select Set transparency… Adjust the slider to roughly 90% and click OK.
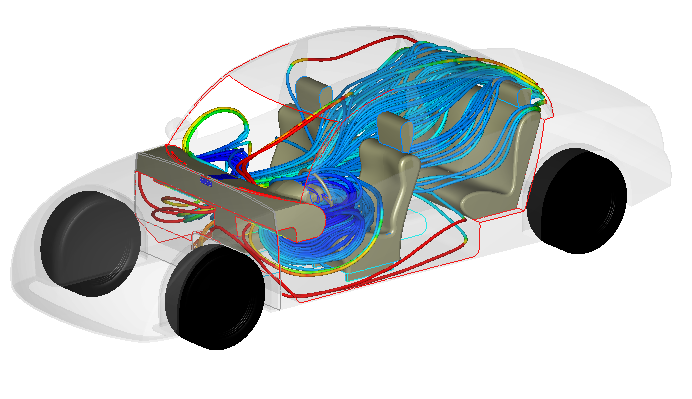
To save this image for comparison across different designs, right click off the model and select Capture summary image.