The Prepare for Info360 option allows you to validate and upload the baseline’s asset and/or model into Info360 in the cloud server.
To upload the baseline into Info360:
- In the Model Group window or Explorer window, right-click the baseline whose data you want to upload.
-
Select Prepare for Info360.com.
Note: If you are accessing this option for the first time, it will open the Info360 Project selection dialog that will connect Info360 in the cloud. -
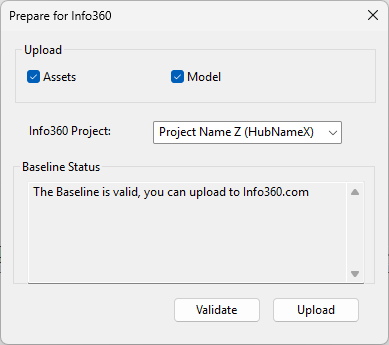
In Info360 Project, select a project from the drop-down list.Note: The name of the hub is in parenthesis.
-
Select the files that you want to upload by checking the appropriate Upload box. By default, both of these options are selected.
-
Assets – This option uploads a ZIP file containing the CSV file from the baseline’s network.
-
Model – This option uploads a transportable database (WSPT) file containing the baseline. The uploaded file will not include projection runs, incident runs, response runs, and results of the base sim.
Note: If you have no access to Info360 Asset, then the Asset option becomes disabled and you can only upload Model to Info360.
The default filename of the uploaded CSV file will be set to <Name of the Baseline>_Asset and the default filename of the uploaded WSPT file will be set to <Name of the Baseline>_Model.
-
-
Click the Validate button. The text in the dialog displays the validation status.Note: The baseline requires validation before you can upload into Info360.
-
If there are validation errors, close the dialog and fix the validation errors. For more information, refer to the baseline validation messages.
-
If there are no validation errors, you can then click the Upload button. A dialog showing the progress of the upload will be displayed.
Note: The Upload button will only be enabled when there are no validation errors. - A message will show that the upload is completed. Click OK.