A dokumentumok Forma Data Management való feltöltéséhez áthúzhatja azokat a csatlakoztatott meghajtóra a Windows Intéző használatával.
Ekkor a program észleli a hivatkozott fájlokat, például az xrefeket és az adathivatkozási referenciákat. A hivatkozott fájlok feltölthetők egy Vonatkozó adatok mappába, így a csatolások újból létrehozhatók. További információ: Bevált módszerek meglévő adathivatkozás-projektek áttelepítéséhez a Forma Data Management.
- Nyissa meg a Windows Intézőt, és keresse meg a célhelyet a Forma Data Management.
A Forma Data Management tartozó csatlakoztatott meghajtókat
 ikon jelöli. A csatlakoztatott meghajtón belüli fiókokat és a fiókokhoz tartozó projekteket
  központ ikon jelöli.
- Nyisson meg egy másik ablakot a Windows Intézőben, és keresse meg a feltölteni kívánt mappákat és dokumentumokat.
- Jelölje ki a mappákat és dokumentumokat, majd húzza át a kiválasztott elemeket a célhelyre az 1. lépésben foglaltak szerint.
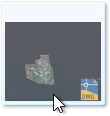
- Ha lenyomva tartja a kijelölő gombot, és a csatlakoztatott meghajtó fölé húz egy dokumentumot, megjelenik a dokumentum előnézete.
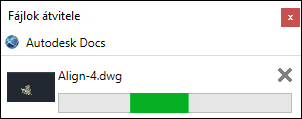
- A kijelölő gomb felengedése után egy üzenetpanel jelenik meg a dokumentumok és mappák másolásakor.
 Megjegyzés: A Desktop Connector-tevékenységek a kezdőképernyőn jelennek meg. További információ: Docs – Kezdőképernyő és tevékenységek.
- Ha lenyomva tartja a kijelölő gombot, és a csatlakoztatott meghajtó fölé húz egy dokumentumot, megjelenik a dokumentum előnézete.
További információt a Dokumentumok használata a Forma Data Management című témakörben talál a Forma Data Management súgójában.